
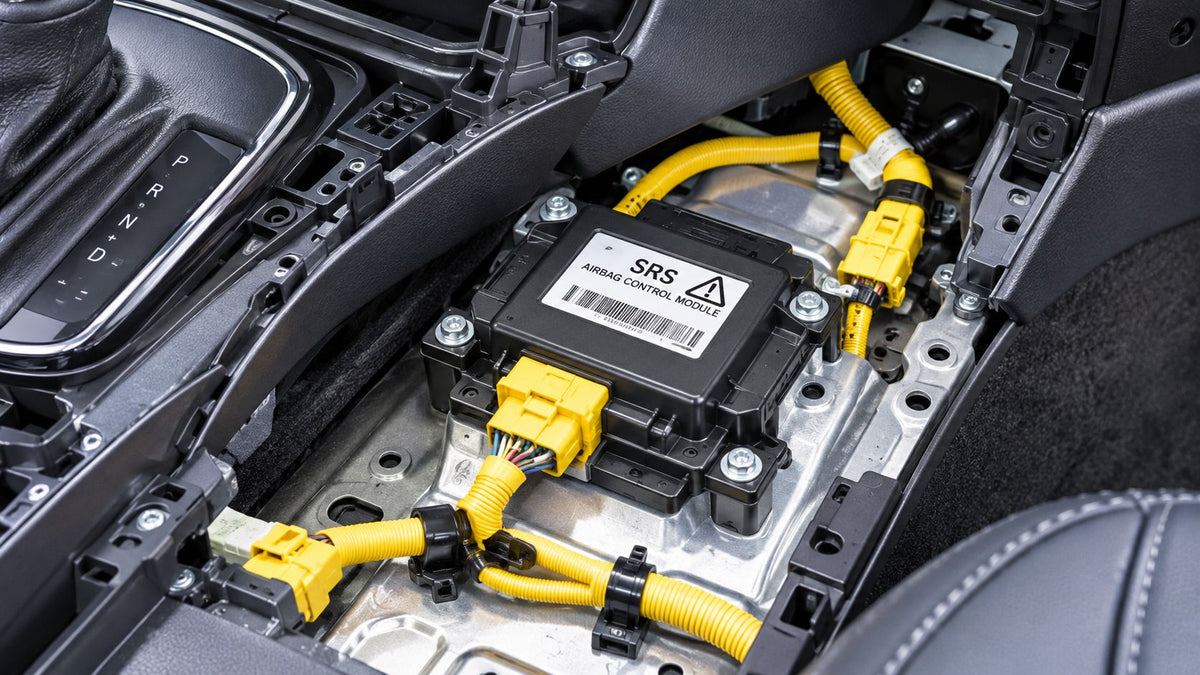
You've got an airbag warning light staring back at you after a collision, and the repair estimate mentions an “airbag module.” You look at the steering wheel, then the dashboard, wondering which panel hides the part you're supposed to find. Before you reach for a trim tool, make sure you're looking for the computer, not the airbag itself.
Table of Contents
- You Searched Where the Airbag Module Is Now What
- Airbag Modules Are Not All the Same Part
- Where the SRS Control Module Typically Lives
- Common Mounting Zones at a Glance
- How to Identify the Module Once You See It
- Safety Steps Before You Touch Anything
- Accessing and Removing the Module
- Sending the Module for Mail-In Reset
- Why People Search for It in the First Place
- Mistakes That Damage the Module or the Interior
- Verifying the Repair After Reinstallation
- Common Questions About Airbag Module Location
You Searched Where the Airbag Module Is Now What
The practical answer to where is the airbag module located starts with identifying the component. If you mean the electronic controller, your search usually belongs low in the passenger compartment, not behind the steering-wheel airbag.
There isn't a universal panel you can remove on every car. The location depends on the year, make, model, and body style, and two vehicles with similar-looking interiors may require different access procedures. Manufacturer documentation illustrates why exact identification matters: one layout places the SRS control unit between the rear mounting points of the center console, with another computer separately located under the console, as shown in this NHTSA-hosted manufacturer service document.
Practical rule: Find the factory component-location drawing before you remove a panel. Looking in the correct general area isn't the same as identifying the correct part.
Start by collecting your vehicle details and finding its SRS service procedure. You can narrow the search without unplugging anything, then decide whether the required trim work and safety precautions are within your abilities.
Airbag Modules Are Not All the Same Part
“Airbag module” can describe different parts of the restraint system. That ambiguity matters when you're ordering a replacement, discussing a repair estimate, or preparing something for mail-in service.
The airbag assembly versus the controller
The driver airbag module is normally in the steering-wheel center. The passenger airbag module is behind the passenger-side dashboard, while curtain-airbag modules may run above the headliner along the roofline. Those are the airbag assemblies, not the separate computer.
The SRS control module receives crash-sensor and restraint-system signals and controls deployment decisions for airbags and seat-belt pretensioners. SRS means supplemental restraint system. Depending on the manufacturer, you may also see names such as SRS control unit, SRSCM, restraint control module, or diagnosis sensor unit.
This diagram separates the physical airbag assemblies from their controller.
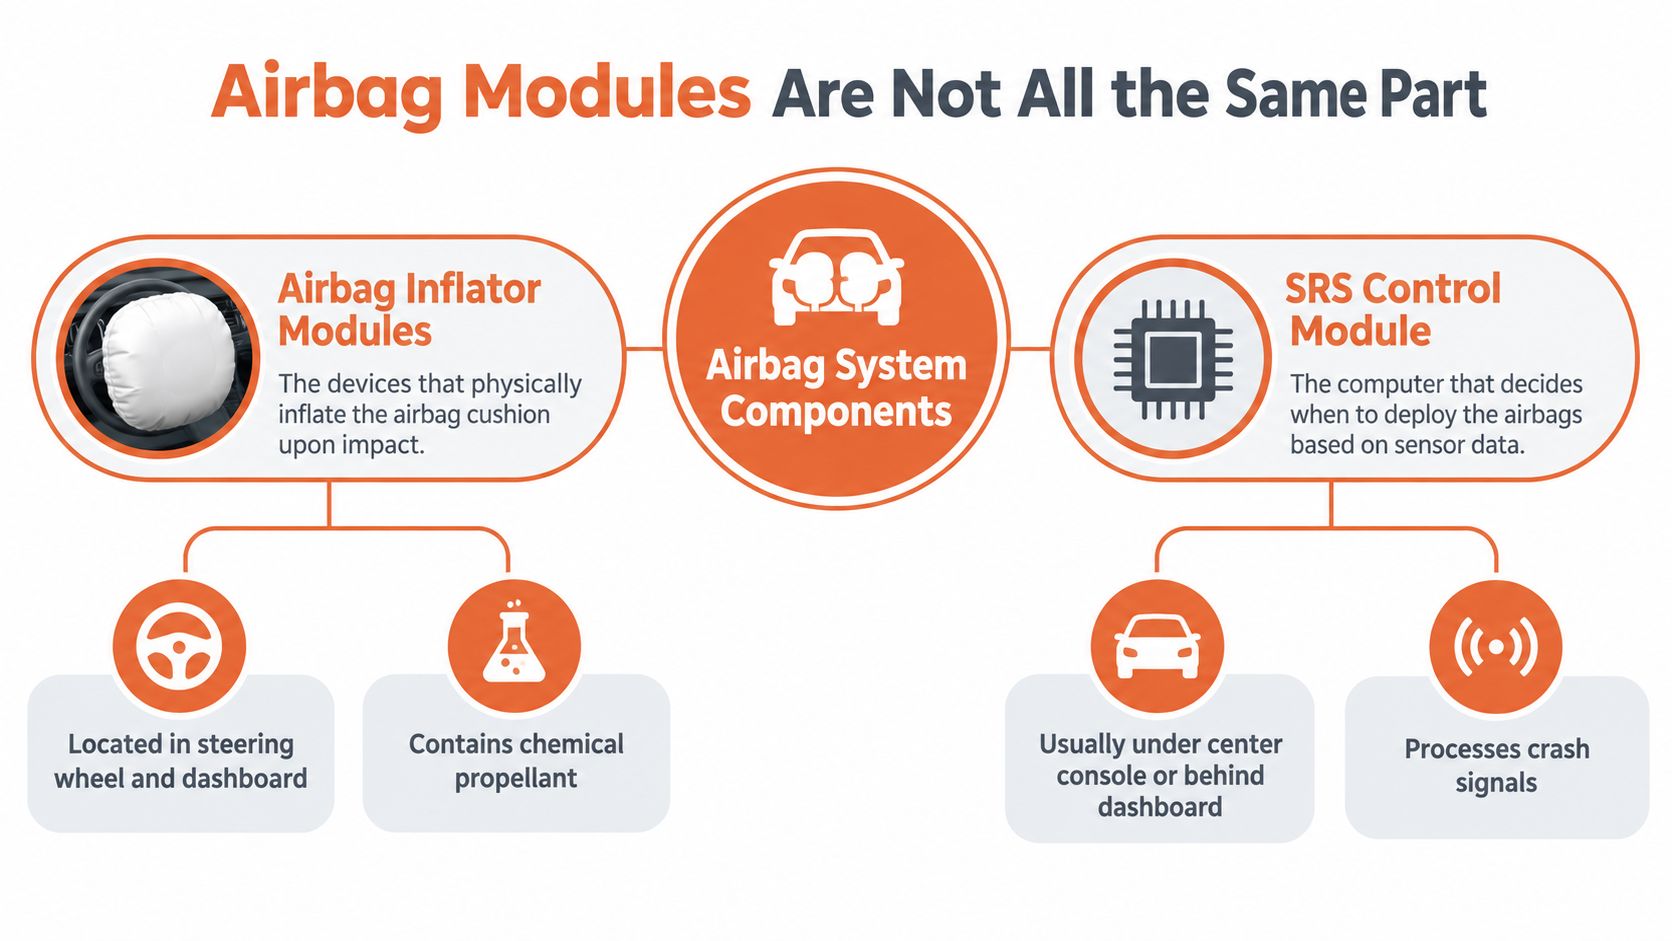
Use the restraint control module identification guide to clarify the terminology before discussing service. Ask whether the repair concerns a deployed airbag assembly, the controller, or another SRS component.
That question prevents a costly wrong turn. If the work order calls for controller service, opening the steering-wheel airbag won't get you to the target.
Where the SRS Control Module Typically Lives
Treat the following areas as documented mounting zones, not permission to start dismantling the interior. The factory location drawing should determine which zone applies to your vehicle.
The exposed Civic interior below shows what a center-console search area can look like.
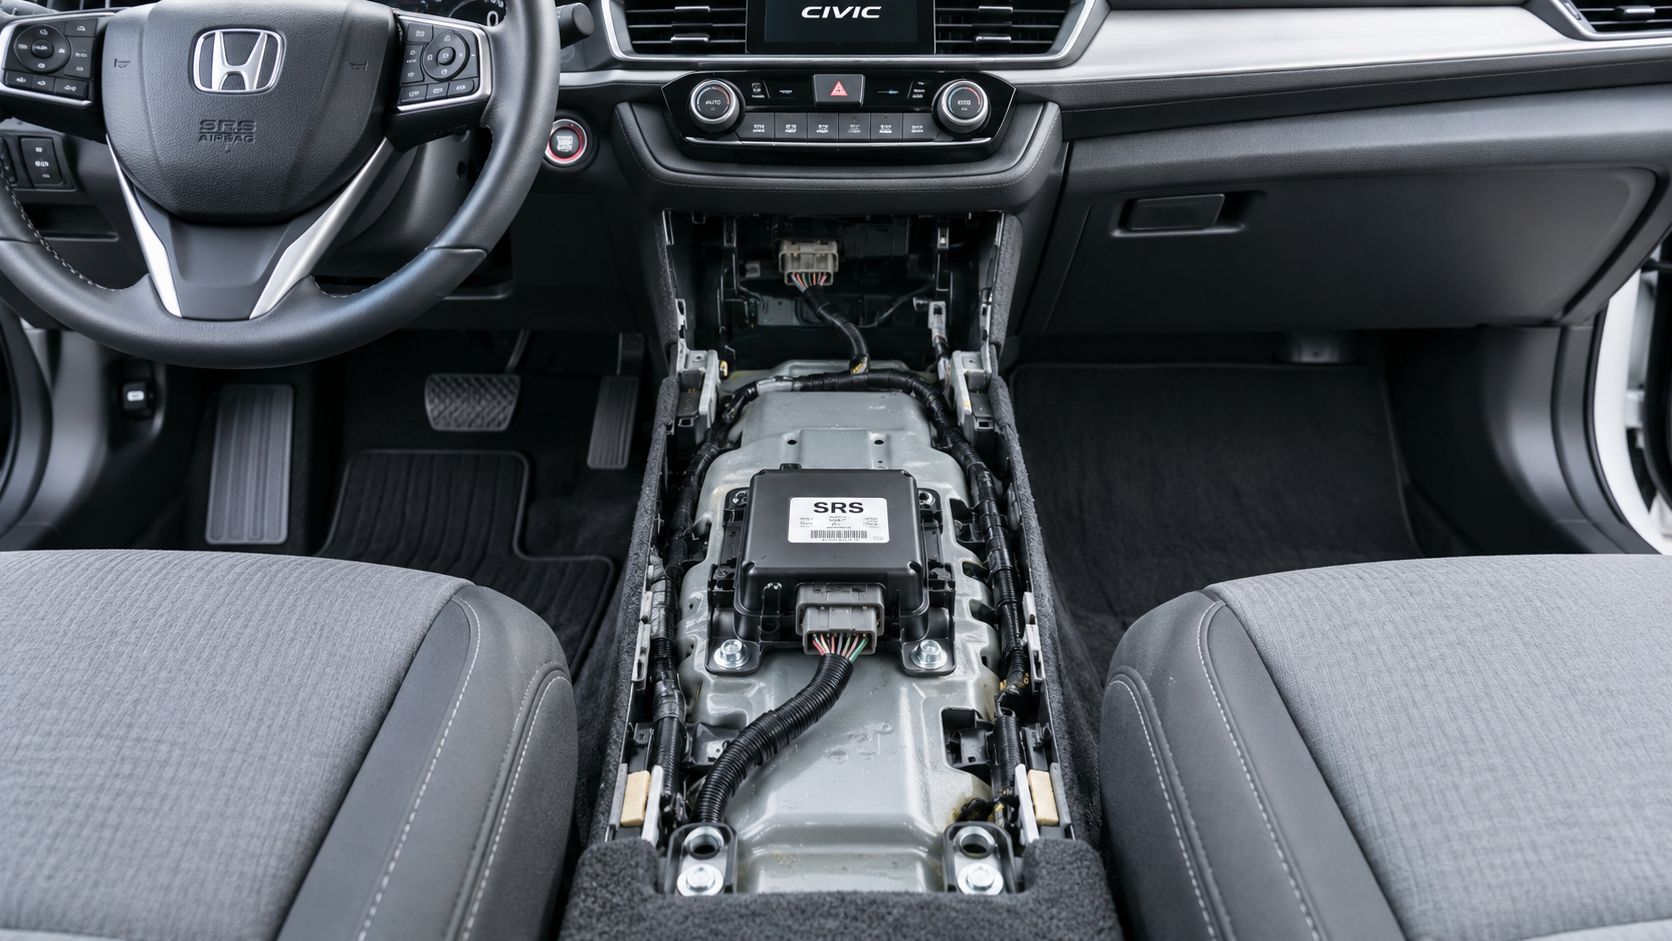
Console and center-tunnel locations
Beneath the center console is a useful starting zone when checking service information. A 2016–2021 Honda Civic service procedure requires center-console removal before SRS-unit removal, providing a concrete example of console access in this NHTSA-hosted SRS service reference.
Below the rear console assembly is another documented arrangement. Hyundai Elantra documentation places the SRSCM there, so looking only beneath the forward console section could miss the controller.
Lower dashboard and under-seat locations
Other documented layouts place the unit in the lower center dashboard or floor area near the center tunnel, or beneath the carpet under a front seat. Those descriptions aren't precise enough to justify removing a seat or cutting carpet. Find the exact access instructions first.
For additional visual context, use the video alongside your vehicle-specific procedure.
The useful comparison is between your factory drawing and your actual interior. A video from another platform may help you recognize the general area, but it can't establish your connector-release method, disabling sequence, or mounting specifications.
Common Mounting Zones at a Glance
Typical SRS Control Module Mounting Zones
| Mounting Zone | Typical Vehicles | Access Required | Difficulty |
|---|---|---|---|
| Under the center console | Documented Honda Civic layouts | Center-console removal | Depends on trim sequence and connector access |
| Below the rear console | Documented Hyundai Elantra layout | Rear console assembly access | Depends on rear trim and surrounding structure |
| Lower center dash or tunnel | Vehicle-specific platforms | Specified lower trim or floor covering | Can be awkward in a confined space |
| Under a front seat | Some vehicle layouts and body styles | Carpet access and possibly seat removal | More involved if seat removal is required |
The Typical Vehicles column gives examples, not a fitment list. Don't assume that every generation carrying the same model name uses the same mounting arrangement.
A location that looks easy through an open trim gap may still require substantial disassembly to release the connectors safely.
Use difficulty as a planning question rather than a promise about job duration. Can you reach the connector locks without pulling on the harness? Can you follow the required trim sequence without forcing a panel?
If either answer is uncertain, obtain the removal procedure before proceeding. The sensible DIY boundary is whether you can complete the prescribed work correctly, not whether you can see the box.
How to Identify the Module Once You See It
A box beneath the console isn't automatically the airbag controller. Location, label, and connector configuration must agree with the factory information.
Start with the component identity
Read the label without moving or disconnecting the unit. Compare its part number and component name with the vehicle's service information or exact parts listing. Manufacturer terminology varies, so the strongest match is the documented part identity, not a familiar abbreviation.
The identification checklist below is useful for organizing those checks.
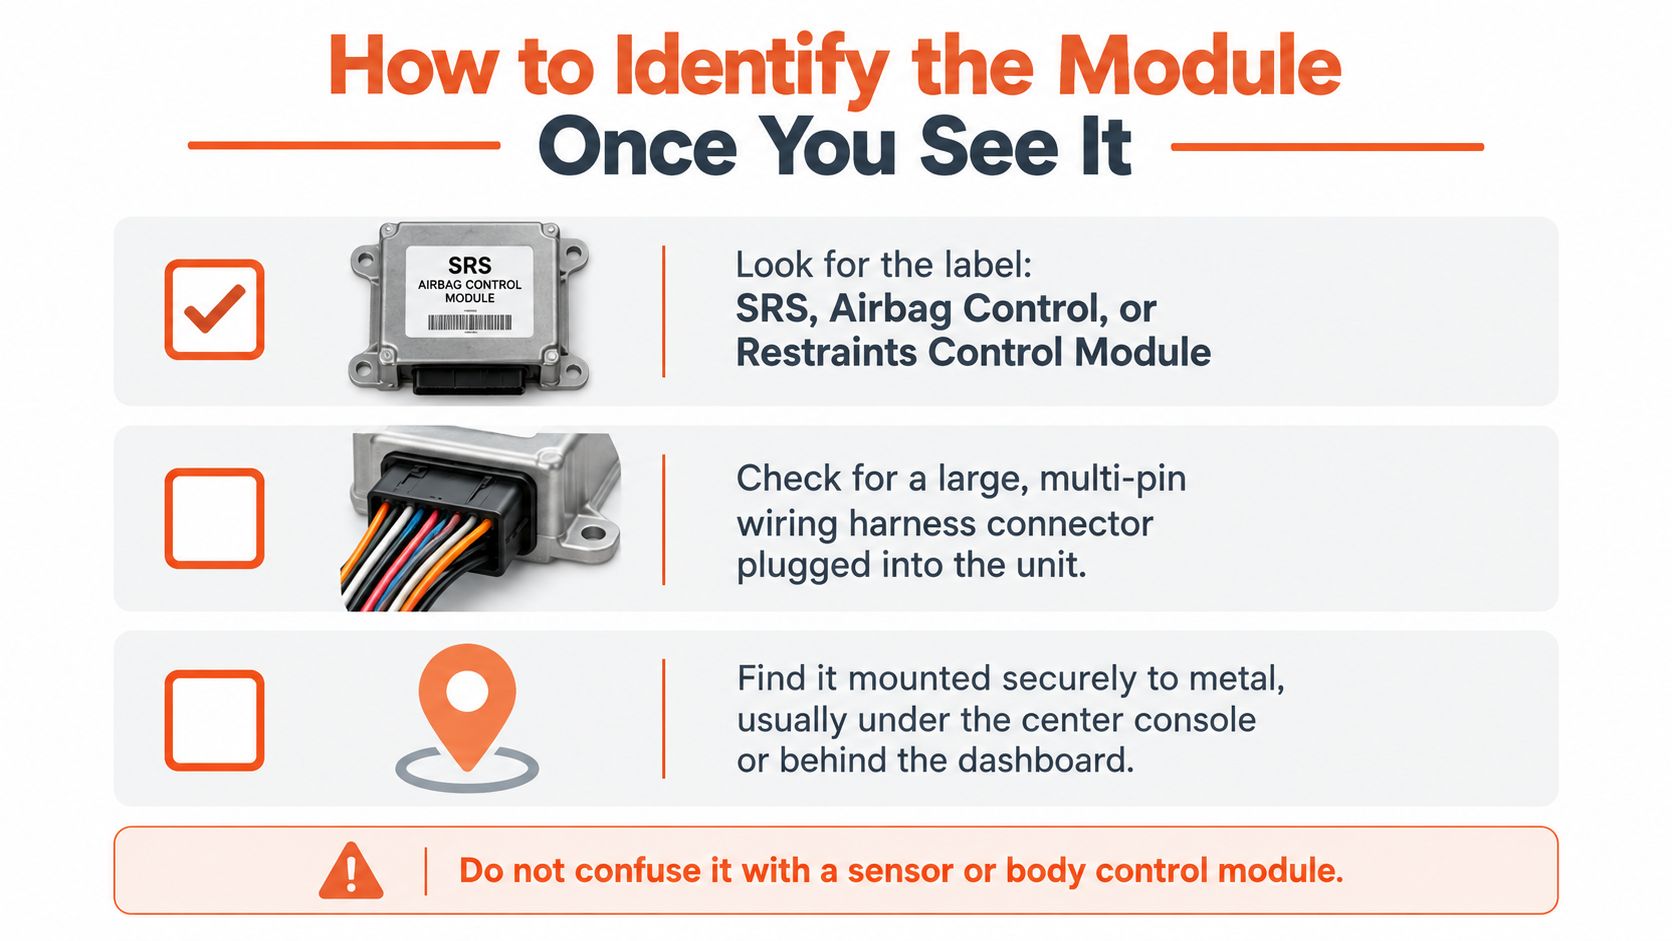
- Match the connectors: Compare connector shape, locking arrangement, and harness position with the service drawing. Yellow SRS connectors are a warning to follow restraint-system precautions, not conclusive identification by themselves.
- Check the mounting arrangement: Confirm that the unit occupies the documented bracket and mounting points.
- Resolve mismatches: If the label or connector layout doesn't match, stop. Don't explain away the discrepancy because the enclosure looks right.
Don't identify it by testing the circuit
Connector count and wire thickness aren't universal identifiers. Avoid guessing that a particular plug must feed an airbag because it looks substantial.
The Hyundai Elantra SRS service documentation provides a useful example of vehicle-specific identification and service requirements. Use that level of specificity for your own car.
Never probe an airbag or pretensioner circuit with a test light or multimeter unless the OEM procedure expressly permits the specified test.
Safety Steps Before You Touch Anything
The step you must never skip is the complete manufacturer-specified SRS disabling procedure. Turning off the ignition alone isn't a substitute.
The system connects to electrically initiated restraint devices. Improper handling can cause serious or fatal injury, which is why the manufacturer warnings accompanying SRS service instructions need to be treated as working instructions, not fine print.
Follow the disabling sequence
- Secure the vehicle: Establish the ignition-off condition and work-area requirements specified by the manufacturer.
- Isolate the battery: Disconnect the negative battery cable using the vehicle's prescribed procedure. Follow any additional isolation instructions that apply.
- Observe the discharge period: Wait the full manufacturer-specified interval before disturbing SRS connectors.
- Handle only as directed: Follow the connector and component-handling precautions in the same procedure.
Don't borrow a waiting interval from another make. The earlier Honda reference specifies its own battery-disconnection and waiting sequence; that doesn't establish the requirement for a different vehicle.
Stop-work boundary: If you can't verify the disabling procedure, don't disconnect the module.
Battery isolation, discharge time, and permitted testing methods are also emphasized in this airbag control module removal guidance. That guide helps identify common search areas, but the factory manual controls the actual service.
Prepare before disabling the system: have the procedure, suitable tools, and a clear place for removed trim. Don't begin a safety-critical job while still searching for the next instruction.
Accessing and Removing the Module
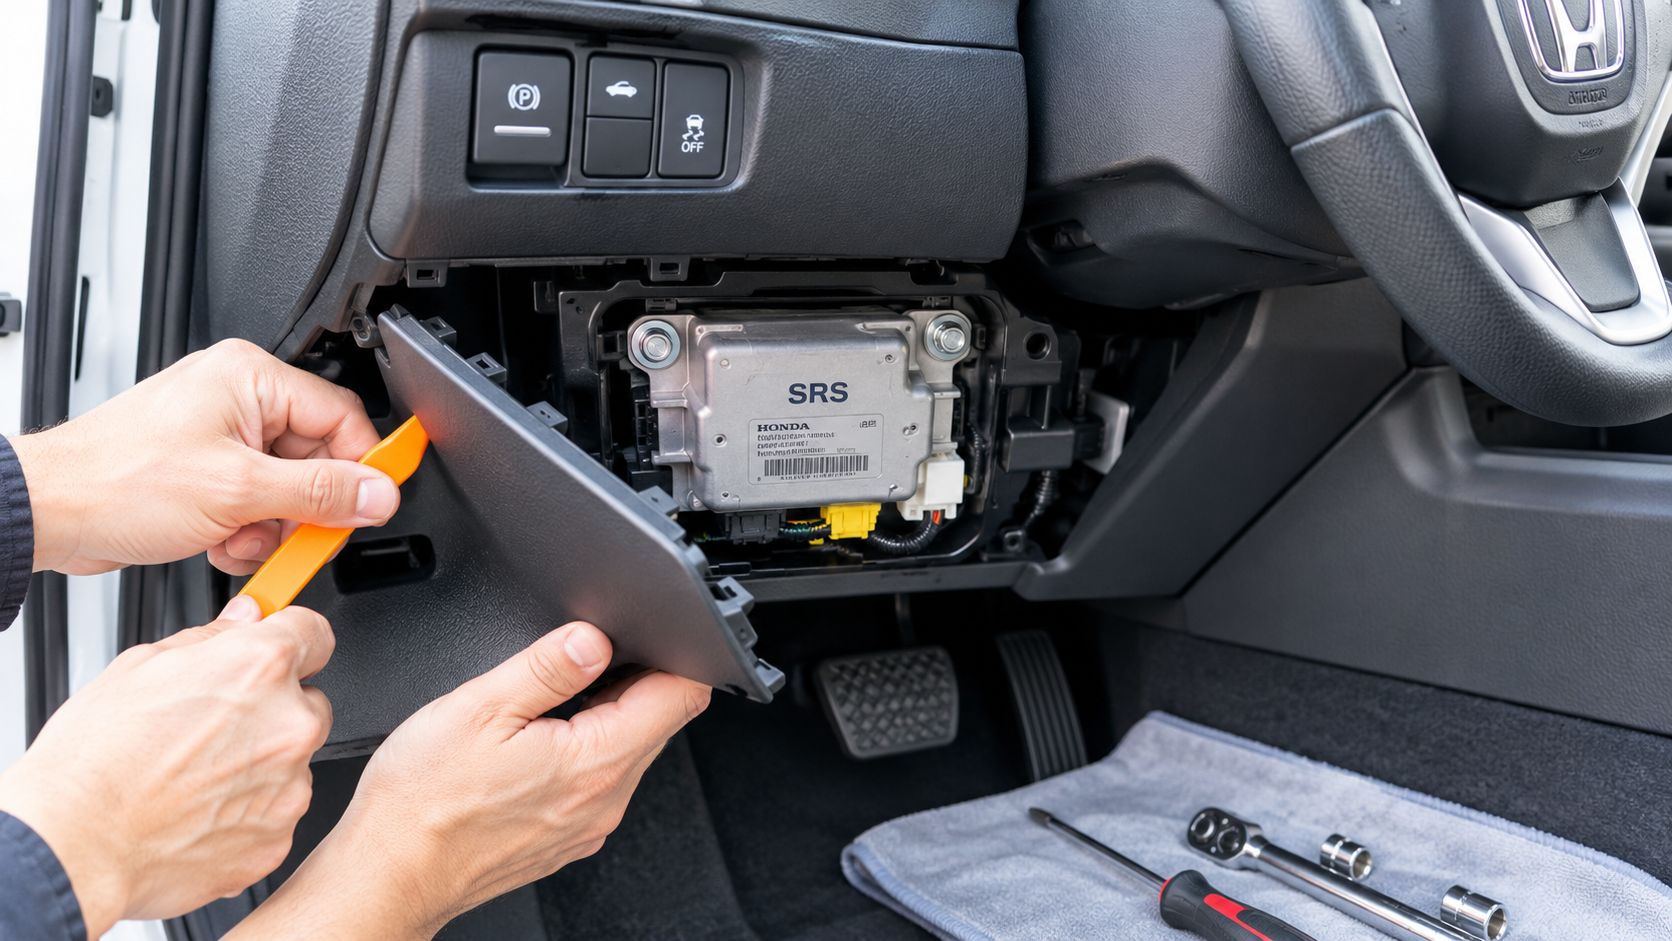
The Honda console-access example shows the broad idea: disable the SRS, remove the specified surrounding trim, and then access the controller. It doesn't establish a universal order for bolts and connectors.
The image below illustrates trim access, not a model-independent prying point.
Expose the mounting area without forcing it
Follow the factory trim-removal sequence. A plastic trim tool can be useful where the procedure calls for releasing trim, but it isn't permission to pry at an unexplained point of resistance.
Photograph the original arrangement before removing the controller. Record its orientation, bracket position, connector routing, and mounting hardware so you have a practical reference during reassembly.
- Release locks deliberately: Use the specified connector-release method. Don't pull on wires or lever a connector off with its lock engaged.
- Keep hardware organized: Preserve the original mounting hardware and note any vehicle-specific replacement instructions.
- Inspect the surrounding area: Look for water intrusion, distorted mounting points, harness damage, and deformed connector terminals.
Mounting is part of the safety system
The controller may contain crash-sensing electronics, so orientation, rigid attachment, and specified fastener torque matter. A loose installation isn't acceptable because the connectors reach.
Under-seat access introduces a different work plan from console access. If the manual requires seat or carpet removal, follow that procedure rather than trying to reach the module through a narrow opening.
Don't improvise around missing service information. Handing the job to a qualified shop is preferable to damaging a connector or compromising the mounting arrangement.
Sending the Module for Mail-In Reset
Confirm that reset is appropriate before shipping the controller. A unit with stored collision information or hard faults shouldn't be assumed serviceable merely because its enclosure looks undamaged.
The decision between reset, replacement, and programming must follow the manufacturer's requirements for the vehicle and the diagnosed condition. A mail-in service is an option to evaluate, not a substitute for that decision.
Confirm the service and shipping details
Use the airbag module service information to request confirmation for your exact module. Supply the vehicle details, controller part number, diagnostic findings, and any known physical or water damage.
The mail-in destination is Westfield, Massachusetts. Confirm the current street address, packing instructions, and expected turnaround with the service before dispatching the part. Don't work from an old label or assume shipping time is included in the repair schedule.
- Protect the connectors: Package the unit so connector housings and terminals can't strike the box or other components.
- Prevent movement: Use a sturdy box and suitable cushioning, following the service's packaging instructions.
- Include identification: Add the requested contact, vehicle, and order information without covering the module label.
Plan the rest of the repair
Mail-in service doesn't include vehicle installation. Arrange for yourself or a local repair facility to reinstall the controller and complete the required checks.
A returned module isn't evidence that the whole SRS is ready. Outstanding restraint-system damage, harness faults, and vehicle-specific programming requirements still need attention before the repair can be considered complete.
Why People Search for It in the First Place
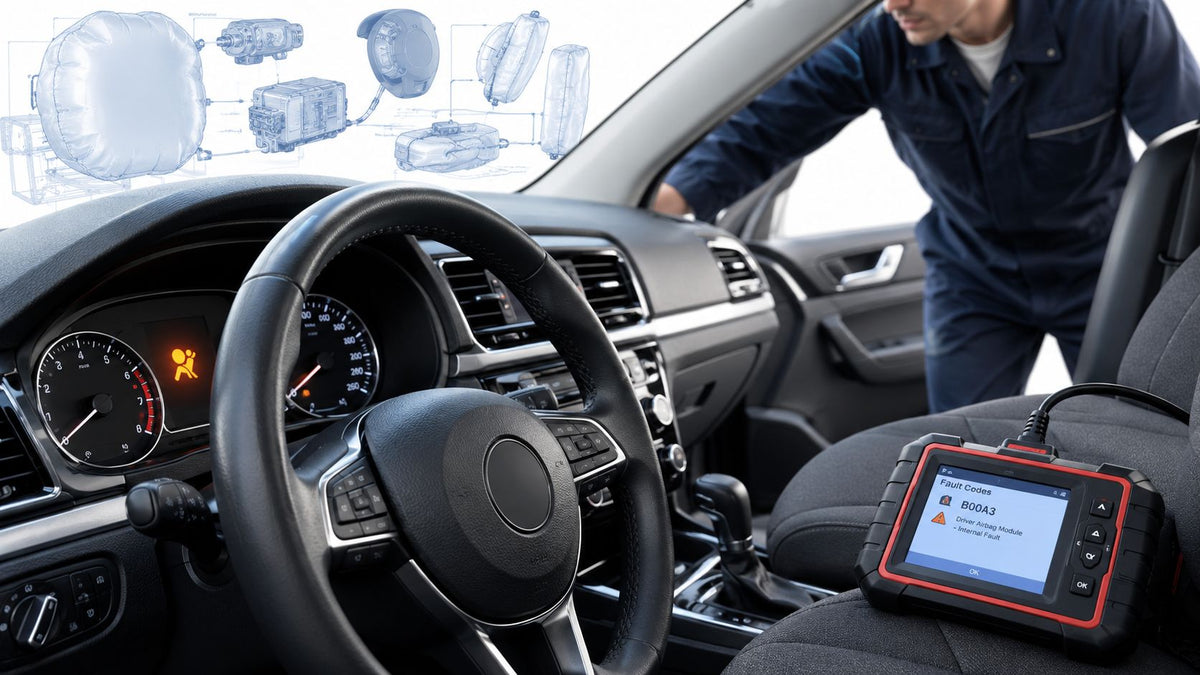
An airbag warning light after a collision is a reason to investigate, not a diagnosis of a failed controller. Finding the module helps with access, but the useful starting point is knowing what fault you're trying to correct.
A salvage rebuild raises a different question: what restraint-system work remains from the previous collision? Don't let an intact-looking controller or a repaired interior settle that question.
Match the search to the actual job
- Post-collision warning light: Obtain SRS diagnostic information before deciding the controller must come out.
- Auction or salvage rebuild: Review the restraint-system condition and repair requirements, not just the visible airbags.
- Replacement-module fitment: Verify part identity and manufacturer programming requirements before treating a connector match as sufficient.
The airbag warning-light diagnostic guide is a useful starting point for organizing the investigation. Ask the technician for the actual SRS findings rather than accepting “the airbag light is on” as the removal instruction.
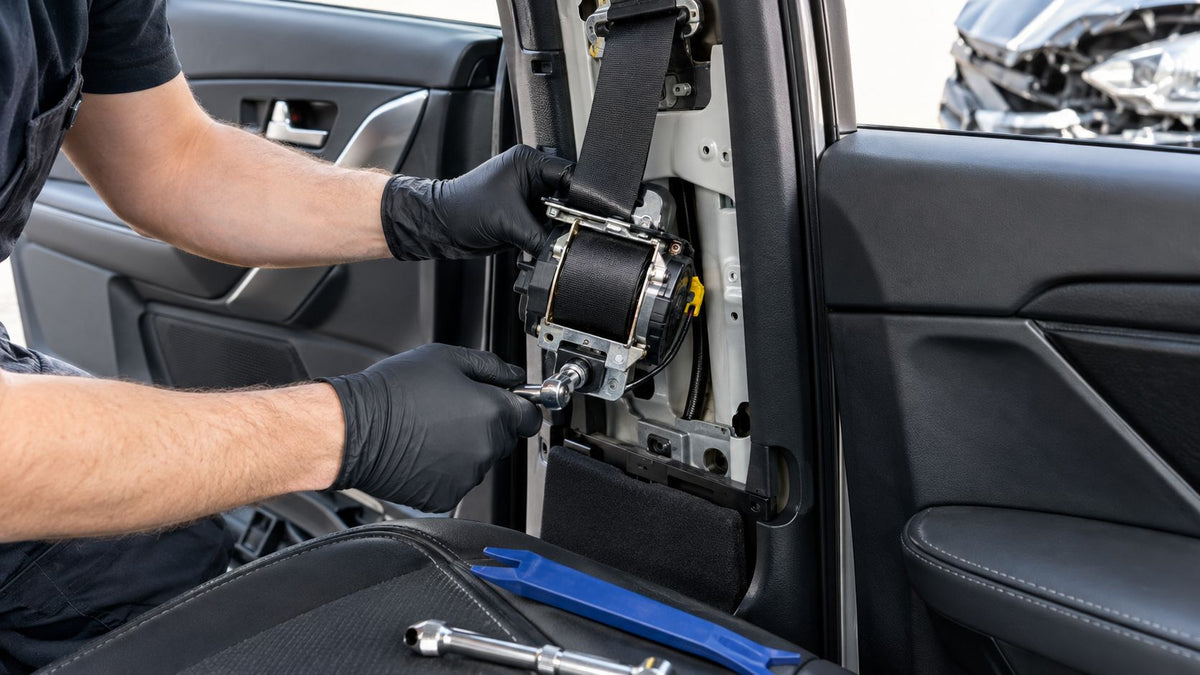
Keep belt work separate from controller work
Seat-belt damage can be part of the same repair, but webbing condition and controller faults are different service questions. Seat Belt Webbing Replacement - All Colors addresses worn or damaged belt webbing; it shouldn't be confused with diagnosing an SRS controller.
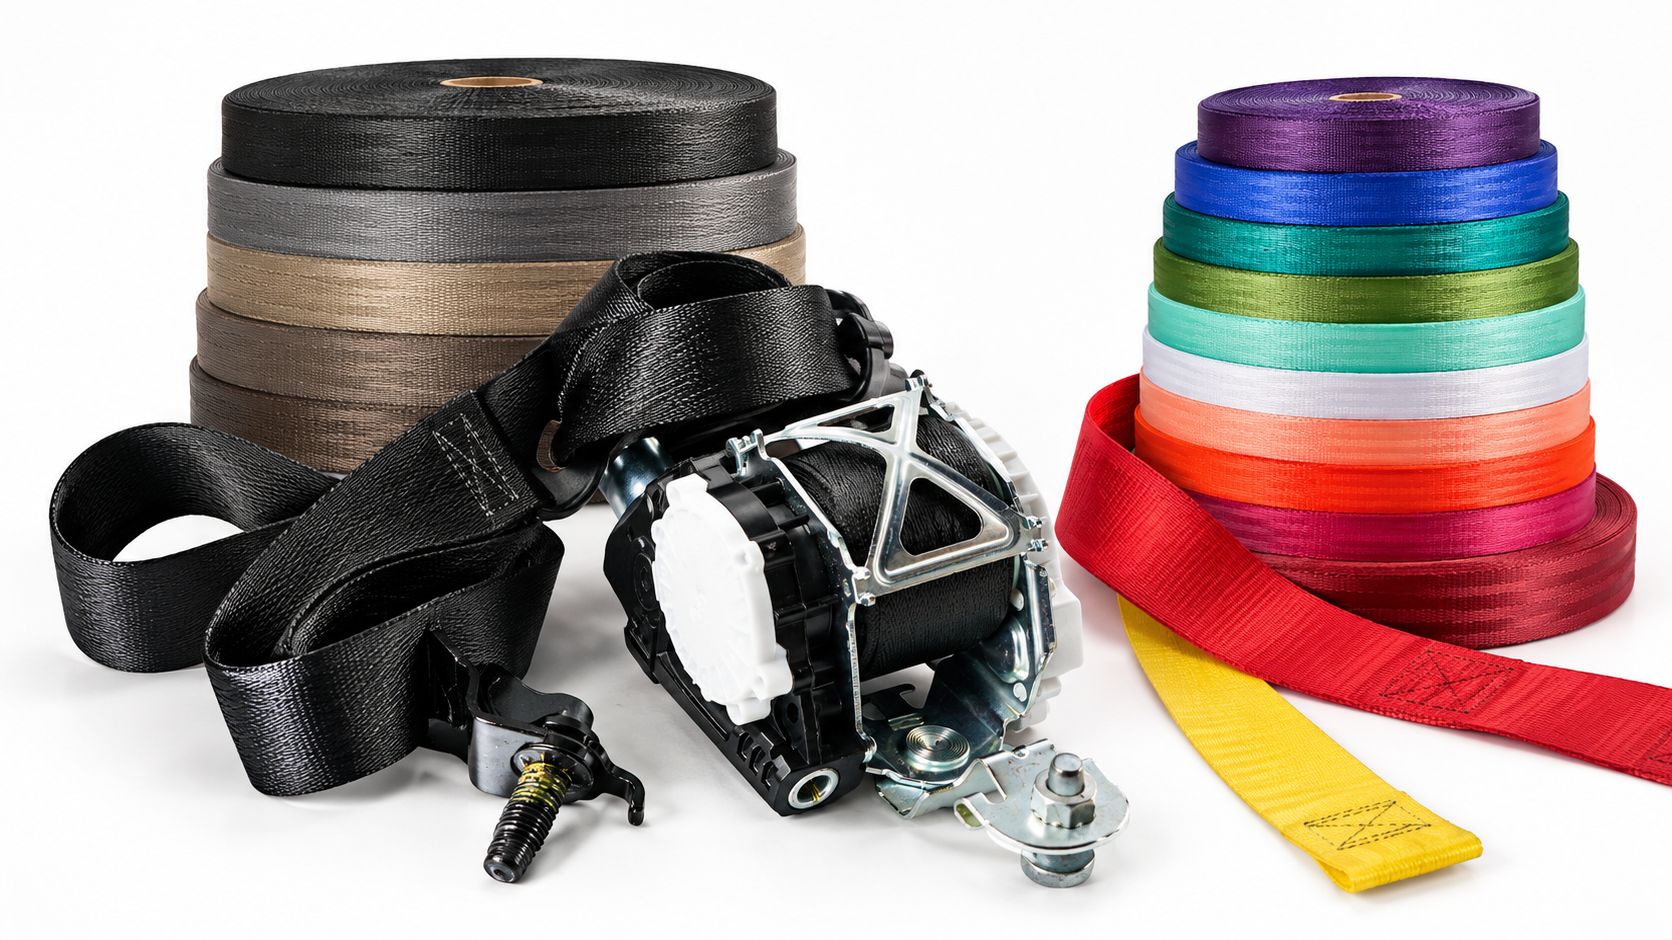
Locating the controller accomplishes something only when removal is required. Diagnosis may point to work elsewhere in the restraint system, leaving the controller in place.
Mistakes That Damage the Module or the Interior
The most expensive shortcut is treating this as ordinary interior disassembly. You're accessing a safety-system controller, and both the electrical connections and mechanical mounting deserve deliberate handling.
Mistakes made during access
Removing the wrong component: A search result showing a steering-wheel airbag doesn't prove that's the controller. Check the component name on the work order against the factory drawing before opening anything.
Forcing trim or connectors: Resistance isn't an instruction to pull harder. Find the remaining attachment or connector lock instead of using the surrounding plastic as leverage.
Keep a separate note of anything that doesn't match the procedure. An unexplained difference is a reason to pause, not improvise.
Mistakes made during service and reassembly
- Abbreviating the safety sequence: Complete the prescribed disabling process before touching SRS connections. Don't substitute a guessed waiting period.
- Ignoring mounting damage: Inspect the bracket and attachment points before reinstalling. Don't use the fasteners to force a distorted mount into position.
- Calling an undamaged enclosure a healthy module: Appearance doesn't establish whether collision data or hard faults remain.
- Finishing without diagnosis: Controller service doesn't resolve every possible restraint-system problem. Complete the manufacturer-required checks before closing the job.
A useful final habit is to account for every fastener, connector lock, and routing clip before replacing the last panel. If you can't explain where a leftover part belongs, stop and check the service drawing.
Verifying the Repair After Reinstallation
Verification starts while you can still inspect the installation. Don't close the interior and rely only on whether the warning light happens to be off.
Inspect before restoring power
- Mounting: Confirm the original orientation and manufacturer-specified fastening requirements.
- Connectors: Check that each connector is seated and its locking mechanism is secured.
- Harness routing: Restore the documented path without pinch points beneath the console or seat.
- Grounds and surrounding damage: Confirm the required ground connections and address any damage identified during removal.
Reconnect the battery and carry out any initialization or programming required by the manufacturer. Use the prescribed ignition and warning-lamp checks rather than expecting identical behavior across vehicles.
Verify with compatible diagnostics
Use a diagnostic scan tool that can communicate with the vehicle's SRS, and follow the factory verification procedure. Record any remaining faults and resolve them rather than repeatedly trying to erase the warning.
An airbag light that remains illuminated indicates an unresolved SRS fault. It isn't a normal condition to accept after controller service.
Don't assume the restraint system is dependable while that fault remains. Have the vehicle assessed and finish the required diagnosis before treating the repair as complete, including any applicable inspection requirements.
Common Questions About Airbag Module Location
Quick Answers to Top Airbag Module Questions
| Question | Short Answer |
|---|---|
| Is the steering-wheel airbag the same as the control module? | No. It's a separate airbag assembly, not the SRS computer. |
| Can I drive with the airbag light on? | Don't assume the restraint system is functioning correctly. Arrange prompt diagnosis. |
| Must the controller come out to clear the light? | Not necessarily. Removal depends on the diagnosed fault and manufacturer procedure. |
| Will a reset work on any vehicle? | Don't assume so. Confirm eligibility for the exact controller and follow OEM requirements. |
What should I ask before authorizing removal?
Ask for the SRS diagnostic findings, the controller's exact location, and the manufacturer-prescribed repair path. That keeps the conversation focused on a fault and a procedure rather than a guess based on the warning light.
If you're considering mail-in work, also ask who will remove and reinstall the module, handle any programming, and verify the completed repair. Broad service coverage doesn't prove that resetting is the correct repair for every individual controller.
What's the sensible first-timer boundary?
You can collect vehicle details, locate the factory drawing, and compare labels without committing to removal. Once the work requires SRS disconnection, uncertain connector handling, or an unavailable service procedure, get qualified help.
Finding the box is useful. Knowing whether it should be disturbed is more important.
Seat Belt Repair offers mail-in SRS control-module reset, seat-belt pretensioner repair, and webbing replacement. Visit Seat Belt Repair with your vehicle details, module part number, and diagnostic findings to confirm the appropriate service and shipping instructions before removing or sending parts.

Leave a comment
This site is protected by hCaptcha and the hCaptcha Privacy Policy and Terms of Service apply.