
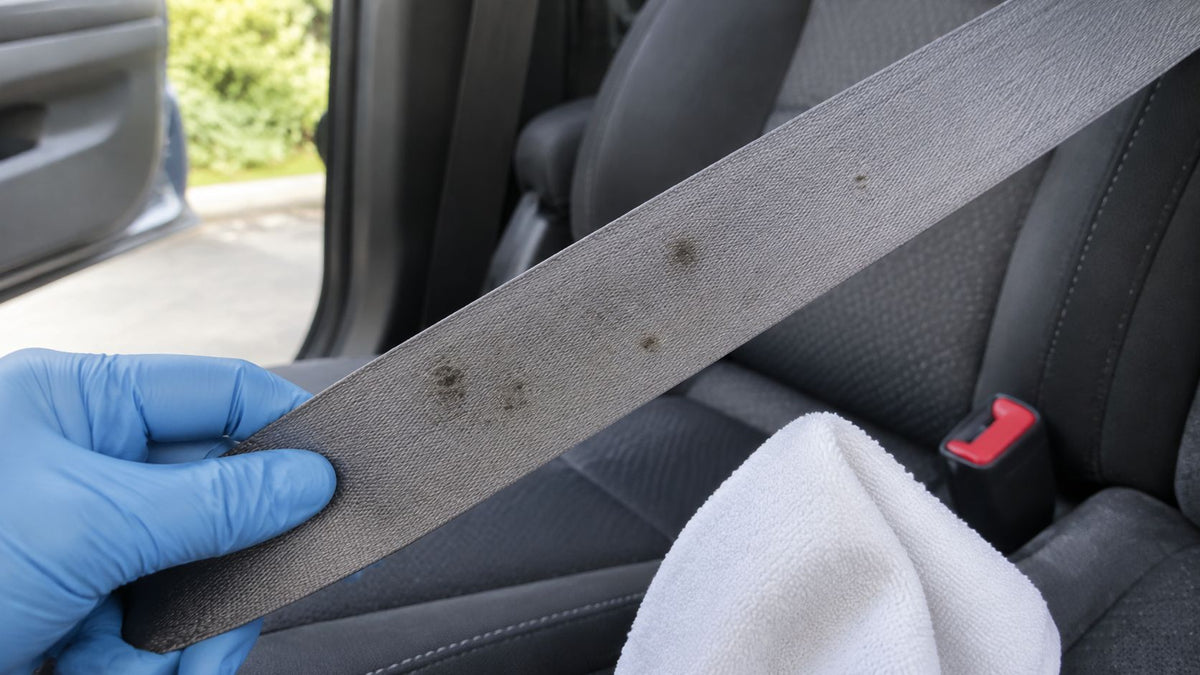
Light, dry surface spotting on intact seat-belt webbing can be cleaned with mild detergent and fully dried, but webbing that stayed wet past 48 hours, smells musty after wiping, is frayed, or won't retract should be replaced rather than scrubbed. Cleaning is only reasonable when the vehicle manufacturer's care instructions permit it and the contamination is superficial.
You pull the belt across your chest and notice speckles near the shoulder guide. The cabin smells stale, and you're wondering whether a cloth and some cleaner will make the car usable again. The important question isn't whether you can remove the spots. It's whether the strap and the mechanism behind the trim are still fit to protect you.
Table of Contents
- What Mold on a Seat Belt Really Means
- Clean or Replace by Belt Condition
- Pretensioners and SRS Parts to Leave Alone
- How to Clean Light Surface Mold
- Tips to Stop Cabin Mold Returning
- Replace the Webbing Instead of the Assembly
What Mold on a Seat Belt Really Means
Say your car sat closed after a sunroof leak. The seat feels dry now, but the belt comes out spotted and the windows fog whenever the temperature drops. The surface you can touch may have dried while carpet backing, seat foam, and the cavity behind the pillar trim stayed damp.
Mold on a seat belt is a moisture-and-time problem, not just dirt on a strap. Water can enter through a door seal or windshield, soak a seat, or collect through condensation during storage. A salvage vehicle parked with wet carpet and closed windows deserves particular caution because you may not know its water-exposure history.
Follow the dampness beyond the visible strap
Pulling out the accessible belt doesn't expose every layer wound around the spool. Moisture can also reach mounting areas, hidden trim, and nearby restraint components. A clean-looking shoulder section doesn't tell you what happened farther inside.
Look for clues before reaching for cleaner:
- Carpet and underlay: Press around seat mounts and beneath removable mats. A dry carpet surface can hide wet backing.
- Seats and trim: Check for water marks, damp seams, and mustiness around the pillar opening.
- Glass and seals: Recurring condensation or water tracks help narrow down where moisture enters.
- Belt movement: Hesitation or incomplete rewind deserves a mechanical assessment, not just cleaning. Our guide to seat belts not retracting explains the faults that can cause this behavior.
The occupant concern isn't limited to touching the strap. The CDC's guidance on dampness and mold associates damp or moldy environments with respiratory symptoms, worsening asthma, allergic rhinitis, and eczema. Ventilate the cabin and keep sensitive occupants away from cleanup rather than masking the smell with fragrance.
Identify suspect growth without pretending to test it
Fuzzy, powdery, or irregular white, green, gray, or black spotting within the weave is suspicious. A musty smell that returns after the cabin has aired out strengthens that suspicion, but neither color nor smell identifies the organism.
A gentle pass with a dry white cloth can help distinguish loose dust from embedded staining. Color transfer doesn't prove mold, though: dirt and belt dye can transfer too, while some mold staining won't. Don't scrub a questionable patch to diagnose it.
Practical rule: Stop the water, dry the interior, then judge the restraint. Don't use a cleaner to compensate for an unresolved leak.
Light, dry spotting on otherwise sound webbing may qualify for conservative cleaning. Brittle fibers, persistent staining, mustiness, or abnormal movement make this a restraint-condition problem instead.
Clean or Replace by Belt Condition
A musty belt may look clean after wiping, yet still have growth in the webbing or on layers wound inside the retractor. Judge the belt by its worst condition, not its cleanest visible patch. A spotless exposed section does not clear a wet, musty retractor.
Clean or replace a moldy seat belt
The EPA's basic mold-cleanup guidance explains that porous materials can be difficult or impossible to clean completely. Treat webbing that stayed wet for more than 48 hours conservatively as contaminated porous material. Appearance alone cannot establish that it is safe.
| Belt condition | Risk signal | Recommended action |
|---|---|---|
| Dry light spotting on accessible webbing | No musty odor after airing, and fibers look intact | Damp-wipe with mild detergent if manufacturer instructions allow, dry fully, then check retraction and latch |
| Musty odor that returns after wiping | Growth may remain in fibers, edge folds, or the spool | Stop surface cleaning and replace the webbing; have the mechanism assessed |
| Webbing wet longer than 48 hours | Prolonged dampness can leave contamination in porous material | Treat as contaminated textile and replace the webbing |
| Flood, sewage, or long damp storage | Water or contaminants may have reached carpet, foam, trim, and retractor | Fix the water source and arrange evaluation of the complete assembly; see the replacement guidance in section 6 |
| Frayed, cut, brittle, stained-through, or pet-damaged webbing | Strength and stitching cannot be assumed | Replace the webbing; don't bleach or scrub it |
| Belt locked, deployed, or won't retract | Possible pretensioner or retractor fault, not just mold | Don't soak the mechanism; get qualified restraint-system evaluation |
| Mold only on hard plastic trim or buckle cover | Nonporous surface, with webbing clean and dry | Detergent-wipe compatible exterior surfaces, dry, and wear respiratory protection, gloves, and eye protection |
The table identifies three separate decisions: whether an exposed surface can be cleaned, whether webbing needs replacement, and whether hardware needs evaluation. Replacing the webbing does not establish that contaminated hardware is serviceable. Likewise, a functioning retractor does not make damaged fabric acceptable.
What a wipe-down can establish
A careful wipe can remove superficial material and make the weave easier to inspect. It may reveal fraying, stiffness, discoloration, or damaged stitching that dirt had obscured.
A clean surface says nothing about retained crash strength. Wiping cannot show whether growth remains inside folded edges, under stitched overlaps, or between layers on the spool. The belt must perform under crash loading, not just withstand a gentle pull.
For example, an intact belt with a faint dry spot, no odor, no water history, and normal operation may be suitable for conservative cleaning. If the spot wipes away but a musty smell returns as more webbing comes out of the pillar, the belt needs removal and assessment rather than another detergent pass.
Replace webbing that is frayed, cut, stained, discolored, or damaged by a pet. Don't trim loose fibers, stitch over a damaged edge, or bleach a patch to make it match the surrounding belt.
Why microbial exposure matters to belt strength
In NHTSA's laboratory test procedure for FMVSS No. 209, webbing exposed to microorganisms for two weeks must retain at least 85% of its pre-exposure breaking strength. This is a controlled laboratory benchmark, not a pass-fail test for a belt in a vehicle.
You cannot estimate remaining crash protection from a spot's color, how easily it wipes away, or how strong the strap feels in your hands. Sun exposure, abrasive dirt, unsuitable chemicals, edge wear, and previous crash loading may also affect the same assembly. Consider the history of a belt from an unknown salvage interior alongside its visible condition.
Don't pull hard on the belt or hang weight from it to test strength. That does not reproduce an approved test or establish the condition of hidden webbing and stitched connections.
When the assembly needs to come off the car
Remove the assembly for assessment when contaminated webbing disappears into the retractor, the full accessible length cannot be inspected, or the mechanism has been wet. Flood exposure needs particular attention because water and contaminants may reach components that should not be rinsed.
- Sound, serviceable hardware with compromised webbing: Professional rewebbing may be appropriate after inspection.
- Wet, corroded, contaminated, or malfunctioning hardware: Have the complete assembly evaluated. New fabric alone is not enough.
- Collision-locked or deployed components: Follow the vehicle manufacturer's restraint-repair requirements before considering reuse.
- Unknown flood or sewage exposure: Keep that seating position out of use until a qualified shop establishes the repair scope.
Pretensioners and SRS Parts to Leave Alone
A belt can look clean while its retractor or crash-activated pretensioner has been exposed to moisture. Keep liquids and compressed air out of the retractor opening. The housing contains a locking mechanism, and restraint-system wiring may be nearby.
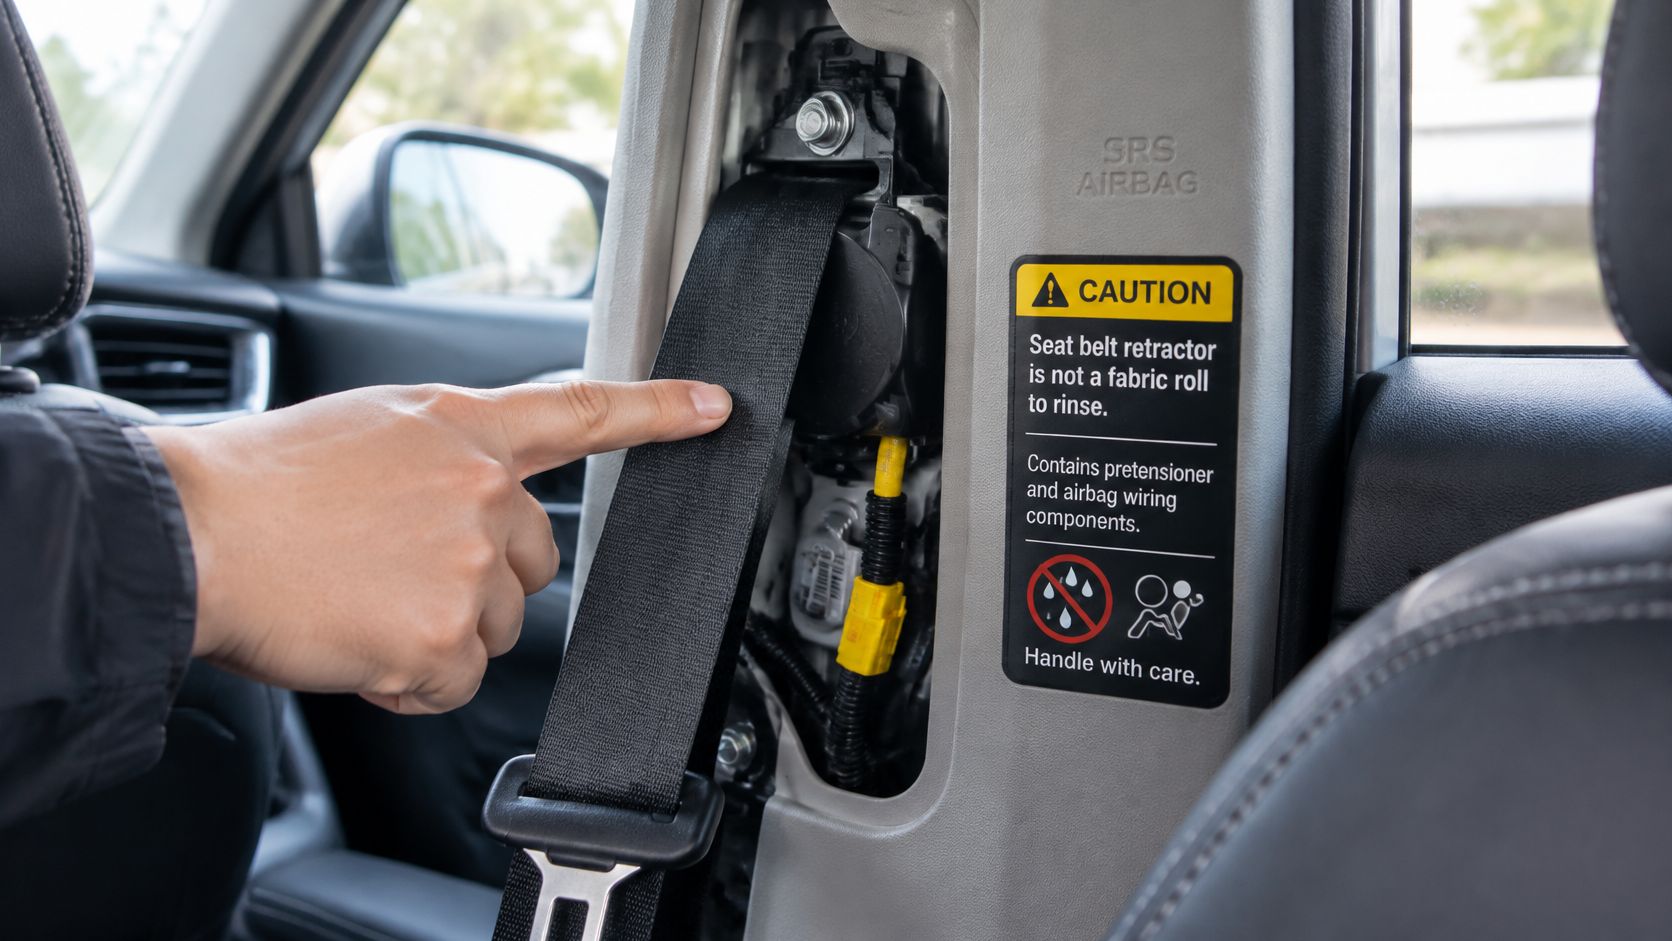
Leave the crash hardware closed
Never open a pretensioner, cut an SRS connector, probe its terminals, or attempt an airbag-module reset at home. Connector color is not a reliable identifier on its own. Use the service information for the specific vehicle.
A belt that locked after a collision may have a deployed pretensioner even if the exposed strap looks undamaged. Read about how seat-belt pretensioners work and why they need repair to understand how this hardware differs from the webbing.
An illuminated airbag warning light calls for diagnosis. Cleaning the belt does not resolve an electrical fault, stored crash information, or an incorrectly connected component.
Keep removal vehicle-specific
The removal sequence depends on the vehicle. Follow its service procedure before handling any SRS component:
- Check the service procedure. Switch the vehicle off, disconnect the negative battery terminal when directed, and wait for the manufacturer-specified period before touching SRS components.
- Remove the relevant trim carefully. Identify clips and airbag areas before using a trim tool. Do not force a tool behind an unknown panel.
- Disconnect and unbolt as directed. Remove the belt as an assembly. Do not open the pretensioner or retractor.
- Stop if anything is unclear. An unidentified connector, damaged wiring, or uncertain pretensioner condition calls for a qualified shop.
Seat Belt Repair provides step-by-step removal instructions for seat belts and airbag modules, and can help if needed. Most belts can be removed by taking off trim panels and unbolting the components from the vehicle frame, but the vehicle-specific safety procedure still applies.
The EPA's mold-remediation training recommends specialist advice when an item's suitability for cleaning is uncertain. For a restraint assembly, uncertainty about contamination inside the housing calls for specialist evaluation.
Reinstallation requires correct routing, specified fasteners and tightening procedures, secure connectors, and any required SRS diagnosis. Keep the seating position out of use until the assembly and restraint system have been cleared.
How to Clean Light Surface Mold
Use this procedure only for the dry, superficial-spotting condition, and only if the vehicle manufacturer's instructions allow mild-detergent cleaning. Embedded growth, recurring odor, or contamination entering the housing isn't a clean-in-place job.
The overview below applies to that narrow cleaning case, not flood-damaged or malfunctioning belts.
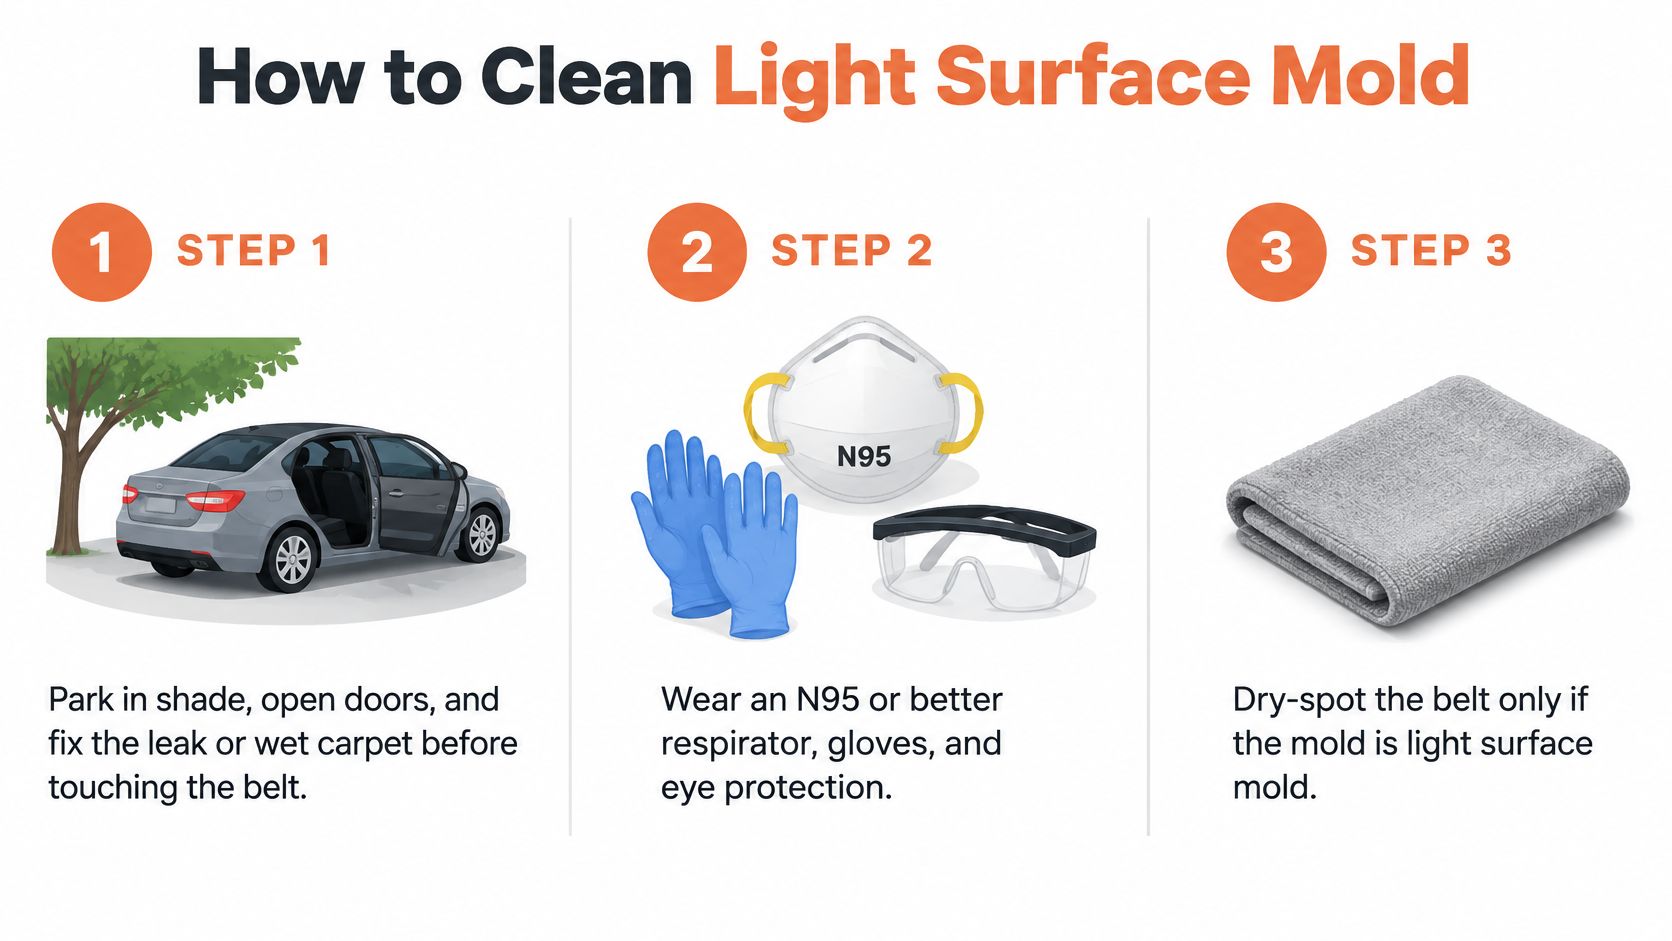
Prepare without spreading contamination
- Park in shade and ventilate. Open the doors in a suitable outdoor location and address the leak or wet interior first, so you're not cleaning over an active moisture problem. Keep children and pets away from the work area.
- Put on protection before handling the spot. The EPA's mold-cleanup guidance recommends at least an N95 respirator, gloves, and goggles for small cleanup tasks and identifies 24–48 hours as the critical drying window for wet materials. Use a properly fitted respirator and non-vented eye protection; this drying window is a prevention benchmark, not proof of decontamination.
- Extend the belt slowly. Have a helper hold the exposed strap or use a smooth, non-damaging restraint on the webbing so damp fabric can't rewind into the spool. Don't use locking pliers or a toothed clamp, and don't force the belt beyond its normal travel.
Wipe lightly and keep the mechanism dry
- Apply cleaner to the cloth, not the car. Dampen a soft microfiber cloth with water and a little mild dish detergent, then wipe gently along the accessible strap because controlled moisture is easier to keep out of the housing. The cloth should be damp, not dripping; don't saturate folded edges or stitched areas.
- Avoid aggressive treatments. Skip bleach, ammonia, solvents, undiluted biocides, steam, compressed air, stiff brushes, and abrasive pads because they can damage material, interfere with labels, spread spores, or drive moisture where you can't remove it. Don't mix cleaners or substitute a household mold-killer for the manufacturer's permitted belt-care method.
- Remove detergent residue and blot. Wipe with a separate cloth lightly dampened in plain water, then press with a clean dry towel so residue and excess moisture aren't left in the weave. Don't rub hard enough to fuzz the fibers or twist the strap to wring it out.
Drying checkpoint: If you can't keep the cleaned webbing out of the housing until it's completely dry, stop the in-place job.
Finish with a function check, not a color check
- Dry with moving air. Keep the cleaned length extended in shade with gentle airflow across it, and dry the nearby carpet and upholstery as well so the belt doesn't return to a damp environment. Start drying immediately; don't leave the strap damp while waiting for the drying window to expire, and don't aim a heater into the retractor.
- Check the belt before using the seat. Once fully dry, let it rewind under control, extend it again, and check smooth movement, correct routing, a secure latch, and normal release because the restraint must still function after cleaning. A returning smell, recurring spots, new stiffness, dye transfer, damaged stitching, or hesitation ends the DIY attempt and calls for professional assessment or replacement.
Tips to Stop Cabin Mold Returning
Start with the water source
- Trace the leak: Inspect sunroof drains, door vapor barriers, windshield seals, the cowl, and trunk water paths. Clear or repair the actual fault rather than adding another fragrance product.
- Expose trapped moisture: Remove floor mats and arrange access to damp carpet backing or seat foam where necessary. Don't assume upholstery is dry because the top feels comfortable.
- Use ventilation sensibly: Open the doors during drying when weather and security permit, rather than closing a wet car under a cover. A moisture absorber can help a stored vehicle, but it can't compensate for water entering the cabin.
Keep the cabin dry between uses
- Remove wet belongings: Take dog towels, gym bags, and soaked clothing out when you park. Leaving them on a seat keeps moisture near the belt and buckle.
- Collect debris instead of blowing it: Once surfaces are dry, use a properly sealed HEPA-filtered vacuum on accessible cabin debris. Keep compressed air away from the belt slot.
- Don't use sunlight as disinfection: Dry the belt in shade with airflow rather than leaving it extended in direct sun for prolonged periods. Fading isn't evidence that mold has been removed.
For a broader cabin-air checklist, EcoQuest Purifiers offers a resource on cleaner air for drivers and travelers. Treat air-treatment equipment as separate from leak repair and contaminated-material removal, not as a way to make a questionable restraint reusable.
After flood damage or a salvage rebuild, assess the whole interior. The visibly spotted belt may not be the only affected restraint.
Recheck after normal driving and another spell of wet weather. Fresh spotting, condensation, or a returning smell means the moisture investigation isn't finished.
Replace the Webbing Instead of the Assembly
A fresh strap cannot make a wet or damaged retractor safe. Rewebbing is an option only when the remaining hardware is suitable for reuse after assessment.
Keep usable hardware only after assessment
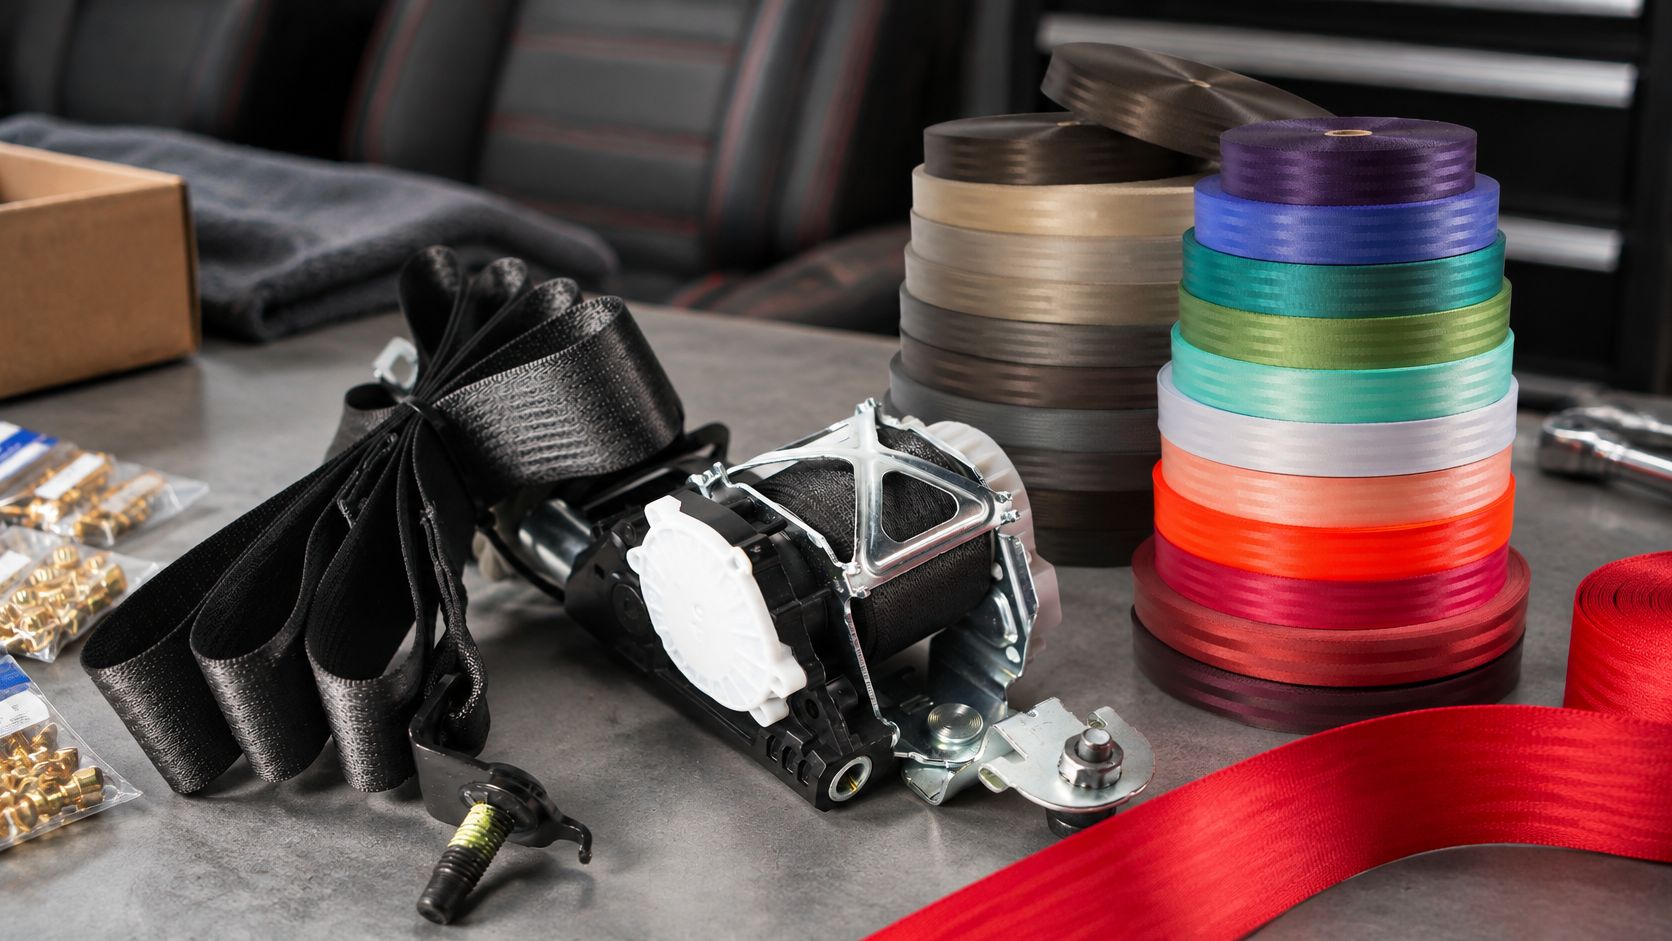
The Seat Belt ReWebbing Service - Any Custom Color costs $89.97 per seat belt. Seat Belt Repair disassembles the belt, installs new webbing, and restitches it with reinforced stitching. Original manufacturer tags are preserved whenever possible.
Replacement webbing can match the belt's existing color or use a custom color. Width and compatibility are technical requirements the rebuilt belt must meet. The guide to seat belt webbing width explains one dimension to consider, while the replacement still needs to suit the belt's original application.
The image shows the webbing service, not a replacement retractor or pretensioner.
Plan the removal and return installation
Follow the removal guidance in the earlier section before sending the belt. Include its exposure history so the technician can assess more than the visible staining.
- Ship for assessment and service: Send the assembly to Seat Belt Repair, 40 Main St., Westfield, MA 01085. The service is mail-in; installation is not provided.
- Arrange local reinstallation: Have a qualified body shop or restraint technician reinstall the components and complete any required checks.
Rewebbing replaces the textile while retaining hardware deemed suitable for reuse. If the hardware is unsuitable, the assembly needs a different repair or replacement route.
Seat Belt Repair offers webbing replacement and repair of eligible restraint components when a moldy belt cannot safely remain a cleaning job. Visit Seat Belt Repair for removal guidance and help identifying the appropriate service before sending your assembly.



Оставить комментарий
Этот веб-сайт защищается hCaptcha. Применяются Политика конфиденциальности и Условия использования hCaptcha.