
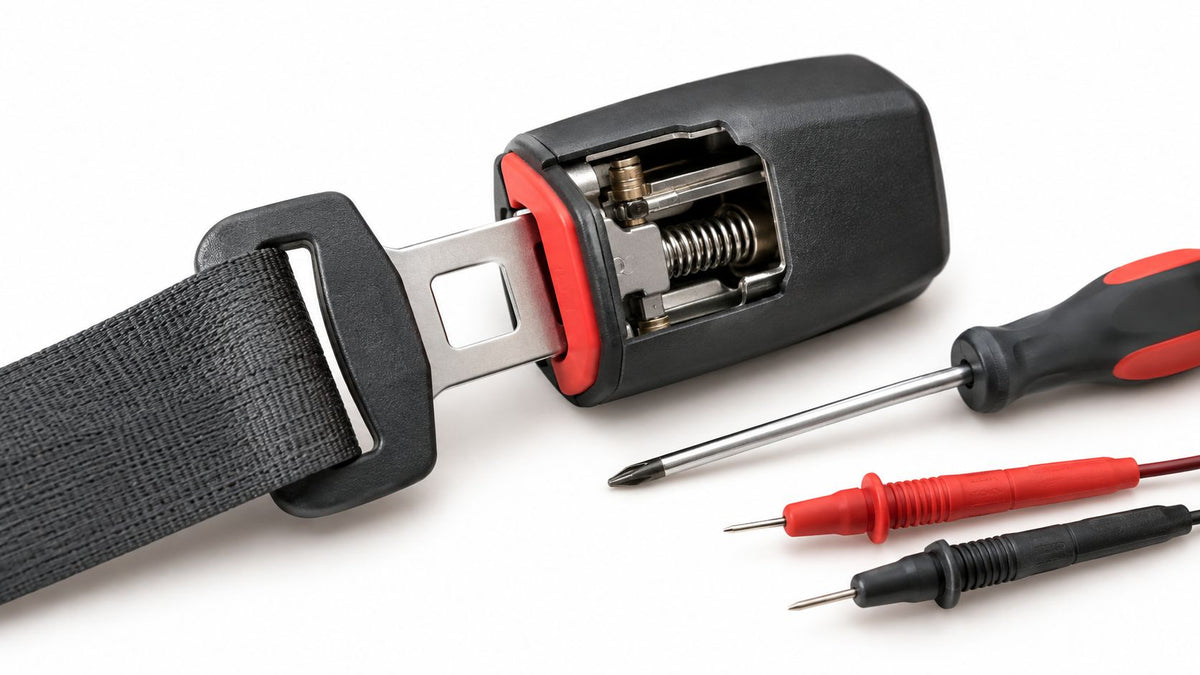
You're in the driveway with a replacement part in one hand and a seat belt that won't click, release, or clear the airbag light in the other. The buckle may look like a small plastic housing, but a modern belt buckle car system combines a mechanical latch, an electrical switch, an anchor, and sometimes a pyrotechnic pretensioner. A part that looks close enough can still sit at the wrong angle, use the wrong connector, or carry crash damage from its donor vehicle.
The safe fix starts with identifying what failed. Some problems respond to a targeted buckle repair. Others require an exact OEM assembly, a pretensioner rebuild, or SRS diagnosis before the car is driven.
Table of Contents
- How a Car Seat Belt Buckle Actually Works
- Why a Buckle Locks After a Collision
- Buckle Types You Will Find in Modern Cars
- Symptoms of a Failing or Faulty Buckle
- Inspecting and Identifying the Real Problem
- Replacement, Repair, and Compatibility Options
- When a Mail-In Seat Belt Service Is the Smarter Call
How a Car Seat Belt Buckle Actually Works
You press the red button, slide the tongue into the buckle, and expect a firm click. Instead, the tongue drops back out, or it clicks but the warning light stays on. That reaction makes sense once you see the buckle as more than a plastic receptacle.
The restraint works as a connected system. The buckle body holds the latch mechanism, the latch plate, also called the tongue, carries the slots that the latch grips, and the retractor controls how the webbing feeds and locks. Separating one component from the others without checking fitment can create a belt that moves normally but won't restrain you correctly.
The mechanical latch
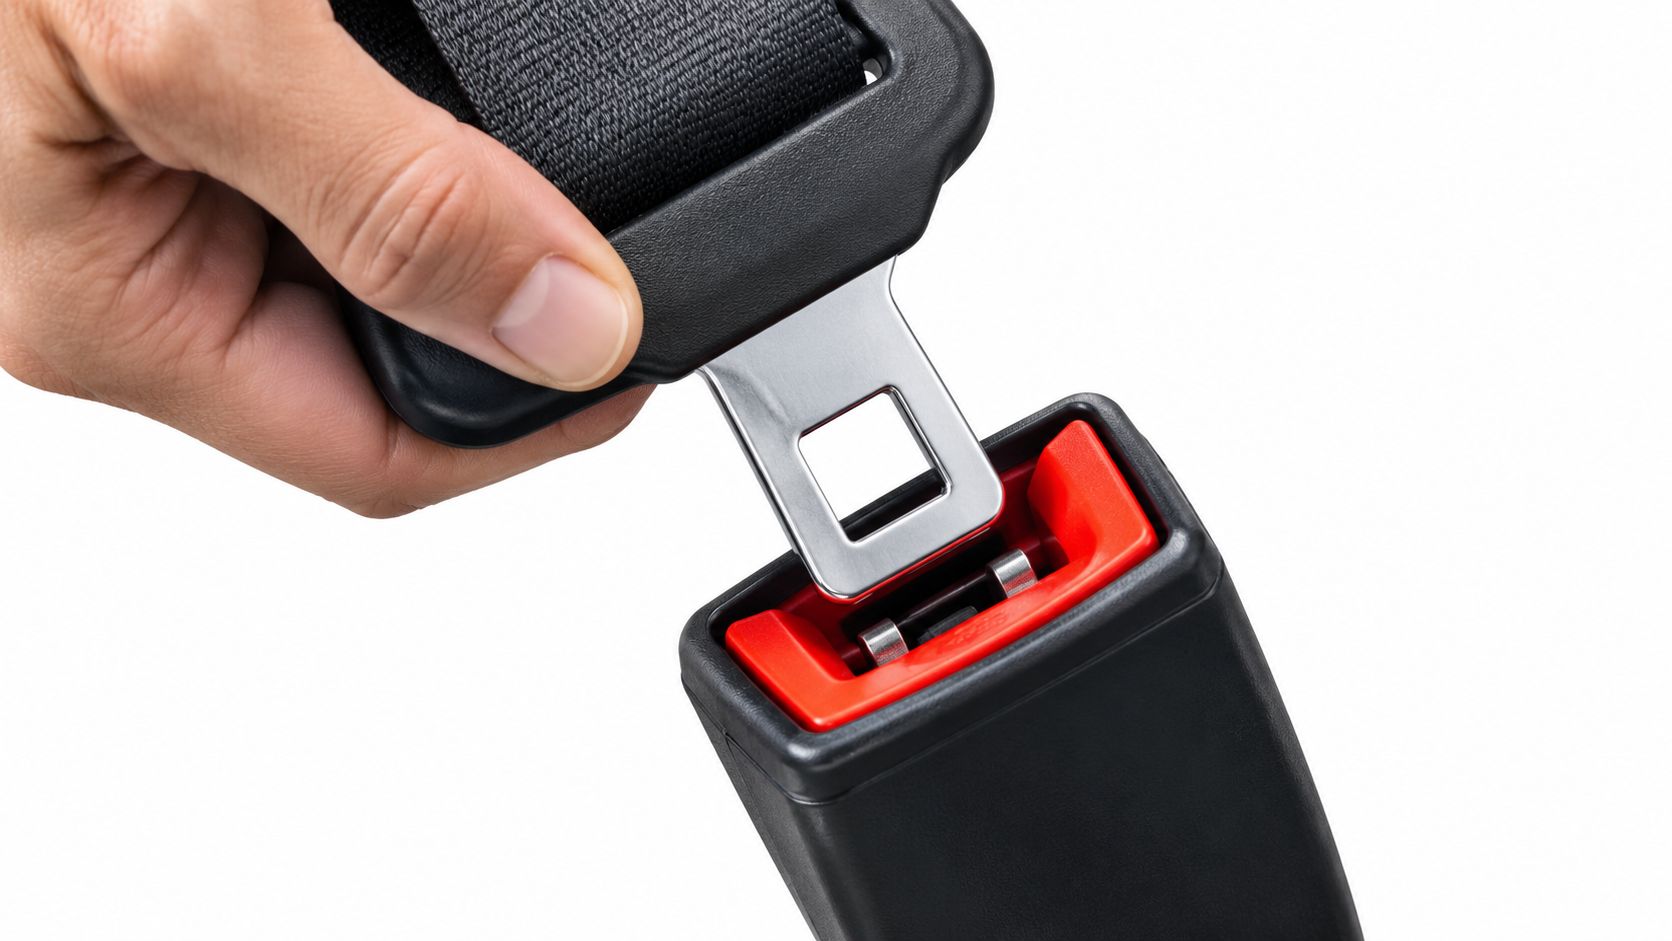
Inside the buckle housing, spring-loaded locking bars or cams move into the tongue slots after you insert and release the latch plate. The red button pulls those locking pieces away so the tongue can exit. Dirt, corrosion, a bent tongue, or a damaged spring can prevent full engagement.
A proper latch has a distinct click and holds the tongue securely. The release button should travel smoothly and return without sticking. Basic latch construction is also described in this seat belt latch explanation, which is useful when you're comparing a loose buckle with a buckle that never fully engages.
The electrical side
Many buckles contain a latch sensor, a small switch that changes the vehicle's electrical circuit when the tongue is inserted. The restraint control system uses that signal for the seat belt reminder and, depending on the vehicle, airbag suppression or occupant-classification logic.
That means a buckle can hold the tongue mechanically while failing electrically. If the dashboard still says the belt is unfastened, the vehicle may treat the occupant as unrestrained even though you heard a click. Don't bypass the switch or install a random resistor. The connector, switch behavior, and restraint module must agree.
The retractor adds another layer. Its ratchet mechanism lets the belt extend during normal movement, while a webbing-sensitive lockout reacts to sudden belt acceleration. During hard deceleration, the retractor stops feeding webbing so the belt can manage occupant movement. The buckle, switch, retractor, and restraint module therefore operate as one safety circuit, not as independent convenience parts.
Why a Buckle Locks After a Collision
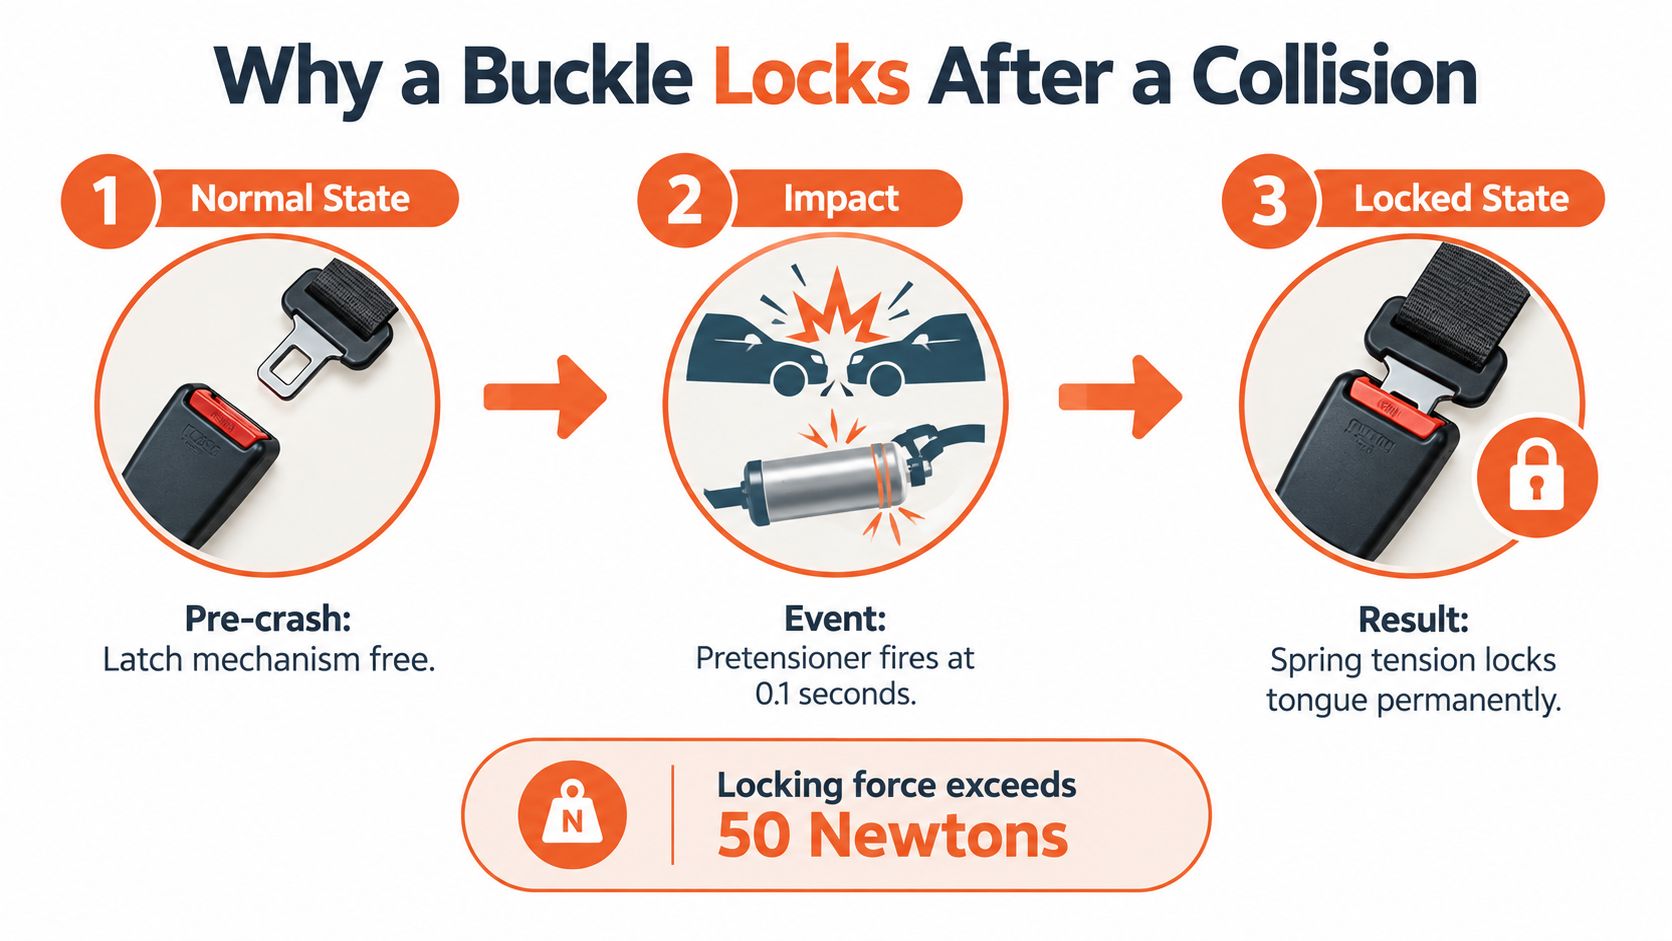
A driver may report that the buckle worked perfectly before a minor crash, then refused to release a few days later. The collision might have damaged the bumper without making the buckle look broken, yet the restraint system can still have changed state.
During a crash event, sensors send information to the SRS control module. The module can fire a pretensioner located in the retractor or buckle stalk. A pyrotechnic charge pulls the webbing tight, reducing slack around the occupant, and the activated assembly may leave the latch plate trapped or the belt retractor locked.
What changed inside the restraint
The buckle hardware usually hasn't become stuck because someone pushed the button incorrectly. The crash event fired a one-shot component. Once that capsule activates, it can't be reset from the passenger compartment, and a release-button repair won't restore the pretensioner.
The same principle applies to the control module. After a collision, the module typically stores crash-event and hard-code information in non-volatile memory. Disconnecting the battery or clearing ordinary diagnostic codes doesn't remove that data. A post-accident locked belt and airbag-light guide explains why the physical belt and the SRS warning can remain affected together.
Why a visible inspection isn't enough
A buckle can have an intact red button and an undamaged housing while its pretensioner has fired. Look for the complete assembly, including the stalk, wiring, connector, retractor, and mounting point. If the belt was in a collision vehicle, treat its crash history as part of the diagnosis.
The CDC describes the seat belt as a major road-safety measure whose adoption moved from optional equipment toward near-universal policy in the United States. That history helps explain why modern restraints contain several monitored and controlled components rather than one simple latch. A locked post-collision belt isn't an inconvenience to defeat. It's a signal that the system needs verification before reuse.
Buckle Types You Will Find in Modern Cars
A replacement buckle should match more than the color of its plastic. On the workbench, two buckles can look nearly identical while differing in anchor spacing, stalk length, latch direction, switch wiring, or pretensioner design.
The most useful starting point is to identify the buckle family and then compare the original part number, connector, seating position, and donor vehicle information.
| Buckle Family | Latch Direction | Typical Location | Pretensioner Integrated | Common OEM Marks |
|---|---|---|---|---|
| Standard lift-latch buckle | Tongue inserts from the top | Front seats and many outer rear seats | Sometimes | Stamped assembly number, red center button |
| European-style end-release buckle | Tongue exits through the front or end | Certain front and rear seating systems | Vehicle-dependent | Side release lever, molded or stamped OEM code |
| Side-mounted or knee-bolster buckle | Tongue enters from the side or upward angle | Rear cushions, convertibles, specialized seating | Sometimes | Short stalk, side-facing release, position-specific bracket |
| Buckle and pretensioner integrated unit | Tongue follows the vehicle-specific latch path | Common in newer front seating systems | Yes | Connector count, stage marking, OEM assembly label |
| Child-seat anchor buckle | Latch position is fixed near the rear cushion | Rear seating positions | Usually not in the buckle itself | Position-specific molding and anchor location |
What to compare before ordering
The anchor pitch determines whether the buckle sits correctly on the vehicle's mounting point. Stalk length controls where the button lands beside the occupant, and the connector type determines whether the car can read the buckle switch or pretensioner.
Check the stamped part number, lever position, webbing width, and the number of connector pins. Also confirm the exact make, model, model year, seating position, and whether the vehicle uses an active or non-active buckle.
The retractor may be an ELR, which locks under emergency conditions, or an ALR design that can hold the belt in a fixed mode for a child restraint. Those variations change how the webbing feeds and locks, so a buckle listing that says only “front seat belt” isn't specific enough.
Bench rule: Match the restraint's geometry and electrical identity, not its appearance.
Symptoms of a Failing or Faulty Buckle
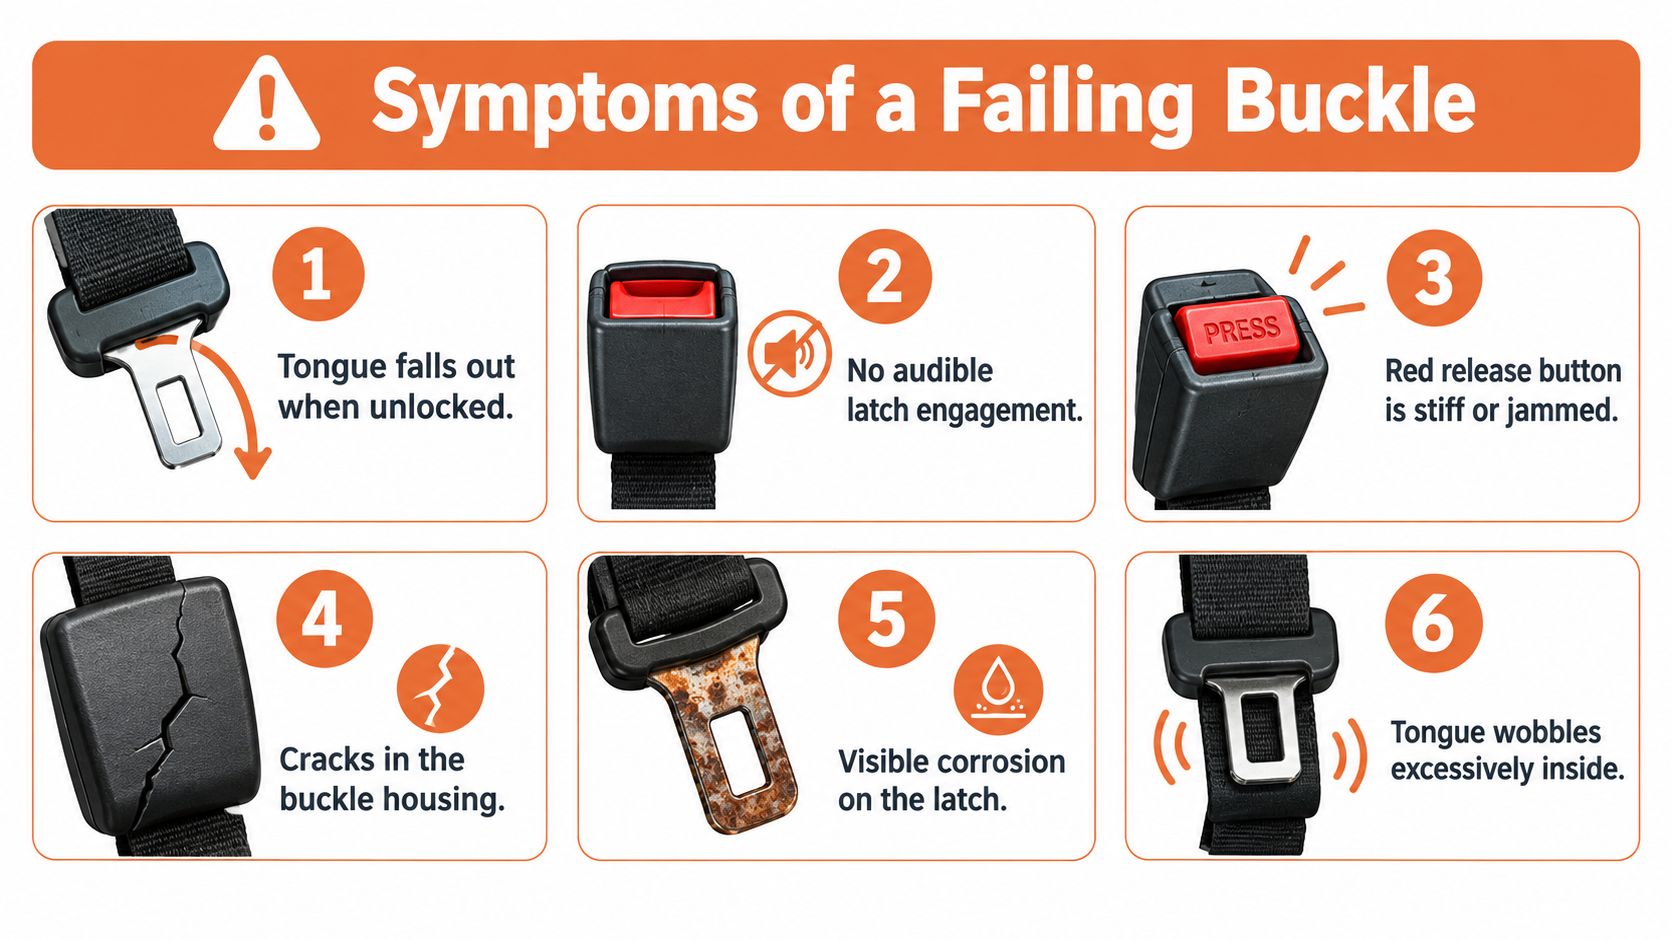
The first warning sign is often obvious. The tongue drops into the buckle, but there's no solid click and the red belt warning remains on. The opposite failure is just as serious: the tongue locks in place and then won't release when you press the button.
Other symptoms are easier to dismiss because the belt still seems usable. Don't dismiss them. A sticky insertion, false latch, loose anchor, or intermittent warning light can point to an internal failure.
Six signs worth taking seriously
- The tongue falls back out. The locking bar may not be reaching the tongue slot, or the release spring may be holding the mechanism open.
- There's no full click. A bent latch plate, debris, or worn internal cam can leave the tongue only partly engaged.
- The red button sticks. A worn release spring, crushed housing, or contamination in the slot can prevent complete release or engagement.
- The tongue grinds during insertion. Grinding or hesitation often indicates corrosion, a damaged latch plate, or an obstruction inside the buckle.
- The buckle feels loose or rattles. Inspect the anchor bolt, stalk, and mounting bracket. The fault may be at the attachment point rather than inside the latch.
- The airbag or belt light returns after reseating. That pattern can indicate a buckle switch or connector fault even when the mechanical latch feels normal.
A driveway check
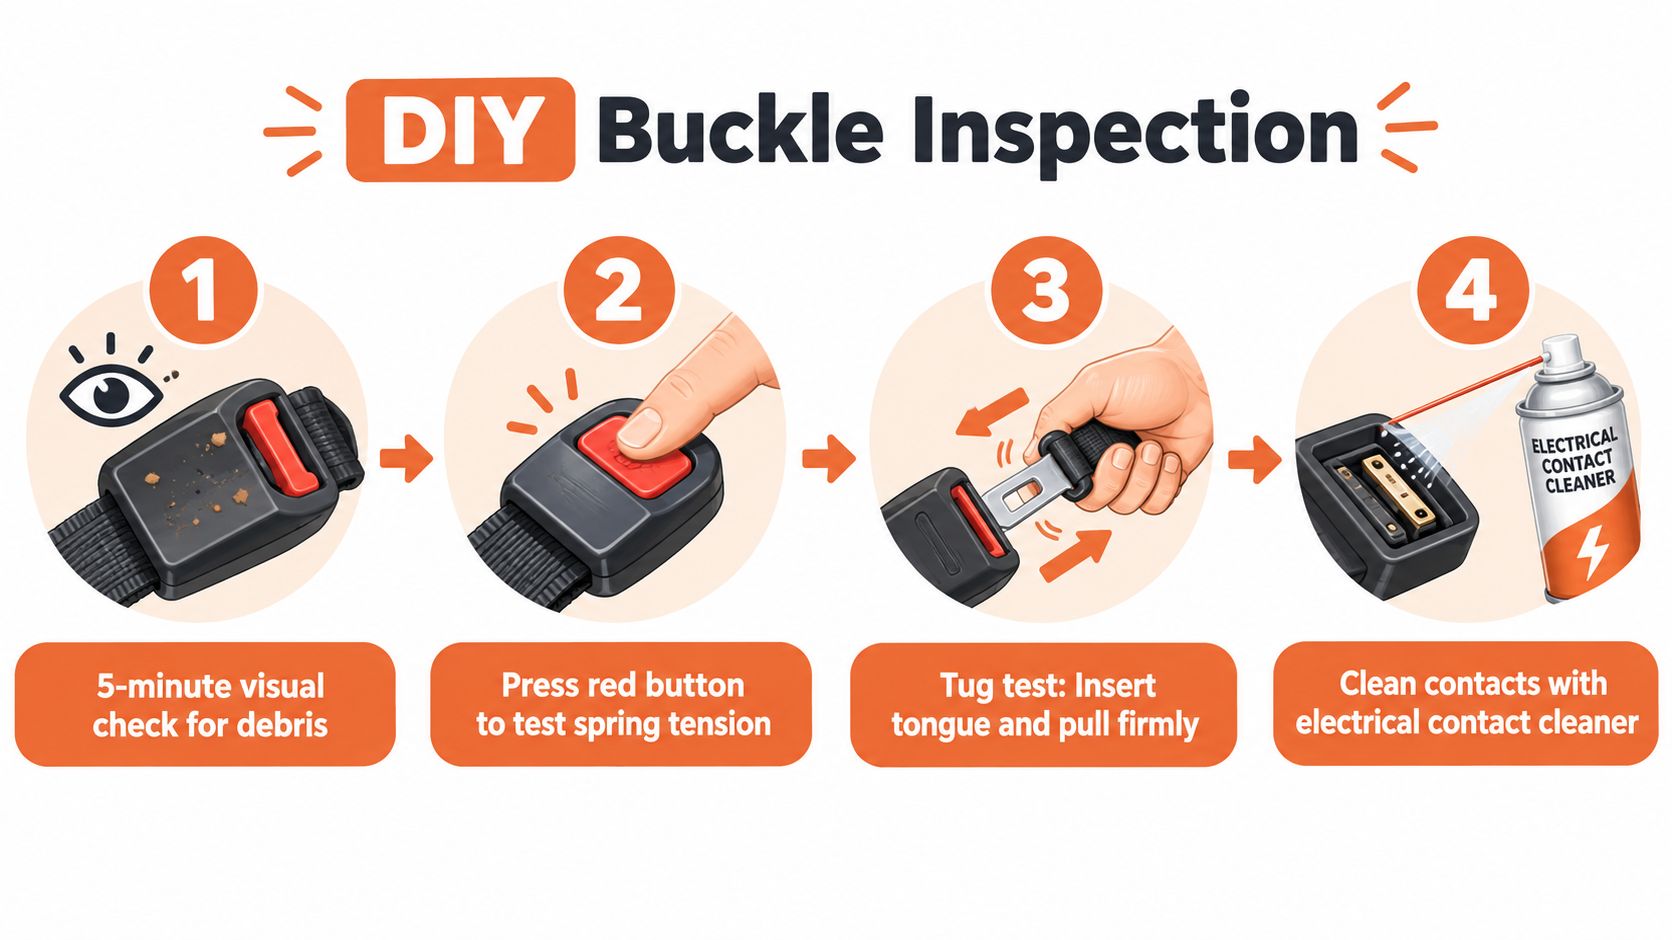
Start with the belt parked and the vehicle off. Look for frayed webbing at the buckle slot, cracks or deformation in the housing, corrosion on the tongue, and missing labels that could indicate a previous swap. Insert a clean tongue slowly and listen for a complete engagement.
With the belt still anchored, press the red button and listen for a sharp release. Then insert the tongue again and pull firmly in the direction of webbing travel. A buckle that pops free, slips, or gives a partial engagement fails that basic check.
Never keep driving to “see whether it settles down.” A restraint that releases under braking isn't a minor trim defect. NHTSA's seat belt information records the life-saving role of belt use, while complaint data compiled from NHTSA records describes reports of belts releasing by themselves, including associated injuries and crashes, in the documented buckle-release complaint summary.
Inspecting and Identifying the Real Problem
A matching-looking buckle isn't automatically a safe swap. The correct decision depends on OEM geometry, connector design, pretensioner configuration, and the donor part's crash history.
Begin with a five-minute visual sweep. Check the webbing where it enters the buckle, the plastic housing, the metal tongue, the stalk, the anchor bracket, and every visible connector. A missing warning label or mismatched fastener doesn't prove the part is unsafe, but it tells you the assembly may already have been replaced.
Work through the latch in order
Feed the tongue into the buckle slowly. You should feel steady resistance followed by full engagement, not grinding, hesitation, or a soft half-click that reverses when you stop pushing. Hold the belt at the anchor, press the red button, and expect the tongue to release cleanly rather than creep out.
Perform the tug test with the tongue fully inserted. Pull hard along the belt's normal travel direction while watching the buckle body and mounting point. Excess movement at the anchor can create warning-light complaints and can also indicate a damaged bracket.
Separate the switch from the latch
If the belt latches securely but the warning light changes when you wiggle the connector or reseat the tongue, suspect the switch circuit. A multimeter can help compare switch continuity against the vehicle's service information, but don't probe live pretensioner circuits casually. Disconnect the battery only according to the manufacturer's SRS procedure, and don't use a test lamp on an airbag connector.
A known-good, exact-fit belt can help isolate the fault, but a random buckle from another seat can't confirm much. The switch's resistance, pin assignment, and signal behavior must match the vehicle.
Watch the practical inspection sequence here before removing anything:
Clean only accessible debris with approved electrical contact cleaner and allow it to dry. Don't flood the housing, drill the latch, bend the locking bar, or defeat the warning circuit. FMVSS No. 209 covers belt-assembly performance, including webbing strength, buckle-release force, hardware strength, and durability, so a repair must preserve the original load path and release behavior. NHTSA's interpretation of those requirements is available in its seat belt assembly compliance guidance.
Replacement, Repair, and Compatibility Options
The safest-looking option isn't always the right one, and the cheapest part isn't automatically the wrong one. The decision turns on whether the original assembly can be inspected, whether the pretensioner fired, and whether the replacement has verified vehicle compatibility.
A dealer-supplied OEM assembly matched by VIN is the straightforward route. It should provide the correct wiring, switch characteristics, webbing relationship, stalk length, and pretensioner configuration. It can also be the most expensive route, especially when a salvage rebuild needs several restraint components.
Compare the available paths
| Option | Typical Cost | Pretensioner Compatible | VIN Match Required | Best Use Case |
|---|---|---|---|---|
| New OEM assembly | Varies by vehicle and assembly | Usually, when specified for the vehicle | Strongly recommended | Collision repair with verified new-part fitment |
| Aftermarket assembly | Varies by brand and design | Only if explicitly certified and compatible | Required | Limited applications with documented specifications |
| Salvage assembly | Varies by donor and condition | Unknown until crash history and connectors are verified | Required | A carefully documented donor part |
| Targeted rebuild | Varies by damage and service | Can preserve or replace compatible OEM components | Required | Locked, deployed, or damaged original assemblies |
| Buckle-switch repair | Varies by fault and design | Depends on the original pretensioner system | Required | Electrical fault with mechanically sound hardware |
Aftermarket listings often focus on appearance and basic fit. That isn't enough for a restraint assembly. Ask for load-bearing certification, exact application data, connector details, and confirmation that the part is intended for the specific seating position.
Salvage parts need an even closer inspection. The donor's build date, part number, crash history, and deployment status matter more than matching upholstery color. A buckle from the same model line can still have a different switch pinout or a different pretensioner stage.
When targeted repair makes sense
A targeted repair may address a damaged latch plate, worn spring, contaminated switch, locked mechanism, or deployed pretensioner while preserving the original OEM geometry. It doesn't make every buckle repairable. Crushed housings, altered mounting points, unknown high-load damage, and mismatched components should push the decision toward replacement or specialist evaluation.
The buying checks are simple but essential:
- Connector: Count pins and compare the shape and keying.
- Electrical behavior: Confirm the buckle-switch specification in service information.
- Physical fit: Match webbing width, stalk length, anchor pitch, and seating angle.
- System type: Confirm whether the buckle includes a pretensioner and whether it is active or non-active.
- History: Reject any donor unit with unexplained deployment or collision exposure.
The useful comparison isn't “new versus used.” It's verified assembly versus unknown assembly.
When a Mail-In Seat Belt Service Is the Smarter Call
A mail-in repair becomes worth considering when the original part has the right geometry but a failed state. A locked buckle, deployed pretensioner, frayed webbing near the buckle, or SRS module carrying crash data can all fit that pattern. The key question is whether the component can be restored with OEM-compatible parts and tested before it returns to the vehicle.
A specialist service may disassemble the latch or retractor, replace damaged webbing, repair the pretensioner mechanism, reset SRS crash data, and function-test the returned component. The exact work depends on the part and the diagnosis. You should confirm what is included before shipping, especially if the buckle shares a harness with a live pretensioner.
Use one decision rule
Send the original assembly for evaluation when:
- The part number is correct: The original component already matches the vehicle's geometry.
- The crash event is known: A fired pretensioner or stored SRS crash data explains the failure.
- A used match can't be verified: Unknown donor history creates more risk than it removes.
- The repair preserves the load path: The provider must use compatible components and test the finished assembly.
- The vehicle needs several restored parts: Rebuilding the original system can be more practical than sourcing multiple exact replacements.
The package should include the component identified by part number, along with the vehicle details and a clear description of the symptom. Leave removal and reinstallation to a qualified technician if you're not trained to work around SRS wiring. Ask how the returned unit is labeled, what testing is performed, which components are replaced, and what warranty applies.
For a practical checklist covering provider selection, component identification, and shipping questions, use this guide to choosing a seat belt repair service online. Seat Belt Repair offers mail-in repair for seat belt pretensioners, webbing, buckles, and SRS modules, with OEM components, functional testing, and a stated 24-hour turnaround after receipt according to the publisher information provided for this guide.
Don't install a buckle just because it clicks. Match the exact assembly, verify the crash history, and repair the part when a qualified service can preserve its original safety design.
If your belt buckle is locked, deployed, frayed, or showing an SRS warning after a collision, send the original component to Seat Belt Repair for mail-in evaluation and restoration. Their service covers buckles, pretensioners, webbing, and SRS modules, so you can diagnose the complete restraint problem instead of gambling on an unverified salvage replacement.


Leave a comment
This site is protected by hCaptcha and the hCaptcha Privacy Policy and Terms of Service apply.