

You release the buckle, but the belt stays hanging beside the seat instead of winding back into the pillar. Or it pulls out a few inches, locks hard, and refuses to move. If you're dealing with a seat belt retractor not working, don't treat it like a minor trim or convenience problem. The retractor controls webbing tension and emergency locking, while the pretensioner may have permanently locked the assembly after a collision.
The useful distinction is between an external friction problem you can sometimes identify safely and an internal safety-device failure that requires professional repair or replacement. A twisted belt, dirty webbing, or misaligned guide can restrict movement. A deployed pretensioner, damaged locking mechanism, defective torsion bar, or bent mounting point can leave the restraint unreliable even when the belt looks intact.
Table of Contents
- Why Your Seat Belt Retractor Stops Working
- How to Diagnose a Stuck or Locked Seat Belt
- Dangerous DIY Fixes You Must Avoid
- Dealership Replacement Versus Professional Repair
- Removing the Assembly for Mail-In Service
- Making the Right Decision for Your Vehicle
Why Your Seat Belt Retractor Stops Working
You release the buckle, but the belt remains beside the seat instead of winding into the pillar. Or it pulls out briefly, locks hard, and will not move. A seat belt retractor not working is a restraint fault, not a trim inconvenience. The retractor manages webbing tension and emergency locking, while the pretensioner can permanently lock the assembly after a collision.
The practical diagnosis starts by separating an external friction jam from an internal crash-device failure. A twisted belt, contaminated webbing, blocked guide, or misaligned trim opening can restrict movement and may be corrected without opening the mechanism. A deployed pretensioner, damaged lock, failed torsion bar, or bent mounting point requires professional repair or replacement.
What the retractor does
During normal driving, a spring-loaded spool feeds the webbing in and out while keeping it reasonably snug. An inertia-sensitive lock stops the spool during sudden movement. In a crash, the pretensioner rapidly removes slack and positions the occupant before the main crash forces develop. After its pyrotechnic charge fires, the assembly may stay locked even if the belt and housing look normal.
The design became part of everyday three-point belt use rather than an optional convenience. In North America, Federal Motor Vehicle Safety Standards 208 and 209 were first issued in 1967. Front-seat retractors became required by 1974, while Volvo was already offering them as standard front-seat belts in 1968, according to the engineering case study documenting the development and failure history of restraint systems.
The common mechanical causes
Slow retraction or stopping at one point usually indicates added drag along the belt path. Check for a twist, fold, dirt on the webbing, a pinched edge near the trim, or a shoulder guide that has shifted. These restrictions can make a healthy spring feel weak.
A hard lock after a collision has a different implication. The pretensioner may have fired, or impact forces may have damaged the retractor's internal locking or tensioning parts. Review this technical explanation of seat belt pretensioners to distinguish the one-time crash function from normal spring operation. Chemical sprays are not a safe substitute for that diagnosis.
Mounting and production defects can create similar symptoms. Ford recalled certain 2025–2026 Corsair and Escape vehicles because rear retractors might not be securely fastened. NHTSA stated that an improperly secured retractor might not restrain an occupant as intended in a crash, as described in the NHTSA recall document. Autoliv also recalled certain assemblies after production damage to a torsion bar could prevent proper restraint. Inspect mounting and previous repair work before condemning the spool.
Why driving with the fault is a bad gamble
A properly worn belt reduces fatality risk by 45% in passenger cars and 60% in light trucks, according to the cited NHTSA safety data. Those figures depend on the restraint functioning as designed. A belt that will not stay snug, will not lock correctly, or has a deployed pretensioner cannot provide the same protection.
NHTSA reported 22,713 passenger-vehicle occupant deaths in 2024, with 48% unrestrained, while observed national seat belt use was 91.2% that year. A failed retractor is therefore a safety defect. For a friction jam, careful external inspection may solve the problem. For a deployed pretensioner, professional mail-in restoration or replacement is the safer repair path.
How to Diagnose a Stuck or Locked Seat Belt
Start with the vehicle parked on level ground. Retractors are angle-sensitive, so a unit can behave differently when the vehicle is tilted, mounted incorrectly, or tested on a bench. Don't open the retractor housing. The spring and locking parts can store energy, and opening a crash restraint doesn't provide a reliable way to verify its performance afterward.
Check the belt path before blaming the mechanism
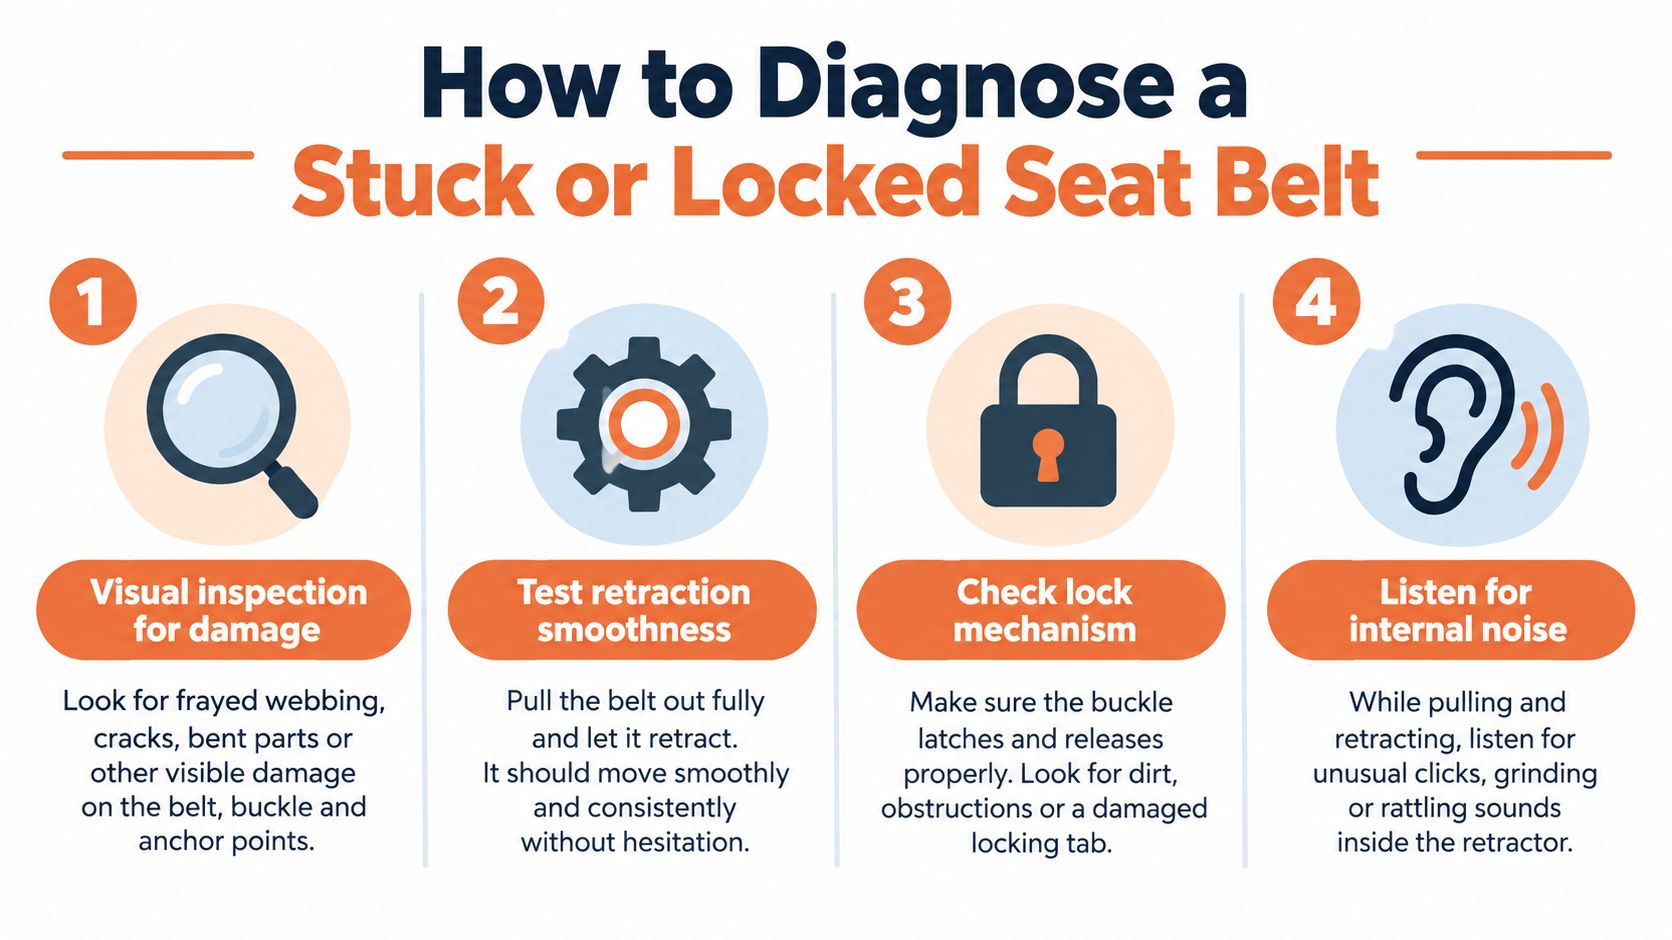
Inspect the complete length of webbing you can access. It should lie flat through the buckle tongue, shoulder guide, and retractor opening. A half-twist near the guide, a folded section caught in trim, or debris pressed against the opening can prevent the spool from taking up slack.
Pull the belt out slowly, then allow it to retract fully without guiding it aggressively. If it improves when you feed the webbing straight by hand, the problem points toward friction, routing, or weak spring tension. If the belt remains completely rigid in both directions, especially after a collision, stop trying to force it.
A seat belt troubleshooting guide for a belt that won't pull out can help you compare these symptoms without confusing a drag problem with a deployed unit.
Test the lock without repeated abuse
A sharp, firm pull with the vehicle stationary should make a functioning retractor lock immediately. Some technical training guidance recommends repeating the dynamic lock test three times to confirm consistent operation, as reflected in NHTSA service material. Use a controlled pull, not a series of violent yanks.
Quick tugs can keep an emergency-locking retractor engaged. To give it a chance to reset, let the webbing return fully and wait for the mechanism to settle before trying a slow extension. If it retracts slowly but locks reliably, contamination, a twist, or spring weakness remains possible. If it fails to lock during the sharp-pull test, consider the assembly unsafe and have it inspected or replaced.
Also listen for unusual internal sounds. A loose rattle, repeated clicking, or a mechanism that locks at ordinary body movement can indicate internal damage or misalignment. Any frayed, cut, burned, stretched, or visibly crushed webbing is a separate stop-use condition, regardless of how well the spool moves.
For a child seat, test the automatic-locking function separately. Some recalled retractors can appear normal during everyday belt use while failing to engage the locked mode needed to secure a child restraint. If the belt binds, rattles, or won't maintain tension during installation, check the vehicle's recall status and use the child-seat manufacturer's instructions rather than assuming the retractor is serviceable.
Dangerous DIY Fixes You Must Avoid
A slow belt often tempts owners to reach for a spray can. That's the wrong response. Don't spray WD-40, silicone spray, oil, solvent, or household lubricant onto the webbing or into the retractor. Independent repair guidance specifically warns that these products can contaminate the fabric and mechanism, increase friction, and make the original defect harder to evaluate (seat belt retractor repair guidance).
The webbing isn't ordinary fabric. It forms part of a calibrated restraint assembly, and its condition affects how the belt moves, locks, and loads the occupant. Chemical contamination can attract dust, leave a residue inside the spool area, and spread beyond the spot that originally felt sticky. A belt that retracts more freely immediately after spraying still hasn't been proven safe in a collision.
What you can inspect safely
External inspection is reasonable when you keep the work limited to the visible belt path:
- Remove routing problems: Flatten twists and folds, then check that trim or the shoulder guide isn't pinching the webbing.
- Clean the exposed webbing carefully: Use a mild soap solution on the belt itself, wipe away residue, and let it dry completely before testing retraction.
- Avoid housing disassembly: Don't open the spool, cut springs, pry the lock, or manipulate a pretensioner cartridge.
- Stop after a failed lock test: A belt that won't lock on a firm pull needs inspection or replacement, not more force.
Practical rule: Cleaning can address surface contamination. It can't reset a fired pretensioner or certify a damaged locking mechanism.
A deployed pretensioner is a one-time crash component. No amount of lubrication restores its spent charge, and bypassing the warning light or connector doesn't restore restraint performance. Salvage buyers should be especially cautious with used assemblies because external appearance doesn't reveal whether a donor vehicle already experienced a deployment.
If the belt was involved in a collision, remains completely locked, has visible webbing damage, or fails its dynamic lock test, remove it from service. A professional rebuilder can assess the specific assembly and determine whether the internal pretensioner, retractor, webbing, or complete unit requires attention.
Dealership Replacement Versus Professional Repair
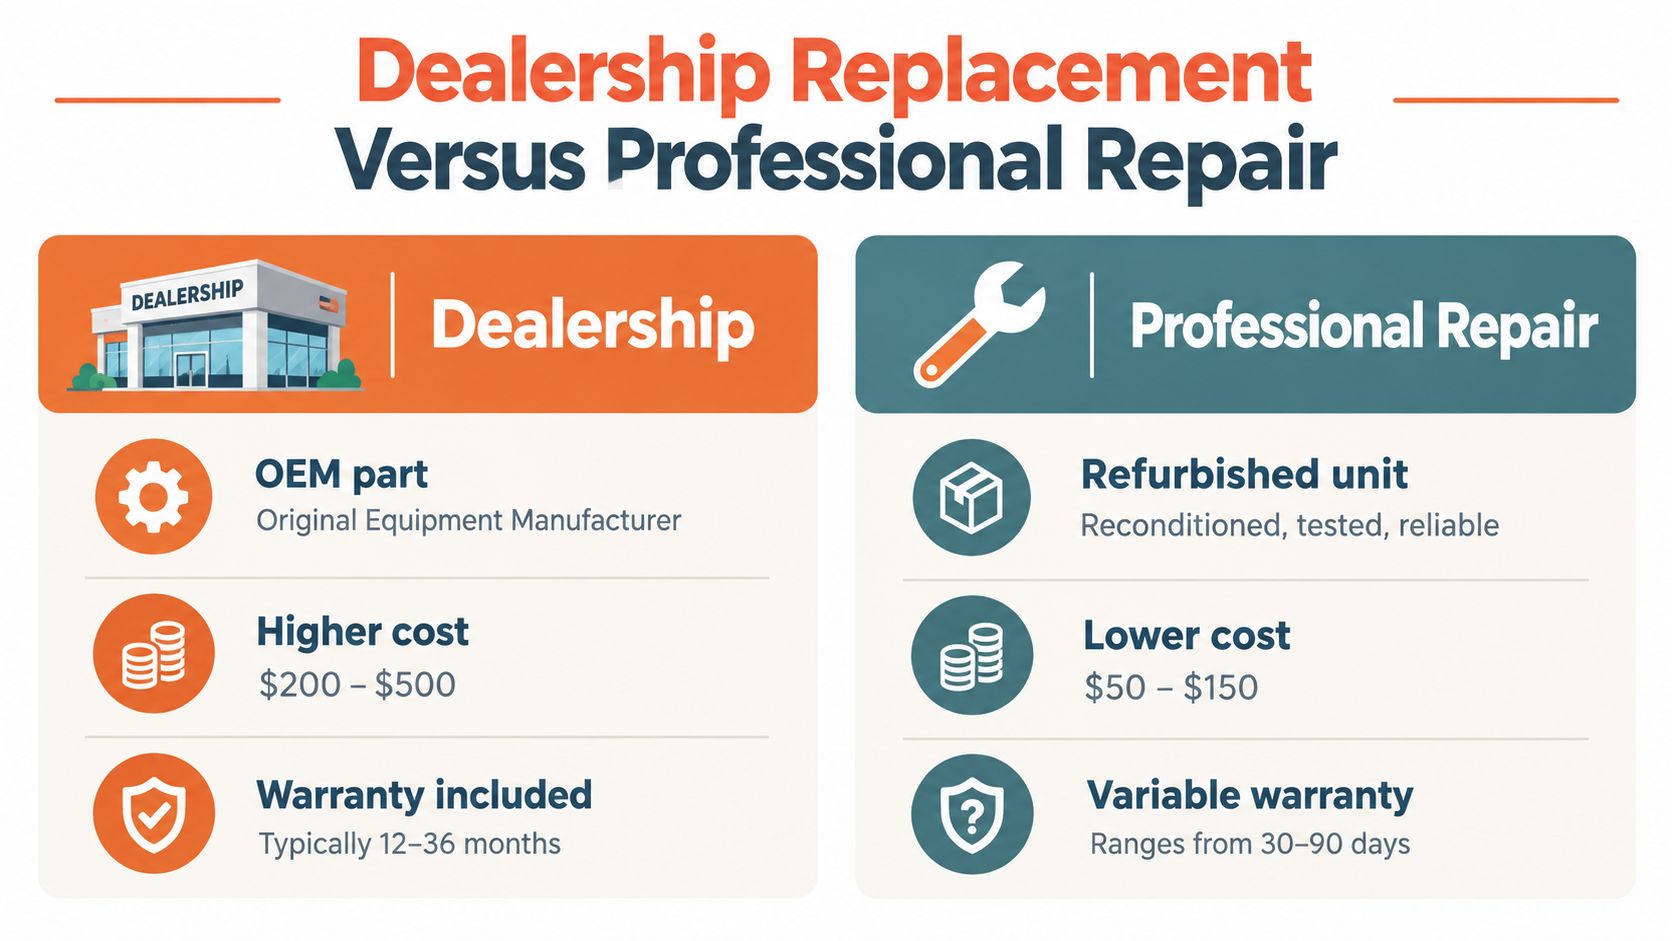
Once the failure is internal, the choice usually comes down to a new OEM assembly, a known-good replacement, or professional restoration of the original unit. A dealership replacement offers a straightforward parts path. The technician identifies the assembly, installs it, checks the SRS system, and follows the vehicle manufacturer's procedures. That route can be appropriate when the unit has severe structural damage, the manufacturer requires complete replacement, or recall coverage applies.
The trade-off is the total job, not just the part. The bill can include a new assembly, labor, diagnostic work, and related SRS procedures. Availability can also delay a repair, especially when a particular trim, connector configuration, or side-specific unit isn't immediately stocked.
What professional mail-in repair changes
A specialist mail-in service keeps the original assembly in the repair workflow. Depending on the unit's condition, the service may rebuild the retractor, replace internal pretensioner components, restore webbing, and function-test the repaired part before returning it. This can be useful for collision shops, salvage rebuilders, and owners who want to avoid installing an unknown used belt.
The key qualification is that not every damaged unit should be restored. A bent mounting bracket, crushed housing, compromised webbing, or unidentified recall issue may require replacement or manufacturer-directed repair. A reputable service should identify the part correctly and tell you when the assembly isn't a suitable repair candidate.
The comparison is practical:
| Dealership replacement | Professional mail-in repair |
|---|---|
| New OEM assembly and vehicle-side installation | Original unit returned after specialist service |
| Higher upfront parts and labor exposure | May reduce replacement-related expense |
| Convenient if local inventory and fitting are available | Requires safe removal, packaging, and reinstallation |
| Appropriate where recall or manufacturer procedure requires replacement | Useful for locked or deployed units suitable for restoration |
| Dealer or manufacturer warranty terms may apply | Warranty and scope depend on the repair provider |
This guide to pretensioner replacement costs and repair alternatives covers the decision from a parts-and-service perspective without treating every failure as identical.
For a salvage rebuild, the important calculation is risk-adjusted reliability. A used belt with an unknown crash history may look cheaper until it arrives with a locked retractor or hidden deployment. A repair preserves traceability of the unit you removed, but only when the provider uses appropriate components, follows the applicable safety requirements, and tests the finished assembly.
Removing the Assembly for Mail-In Service
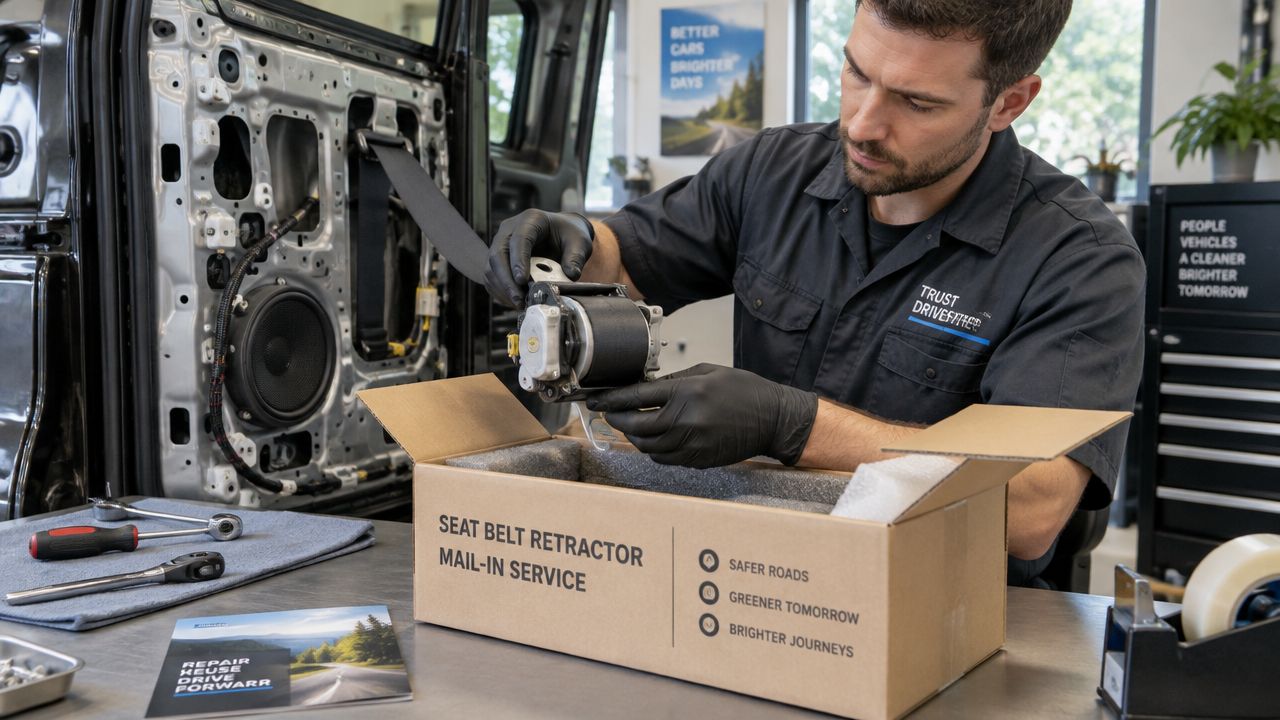
Treat removal as an SRS procedure, not a routine trim job. If you're not trained to work around airbag and pretensioner circuits, have a qualified repair facility remove the assembly. The exact fastener locations and connector procedures vary by vehicle, so the factory service information for your make and model takes priority.
A controlled removal sequence
Before touching the belt, record the vehicle identification details and photograph the connector, mounting position, webbing route, and any labels. These images help prevent a reversed installation and let the repair provider match the unit to the correct service request.
Then follow the vehicle's specified SRS shutdown process. In many vehicles, that includes switching off the ignition, disconnecting the battery as directed by the service manual, and waiting the prescribed period before disconnecting a pretensioner connector. Don't probe SRS terminals with a test light or meter unless the manufacturer explicitly permits that procedure.
Remove the relevant B-pillar or floor trim carefully. Support the retractor while removing its mounting bolt, and don't drop, strike, clamp, or energize the unit. Keep the webbing clean and fully supported so it doesn't drag across a sharp edge.
Include the related SRS diagnosis
A post-collision belt fault may exist alongside crash data in the SRS airbag control module. Use a compatible scan tool to record diagnostic trouble codes before clearing anything. Manufacturer service instructions can require cycling the belt fully back into the retractor before retesting, so code documentation and physical inspection should happen together.
If the airbag control module contains hard crash codes, ask whether it also needs a professional reset. Repairing the belt while leaving the SRS system unable to recognize the restored component can leave the warning light on and the restraint system unresolved.
Packaging details that prevent delays
Use a rigid box with enough cushioning to stop the assembly moving during shipment. Protect the connector and exposed mounting points, keep the belt dry, and include the vehicle information, part number, requested work, and a description of the failure. Don't ship loose hardware inside the retractor or wrap the unit so tightly that the webbing is crushed.
A mail-in provider can explain what parts to send, whether the SRS module should be included, and how to identify different belt stages from the connector arrangement. Reinstall only after the repaired unit has returned, inspect the routing again, and complete the vehicle's post-repair SRS checks before regular driving.
Making the Right Decision for Your Vehicle
Use the vehicle's history and the belt's behavior to choose the next step.
- No collision, belt moves with resistance: Inspect twists, dirt, trim pinching, and guide alignment. Clean only the exposed webbing with an appropriate mild method, then retest after it dries.
- Belt is completely locked after a crash: Assume an internal deployment or crash-related lock until a qualified technician confirms otherwise. Don't force the spool or use chemicals.
- Belt retracts but fails the sharp-pull lock test: Remove it from service. A retractor that doesn't lock consistently isn't ready for occupant protection.
- Child seat won't stay locked: Check the automatic-locking function and vehicle recall information, because normal everyday retraction doesn't prove that child-restraint mode works.
- Visible mounting, housing, or webbing damage: Compare professional restoration with complete replacement, but follow recall or manufacturer instructions first.
A salvage rebuilder should also verify the vehicle's SRS codes and inspect every restraint affected by the collision, not just the belt that first drew attention. If the fault points to a production or mounting defect, recall assistance may be more appropriate than mail-in restoration. If the unit is locked or deployed but structurally suitable, professional repair can preserve the original assembly without relying on an unknown donor part.
Don't return the vehicle to regular use until the belt retracts correctly, locks consistently, mounts securely, and the SRS system passes its required checks. For a locked or deployed assembly, send the identified unit to Seat Belt Repair for mail-in evaluation and service, including retractor and pretensioner work, rather than attempting an internal DIY reset. Visit Seat Belt Repair to review the mail-in process and arrange the correct repair path for your vehicle.


Leave a comment
This site is protected by hCaptcha and the hCaptcha Privacy Policy and Terms of Service apply.