
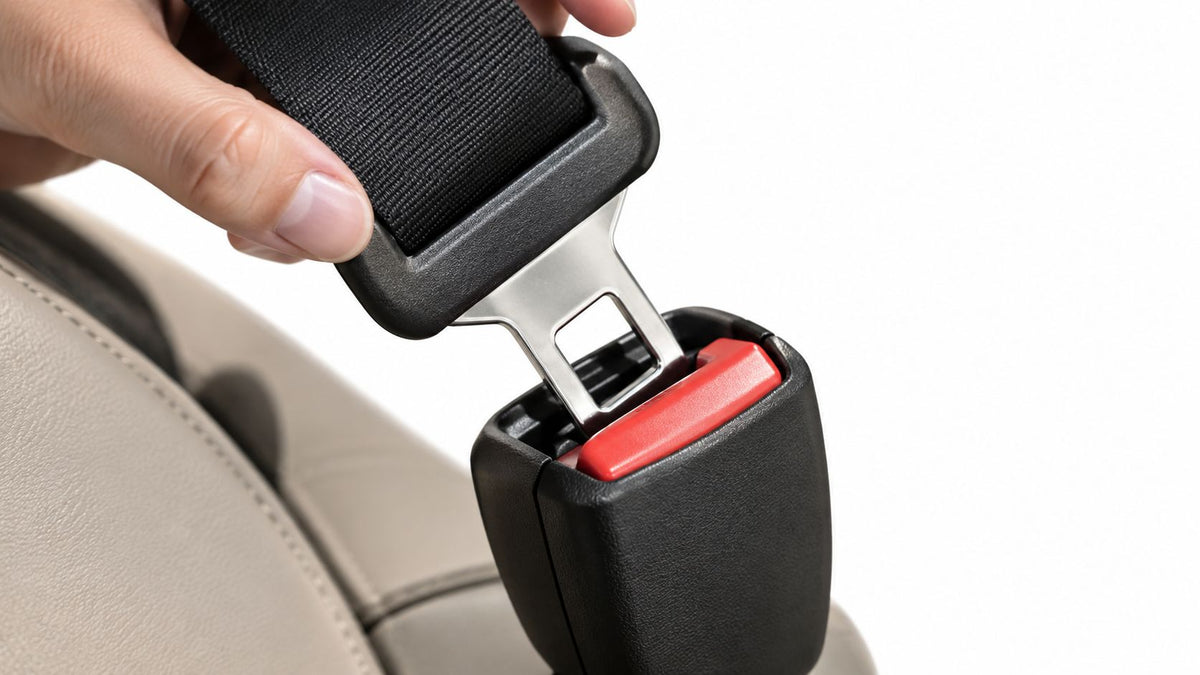
You press the red button after a minor collision, but the seat belt won't release. In another vehicle, a passenger hears what sounds like a click, pulls the shoulder belt, and discovers that the buckle never engaged. Both situations involve the same small component, yet they point to very different faults.
The seat belt latch is the occupant's physical confirmation that the restraint system is connected. The retractor controls webbing movement, a pretensioner removes slack during a crash, and airbags provide additional protection. None of those systems can secure an occupant if the tongue plate never locks inside the buckle, or if the buckle only appears to engage.
That makes the latch more than a convenience feature. It is a mechanically loaded catch, a release mechanism, and, in many vehicles, an electrical input to the restraint system. Understanding those jobs helps you distinguish contamination from wear, misuse from crash damage, and a simple inspection from a repair decision.
Table of Contents
- Why the Seat Belt Latch Matters More Than You Think
- How a Seat Belt Latch Actually Works
- The Safety Standards Behind Every Click
- Common Seat Belt Latch Problems and What They Mean
- Quick Troubleshooting Before You Call a Shop
- Repair, Replace, or Mail-In Service
- Why OEM Mail-In Repair Often Wins
- Putting It All Together
Why the Seat Belt Latch Matters More Than You Think
A buckle that sticks after a minor crash can delay an occupant's exit. A buckle that seems to click but never fully locks creates a different danger, because the vehicle may appear ready to protect someone who is not connected to the restraint system.
The seat belt latch is the contact point between the occupant and the belt's protective structure. It must guide the metal tongue into position, hold it against crash loading, release when the red button is pressed, and, in many vehicles, report buckle status to the restraint-control module. A useful analogy is a door lock with a warning switch: the latch must physically hold the door closed, and the vehicle must also know whether that closure is genuine.
That small assembly links several systems:
- The retractor stores the webbing and controls its extension.
- The latch and tongue join the belt across the occupant's body.
- The pretensioner removes slack during a qualifying collision.
- The airbag system adds protection while working with the belt.
The latch does not absorb all crash energy. It must stay closed while the belt loads the occupant, then release deliberately afterward. Federal requirements reflect both demands. Under FMVSS 209 requirements summarized in Auburn's seat belt history research, a Type 1 or Type 2 buckle must release at no more than 133 N of applied force. The limit balances resistance to unintended opening with the ability of an occupant or rescuer to release the buckle after a collision.
A vague click, a tongue that backs out, or a release button that binds should therefore be treated as a mechanical warning, not a minor annoyance. Misuse can leave the tongue only partly inserted. Debris or wear can interfere with the locking path. Crash damage can distort the housing or affect the pretensioner and buckle-status circuit. Those causes may produce similar driver complaints, but they require different responses: cleaning and inspection for contamination, replacement for worn or damaged locking parts, and professional restraint-system evaluation after a collision.
Practical rule: If the click is uncertain, treat the belt as unlatched until a qualified inspection proves otherwise.
Seat belt use is widespread, yet correct use and reliable engagement remain separate issues. NHTSA reported a 91.3% national seat belt use rate in 2025. An earlier observational count recorded 91.2% use across 1,800 intersections, while NHTSA safety information reported that 8.8% of unbuckled passenger-vehicle occupants accounted for 49.2% of passenger-vehicle occupant deaths in 2023. These figures describe the consequences of being unrestrained, not a latch failure rate.
The practical lesson is simple: the latch is small, but its condition determines whether the occupant is connected to the rest of the restraint system at all.
How a Seat Belt Latch Actually Works
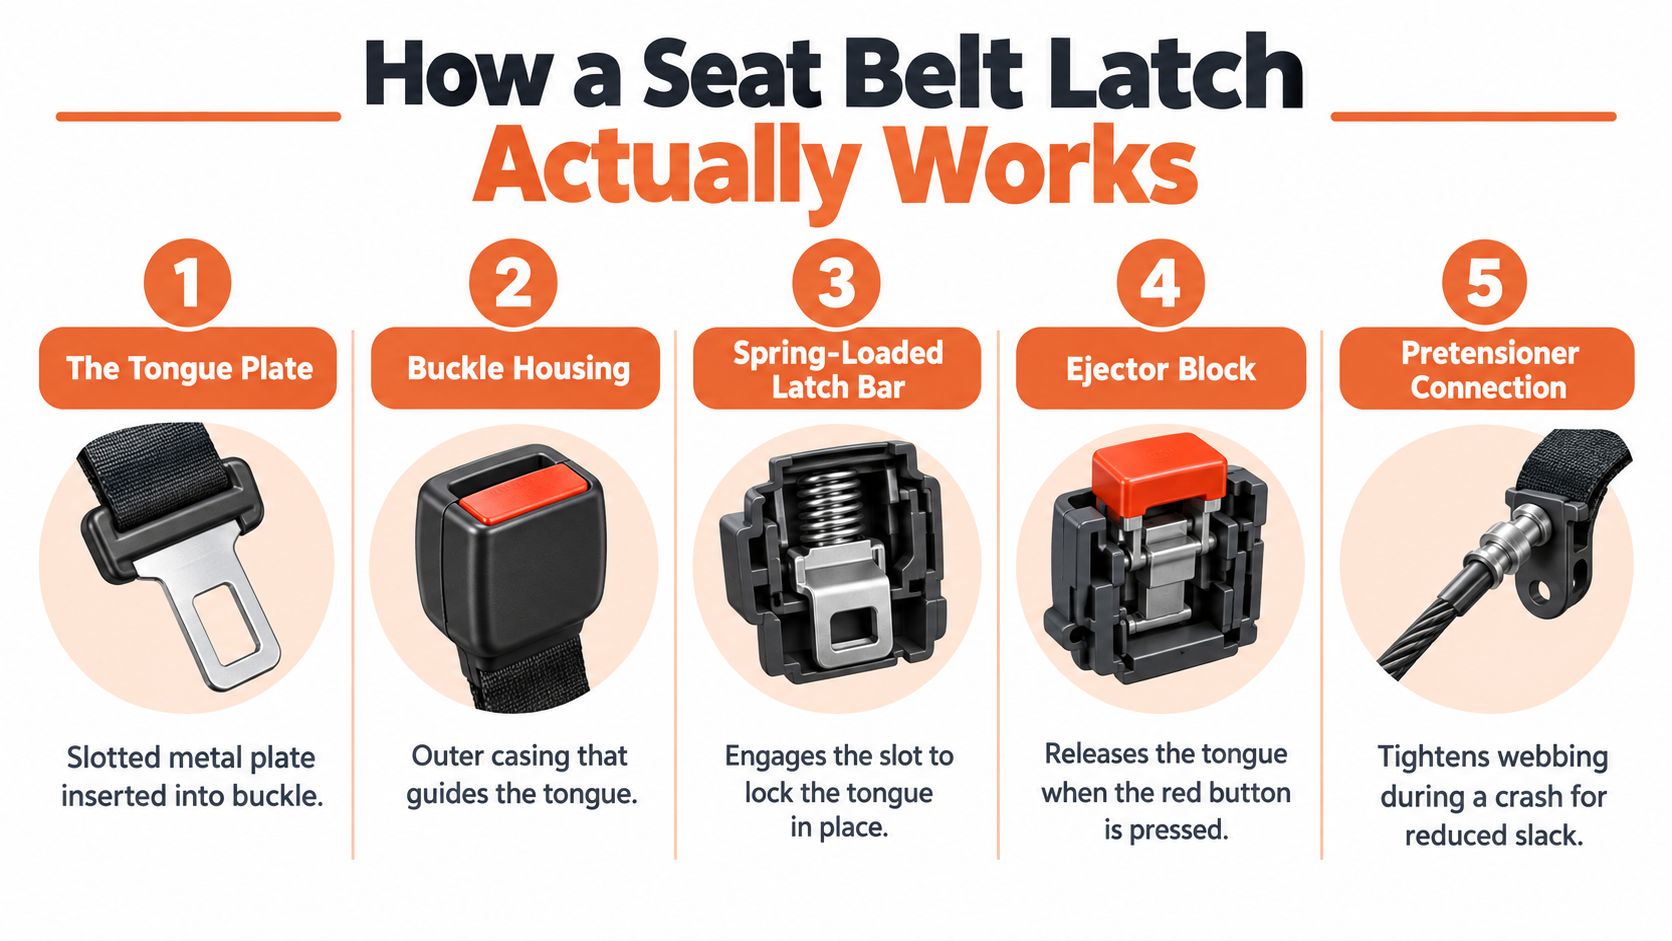
Start with the part you hold. The tongue plate is the slotted metal piece attached to the belt webbing. Its shape guides it into the buckle housing, where an internal latch bar or locking element enters the slot and prevents the tongue from pulling back out.
The mechanical sequence
Insertion normally follows a short sequence:
- The tongue enters the buckle guide.
- The tongue pushes against an internal spring-loaded component.
- The latch bar moves aside, then returns into the tongue slot.
- The ejector block stays compressed while the tongue is locked.
- Pressing the red release button moves the internal lever and ejects the tongue.
The audible click comes from that locking movement. It isn't proof by itself that the tongue is fully seated, especially if debris, misalignment, or wear prevents the latch from reaching its intended position.
A release button should move with a defined stroke, not scrape, bind, or remain depressed. NHTSA interpretation guidance for FMVSS 208 requires the latch to release at a single point through push-button action, rather than a hook-style or multi-step motion. That design makes emergency release more predictable.
The electrical side of the buckle
Many modern buckles include switch contacts or sensors that report latch status to the vehicle. Wiring may connect the buckle with the restraint control module, the seat belt warning system, and pretensioner circuits. Depending on the vehicle design, the system can use buckle status alongside occupant and impact information when managing restraint functions.
A latch can therefore have two separate problems. The metal tongue may lock correctly while a switch or connector sends an incorrect signal. Conversely, the warning system may behave normally while the mechanical catch is worn. A sticky button, loose buckle, damaged wiring, or intermittent warning light should not be dismissed as a minor inconvenience.
The Safety Standards Behind Every Click
A buckle can look normal and still miss the mark inside. FMVSS 209 focuses on how the seat belt assembly behaves under release, partial engagement, wear, and durability, not just on whether the tongue clicks in. The regulatory text for FMVSS 209 says a metal-to-metal buckle tested for partial engagement must separate with no more than 22 N of force.
That threshold explains a common failure mode. The tongue may appear seated, yet the internal parts never fully capture it. Dirt, corrosion, distorted parts, internal friction, and weakened springs can all make the buckle sound right while the latch is not doing its job.
Key FMVSS thresholds for seat belt latches
| Standard | Parameter | Typical threshold |
|---|---|---|
| FMVSS 209 | Normal buckle release force | No more than 133 N, according to NHTSA seat belt safety information |
| FMVSS 209 | Metal-to-metal buckle separation under partial engagement | No more than 22 N, according to 49 CFR 571.209 |
| FMVSS 208 interpretation | Release method | Single-point push-button action, according to NHTSA interpretation guidance |
These are compliance targets, not steps for a driver to test with garage tools. Engineers use them to judge whether the buckle can hold under load and still release when needed. Material choice, spring rate, housing shape, and surface finish all play a part in that balance.
Why replacement quality matters
A salvage buckle or universal aftermarket part can look right from the driver's seat and still miss that balance. The same risk applies when a repair changes the release button, spring, latch bar, or housing geometry. A part can fit in place and still behave differently under load.
Seat belt hardware has always been treated as regulated safety equipment, not a simple fastener. The modern latch is part of that system, so compatibility matters just as much as appearance. When the buckle, tongue, or internal mechanism no longer matches the original design, the symptom may be a hard release, a false click, or a buckle that no longer holds with confidence.
Common Seat Belt Latch Problems and What They Mean
Three complaints sound similar in a service bay, but they don't lead to the same diagnosis. A buckle that won't release is different from one that won't catch, and both differ from a buckle that clicks without securely holding the tongue.
Sticking, non-latching, and false engagement
A sticking latch may have contamination in the throat, a damaged release button, a weakened spring, or internal friction. A non-latching buckle may have a worn latch bar, a damaged ejector, a bent tongue, or misalignment between the buckle and tongue. False engagement can occur when debris or wear prevents full seating, or when the wrong tongue and buckle are paired.
| Failure mode | Typical cause | Driver-visible symptom | Underlying risk | Likely fault location |
|---|---|---|---|---|
| Sticking latch | Debris, damaged button, internal friction | Button is hard to press or tongue won't eject | Delayed emergency release | Buckle housing or release mechanism |
| Non-latching buckle | Worn latch bar, ejector issue, bent tongue, misalignment | Tongue won't stay locked | Occupant may be unrestrained | Buckle, tongue, or mounting alignment |
| False engagement | Partial insertion, contamination, incompatible parts | Click occurs, but pull test fails | Belt can separate under load | Tongue slot, latch bar, or buckle throat |
Read the symptom before choosing the repair
A buckle that is dirty may respond to careful cleaning. A buckle that has been exposed to crash loading, has a deployed pretensioner, or has damaged webbing needs a broader restraint inspection. The SRS warning light may indicate an electrical or deployment-related issue rather than a simple latch fault.
The seat belt troubleshooting guide for a belt that won't pull out can help separate retractor lockup from buckle problems. Don't confuse a belt that won't extend with a tongue that won't lock. Those components interact, but they fail in different ways.
A false engagement deserves particular caution because the driver's hand may receive reassuring feedback while the restraint remains unsecured. In child and booster-seat use, the broader problem is often routing or engagement rather than broken hardware. NHTSA's National Child Restraint Use Special Study recorded overall misuse at 46%, including 61% misuse in forward-facing car seats and 49% in rear-facing infant seats, as reported in NHTSA's additional NCRUSS analysis.
Quick Troubleshooting Before You Call a Shop
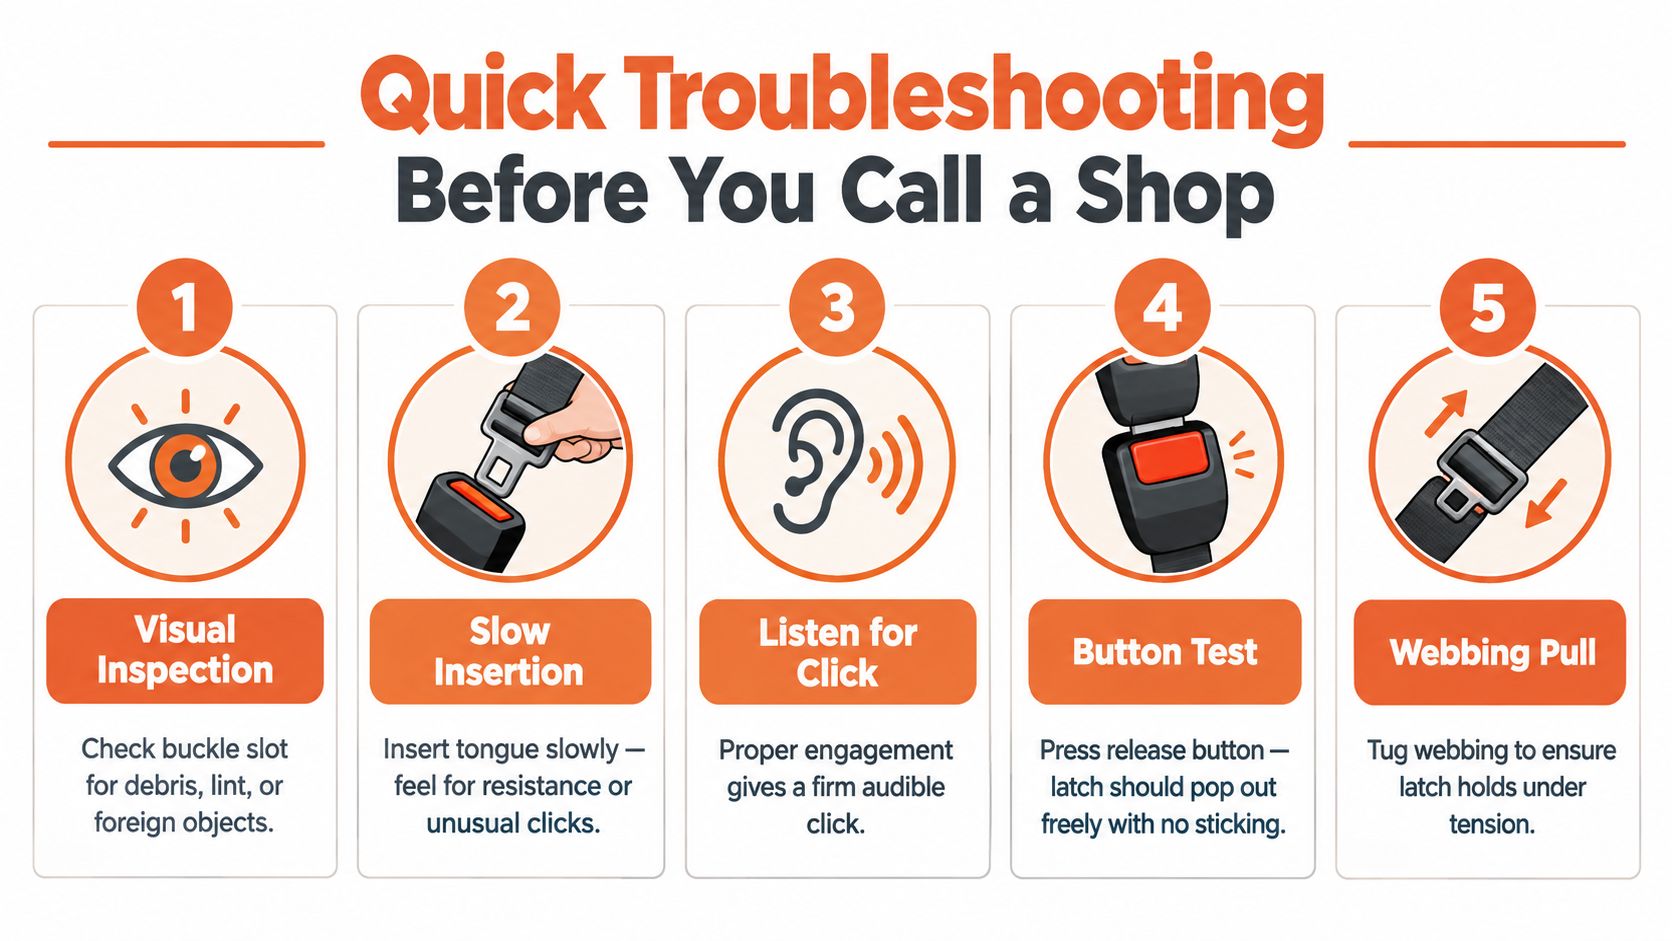
You can perform a limited driveway check without opening the buckle or disturbing the restraint wiring. Park safely, switch off the vehicle, and keep your hands away from pyrotechnic components and airbag connectors.
A safe external check
- Inspect the buckle throat. Use a flashlight to look for lint, coins, food particles, or another object blocking the tongue path. Foreign material can prevent full insertion or interfere with the release mechanism.
- Insert the tongue slowly. Don't slam it into the housing. Pay attention to resistance, unusual scraping, or a click that feels incomplete.
- Confirm the engagement. After insertion, pull the shoulder belt with moderate hand force. The tongue should remain locked. If it slips, releases, or feels loose, don't use that seating position.
- Test the button. Press the red release button while the belt is relaxed, then with the belt angled naturally as it would be during use. The button should move and return without sticking.
- Check the surrounding belt. Look for cuts, fraying, melted fibers, torn stitching, or chewing damage. Webbing damage is a restraint problem even if the latch works.
Clean only what you can reach safely
Compressed air can remove loose lint when used carefully around the buckle opening. A soft plastic pick may help lift visible debris, but don't force it deeper into the housing. Avoid solvents, oils, and household sprays that can attack polymers, contaminate internal surfaces, or change friction inside the latch.
The seat belt latch maintenance guidance can supplement an external inspection, but online steps don't replace a professional evaluation when the mechanism remains unreliable.
Stop troubleshooting if the vehicle shows an SRS warning light, the belt locked after a collision, the pretensioner fired, wiring is damaged, or the webbing is compromised. Never probe airbag or pretensioner connectors, and never cut into a belt assembly to reach an internal component.
Repair, Replace, or Mail-In Service
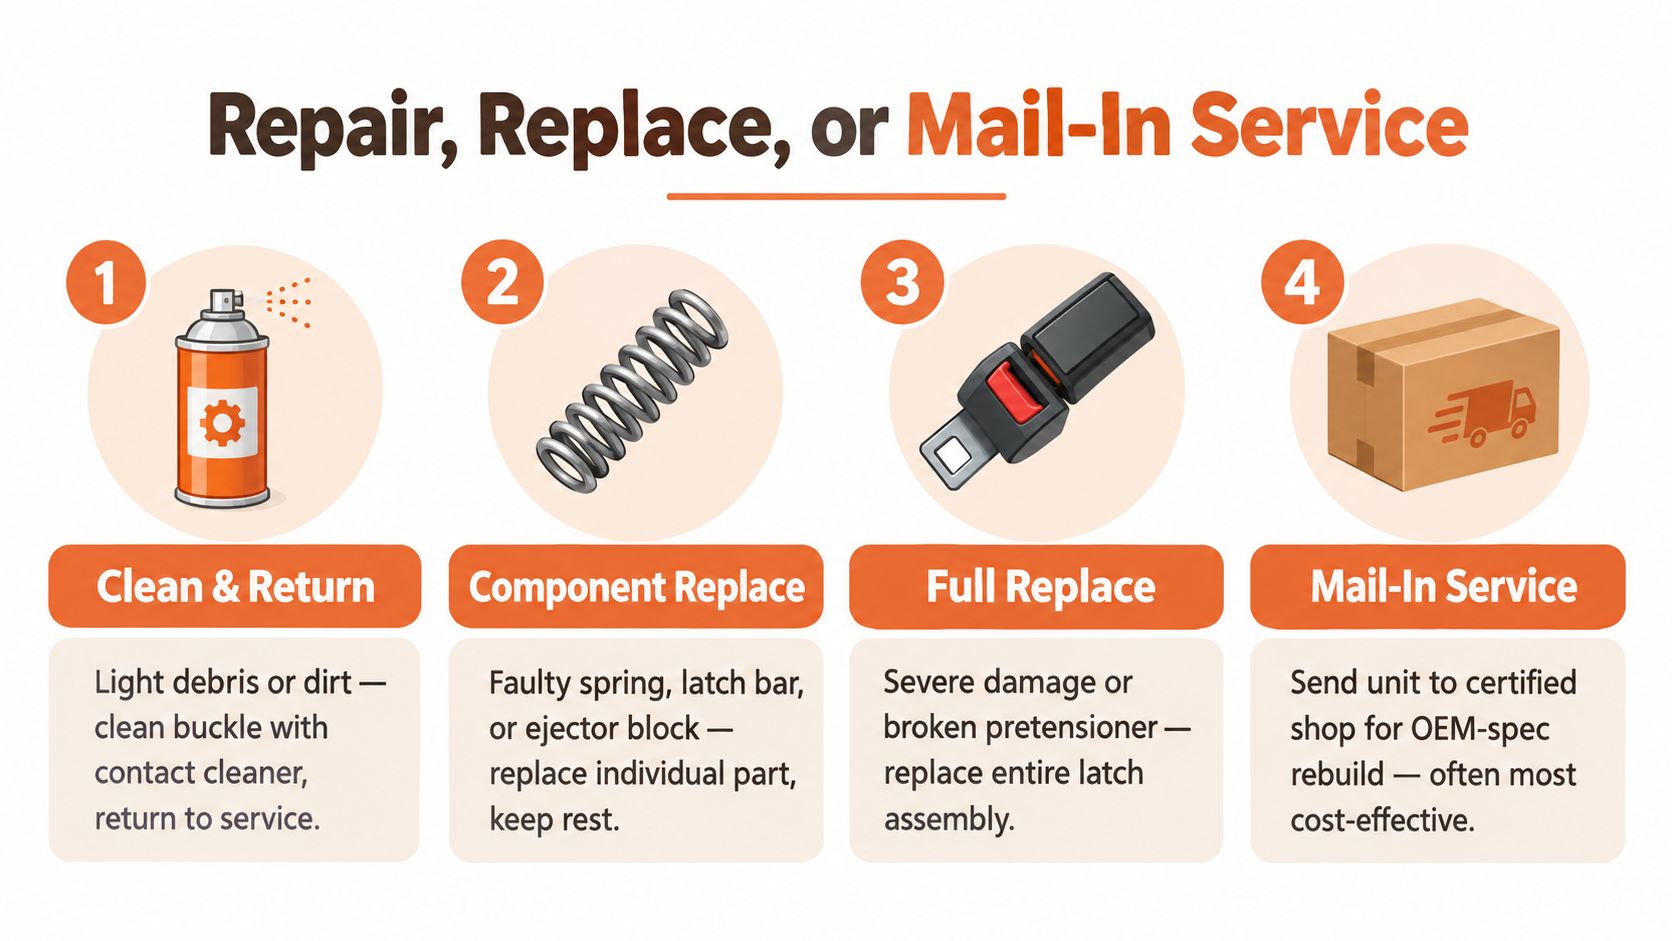
The correct service choice follows the failure, not the price tag alone. Light contamination with a clean mechanical response may justify external cleaning and a careful retest. Persistent sticking, inconsistent release, or a buckle that won't hold calls for professional inspection because the fault may be internal.
Match the remedy to the evidence
- Clean and return to service: Appropriate only when visible debris is the clear cause, the tongue locks positively, the release button operates freely, and no crash or SRS symptoms exist.
- Replace an internal component: A qualified technician may address a worn spring, latch bar, or ejector when the rest of the assembly remains suitable for service.
- Replace the complete assembly: The safer path for severe impact damage, distorted housings, damaged webbing, incompatible parts, or a failed pretensioner.
- Use a mail-in specialist: Practical when the original assembly can be removed safely and a specialist can rebuild and test it to the applicable specifications.
A dealership replacement typically provides a new assembly through the vehicle manufacturer, but availability, labor, and vehicle-specific procedures affect the total job. An aftermarket replacement may be less expensive, yet the buyer must verify fit, buckle geometry, electrical compatibility, and compliance. A salvage part can carry unknown wear or prior crash history.
Crash-deployed belts deserve separate treatment. A pretensioner uses a pyrotechnic or gas-generating mechanism to remove slack, so a deployed unit may remain locked even when the buckle itself appears normal. Restoring the restraint system can require pretensioner service and SRS module work, not just a replacement buckle.
For owners or shops considering a mail-in route, Seat Belt Repair's OEM repair service after an accident accepts seat belt and related safety components for service. The customer or local repair facility still handles removal and reinstallation, so the vehicle must be returned to service only after the repaired parts and any required SRS work are properly installed and checked.
Why OEM Mail-In Repair Often Wins
OEM-spec mail-in repair can make sense when the original belt assembly has identifiable crash, retractor, pretensioner, or webbing damage and a qualified service provider can restore it using manufacturer-compatible components. Keeping the original assembly also preserves vehicle-specific geometry, connector placement, buckle fit, and belt length.
A dealership replacement offers a straightforward path, especially when a new assembly is readily available and the vehicle remains under a relevant service program. An aftermarket swap may solve a fit problem, but a generic part doesn't automatically satisfy the vehicle's restraint-system requirements. A salvage-yard buckle can be even harder to evaluate because its prior use and load history may be unknown.
What a documented rebuild should address
A responsible service process should identify the component, inspect the housing and latch, address the pretensioner where applicable, replace damaged webbing when necessary, and function-test the finished unit. It should also state what the service does not include. Mail-in providers generally don't install parts in the vehicle, and SRS faults may require separate reset or diagnostic procedures.
The infographic's listed prices are service examples, not verified data for every vehicle or provider, so compare written estimates rather than relying on a universal figure. The meaningful comparison is whether the work restores the complete restraint function, including mechanical latching, webbing integrity, pretensioner operation, electrical connections, and SRS readiness.
For collision shops, documentation can make the decision easier to defend. A tested repaired original part gives the technician a defined work order and traceable service outcome. For an owner, it can avoid the uncertainty of installing a visually similar buckle that hasn't been evaluated for the vehicle's restraint system.
Putting It All Together
Use the symptom as your first decision point. A latch that sticks after visible contamination may need careful cleaning, but persistent friction or inconsistent release calls for professional service. A buckle that won't hold the tongue should be taken out of use until the buckle, tongue, and alignment are inspected. False engagement, especially after a collision, warrants restraint-system and SRS evaluation rather than another insertion attempt.
The latch is a federally regulated safety component with defined release and partial-engagement requirements. That makes a random replacement or improvised repair a poor substitute for a verified, vehicle-compatible solution.
If the click is uncertain, don't guess. Stop using that seating position, document the symptom, and have a qualified technician inspect the latch and the connected restraint components.
Seat Belt Repair provides mail-in service for seat belt pretensioners, damaged webbing, and SRS airbag control modules, with OEM components, functional testing, and guidance for removal and reinstallation. If your seat belt latch or related restraint system is sticking, locked, deployed, or showing an SRS warning, visit Seat Belt Repair to review the appropriate service option.

Leave a comment
This site is protected by hCaptcha and the hCaptcha Privacy Policy and Terms of Service apply.