
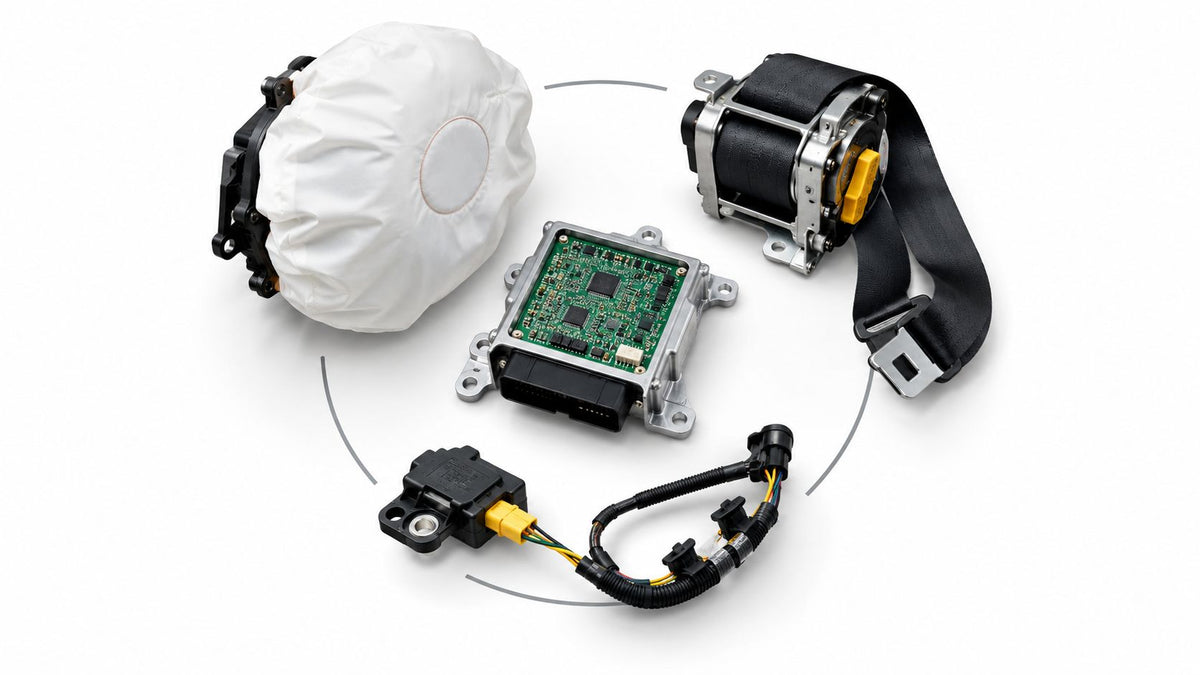
A crash can leave a vehicle looking repairable while the airbag warning light stays on, the driver's belt refuses to extend, or the buckle locks after a single pull. Those symptoms don't automatically mean every restraint part is beyond service, but they do mean the vehicle shouldn't return to the road on guesswork. Automotive safety components work as a connected system, and a correct repair starts by identifying which part deployed, which part stored crash information, and which part suffered physical damage.
The practical question is rarely “Can this code be erased?” It's “What must be restored before the SRS can protect the occupant again?” The answer depends on webbing condition, pretensioner operation, module integrity, sensor readings, connector condition, and the repair standards used. The guidance below focuses on that decision, so owners, collision shops, and rebuilders can separate a serviceable component from one that must be replaced.
Table of Contents
- Understanding Automotive Safety Components After a Collision
- The Complete Automotive Safety Components System Overview
- Seat Belt Assemblies and Pretensioner Functions
- SRS Airbag Control Modules and Crash Data Systems
- Identifying Common Failure Symptoms and Diagnostics
- Repair Versus Replacement Decision Criteria
- Removing and Preparing Components for Mail-In Service
- Federal Motor Vehicle Safety Standards and Refurbishment Requirements
- Common Misconceptions About Automotive Safety Component Repair
- Post-Service Installation and Functional Verification Steps
Understanding Automotive Safety Components After a Collision
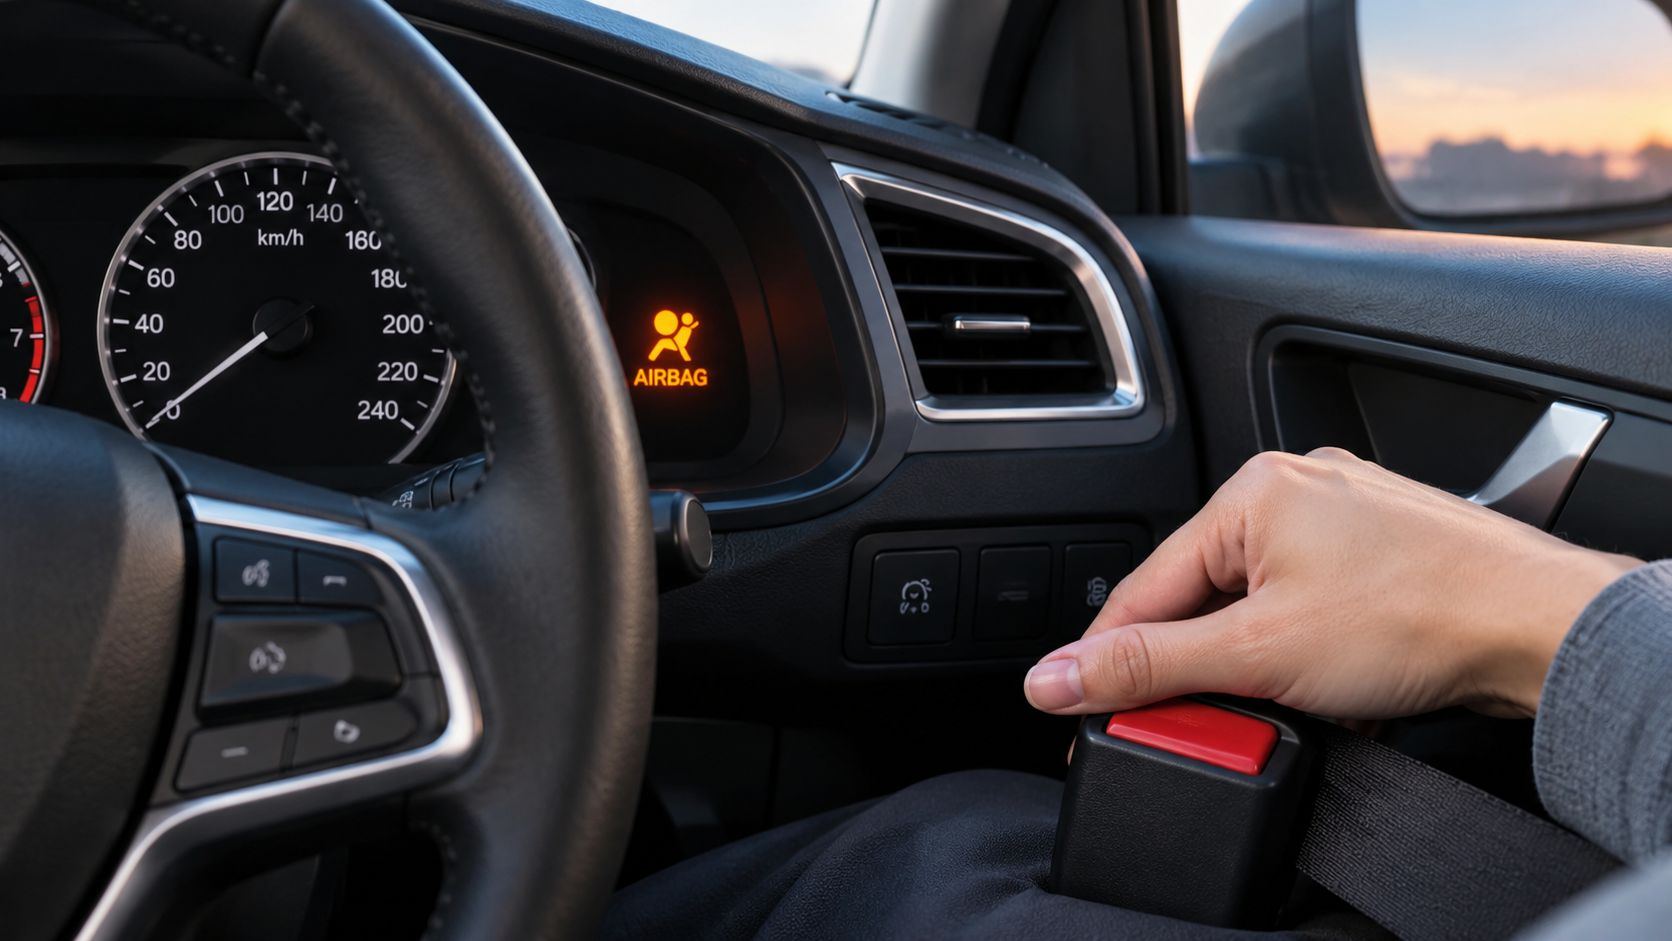
The first step after a collision is to treat the warning light and locked belt as evidence, not as a parts order. An illuminated SRS lamp may reflect stored crash data, a failed sensor circuit, a deployed pretensioner, damaged wiring, or a control module fault. A belt that locks may have fired its pretensioner, but the webbing and retractor still need separate inspection.
Seat belts provide the primary restraint, while airbags add controlled cushioning and the SRS module coordinates deployment decisions. That division matters during post-collision work. A reset module can't make a torn belt safe, and a replaced belt can't correct a module that still contains crash data or a hard internal fault.
Start with physical evidence
Inspect the belt webbing from end to end. Look for cuts, pulled stitching, fraying, heat damage, contamination, and animal chewing. Check whether the retractor extends and retracts smoothly, but don't repeatedly force a locked unit or open a pyrotechnic component without the correct service procedure.
The vehicle's surrounding structure matters too. A damaged door frame can affect belt anchorage, wiring routes, and occupant protection even when the restraint parts appear intact. A practical reference on door frame safety and maintenance can help owners understand why the door-jamb area deserves inspection alongside the SRS components.
Then match the symptom to the component
Use a scan tool to identify SRS codes, but don't treat the scan as a complete physical inspection. The most reliable workflow combines code retrieval, visual examination, connector checks, and functional testing after service. That approach prevents a common failure in collision repair, replacing an expensive assembly while leaving the actual damaged webbing, wiring, or sensor untouched.
The Complete Automotive Safety Components System Overview
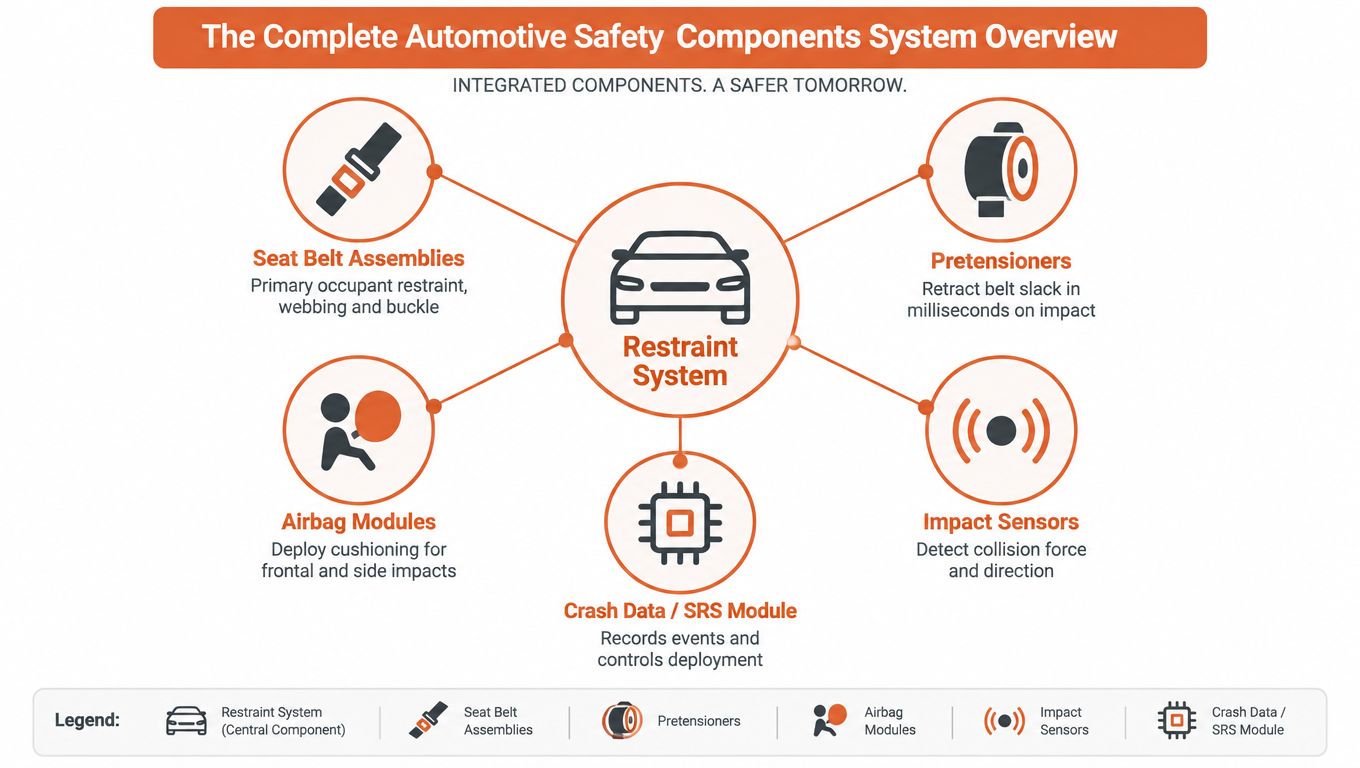
Think of the restraint system as a chain with separate jobs. Impact sensors detect a crash event and provide information about force and direction. The SRS control module evaluates that information, stores event data, and commands the relevant restraints. Pretensioners remove belt slack, while airbags deploy only when the module's decision logic and crash conditions call for them.
The seat belt assembly remains the occupant's first line of restraint. It includes webbing, a buckle, an anchor, a retractor, and, in many vehicles, a pyrotechnic pretensioner. The airbag module then works with the belt to manage occupant movement. The system isn't a collection of interchangeable warning-light parts.
A useful system map
- Impact sensors: Detect changes associated with a collision and transmit signals through the restraint wiring.
- SRS control module: Processes crash information, controls deployment commands, and may retain crash records.
- Pretensioners: Pull slack from the belt during a qualifying collision event.
- Airbag modules: Provide a cushioning surface when the control logic commands deployment.
- Belts and buckles: Hold the occupant in the intended seating position and manage movement throughout the crash.
A front-end repair can also involve components outside the restraint assembly. For example, understanding what your car's front bumper does helps explain why bumper damage shouldn't be judged only by appearance. Structure, sensor mounting, harness routing, and energy management all influence the diagnostic picture.
Practical rule: A scan tells you what the module sees. It doesn't prove that every physical restraint component is serviceable.
Why diagnosis must follow the chain
A module reset can't replace a deployed airbag, repair crushed sensor wiring, or restore a belt with damaged webbing. Conversely, replacing a belt won't clear crash data from a module that remains locked in a post-deployment state. Technicians should document each component, its physical condition, its code status, and its final test result before returning the vehicle to service.
Seat Belt Assemblies and Pretensioner Functions
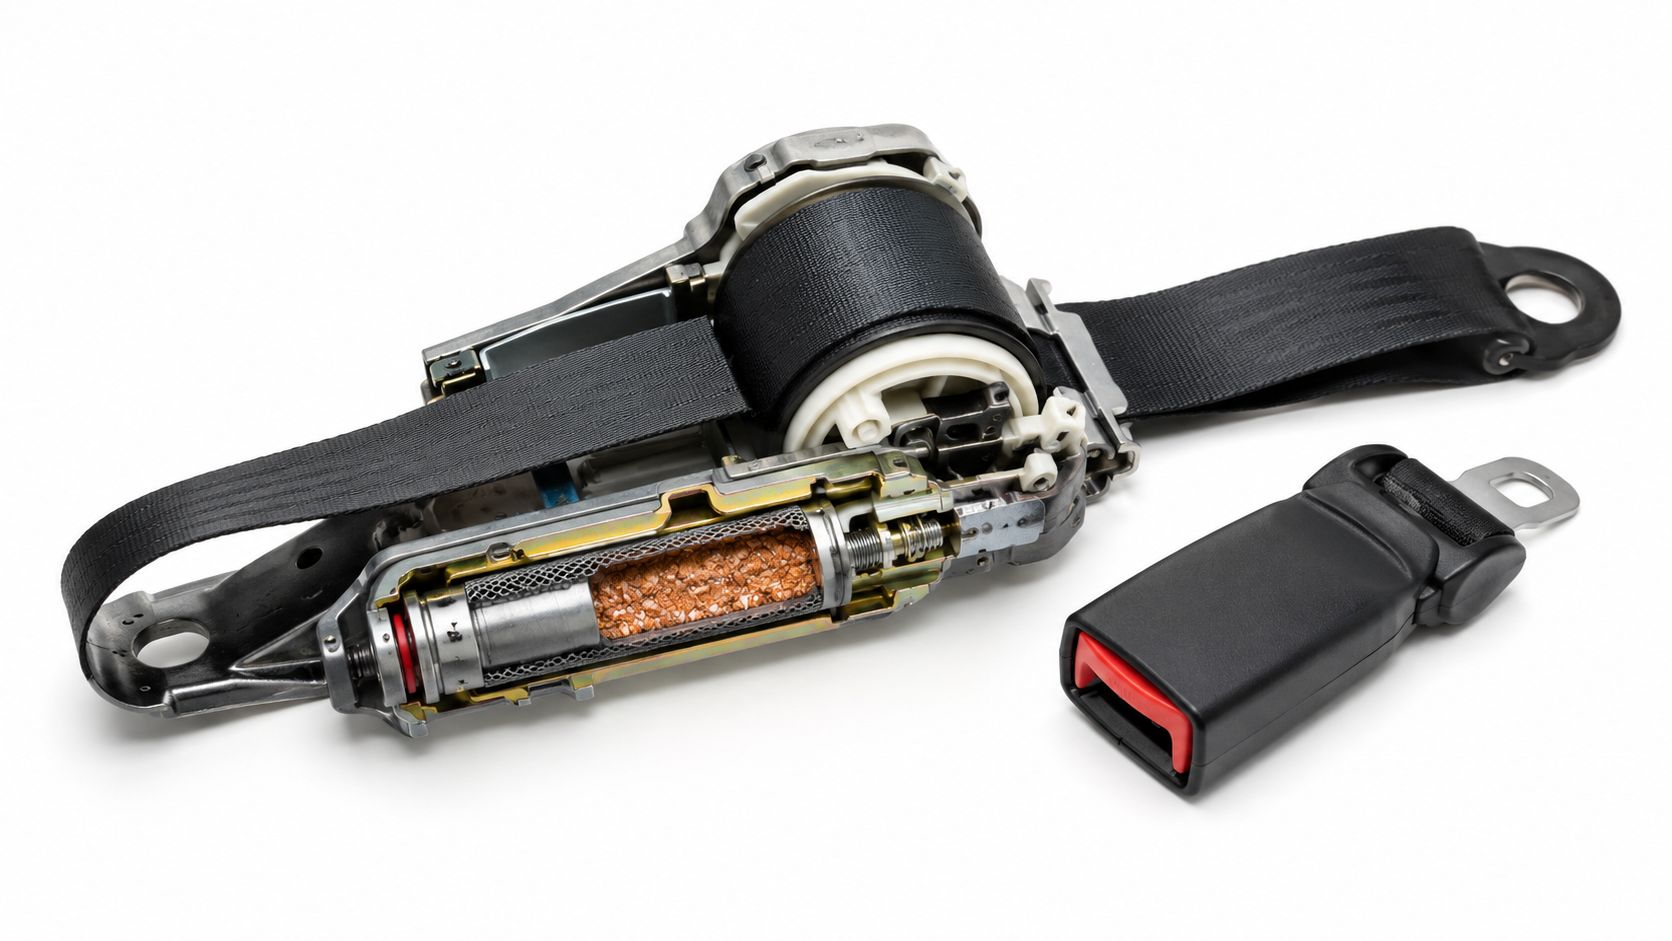
A seat belt assembly has two separate safety questions: Can the belt restrain the occupant, and can the mechanism respond correctly during a crash? A belt can look clean while its pretensioner has fired. It can also retract normally while the webbing has suffered damage that makes replacement the responsible choice.
Pretensioners use a pyrotechnic charge or another deployment mechanism to remove slack rapidly. Vehicle designs may use single-stage, dual-stage, or triple-stage arrangements, but the repair decision still begins with the same checks: identify the belt configuration, determine whether deployment occurred, inspect the webbing and stitching, and evaluate the retractor and buckle.
For an accessible explanation of the mechanism and why a locked unit needs professional attention, see this guide to seat belt pretensioner operation and repair.
Webbing damage changes the decision
Replace webbing when it is cut, torn, frayed, heat-damaged, chemically contaminated, or chewed. Cosmetic wear alone may not tell the full story, so inspect the fold points, sewn loops, anchor areas, and the section hidden inside the retractor. The replacement must preserve correct width, stitching, routing, labeling, and buckle compatibility.
Color matching can restore an interior without treating appearance as a substitute for strength. Custom colors can be considered only when the service preserves the required construction and restraint performance. A bright replacement belt is useful only if its webbing, stitching, and hardware remain appropriate for the vehicle.
Locked belt or failed belt?
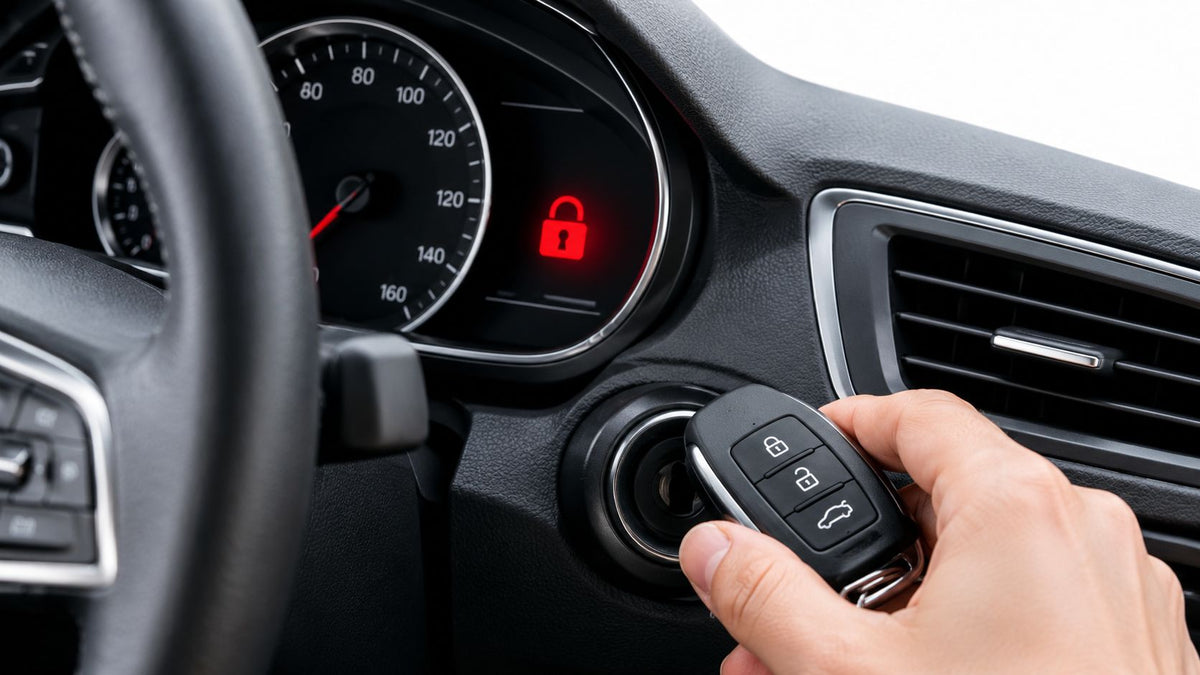
A belt that won't extend after a crash may have a deployed pretensioner, a locked retractor, a damaged sensor circuit, or an internal mechanical failure. Don't pull aggressively, bypass the connector, or install a resistor to extinguish the warning light. Those actions can hide the fault without restoring the restraint.
A belt with intact webbing and an undamaged housing may be a candidate for professional pretensioner service. Torn or structurally compromised webbing calls for replacement, not a cosmetic repair. The final choice should follow inspection and the vehicle's service information, not the price of a replacement assembly alone.
SRS Airbag Control Modules and Crash Data Systems
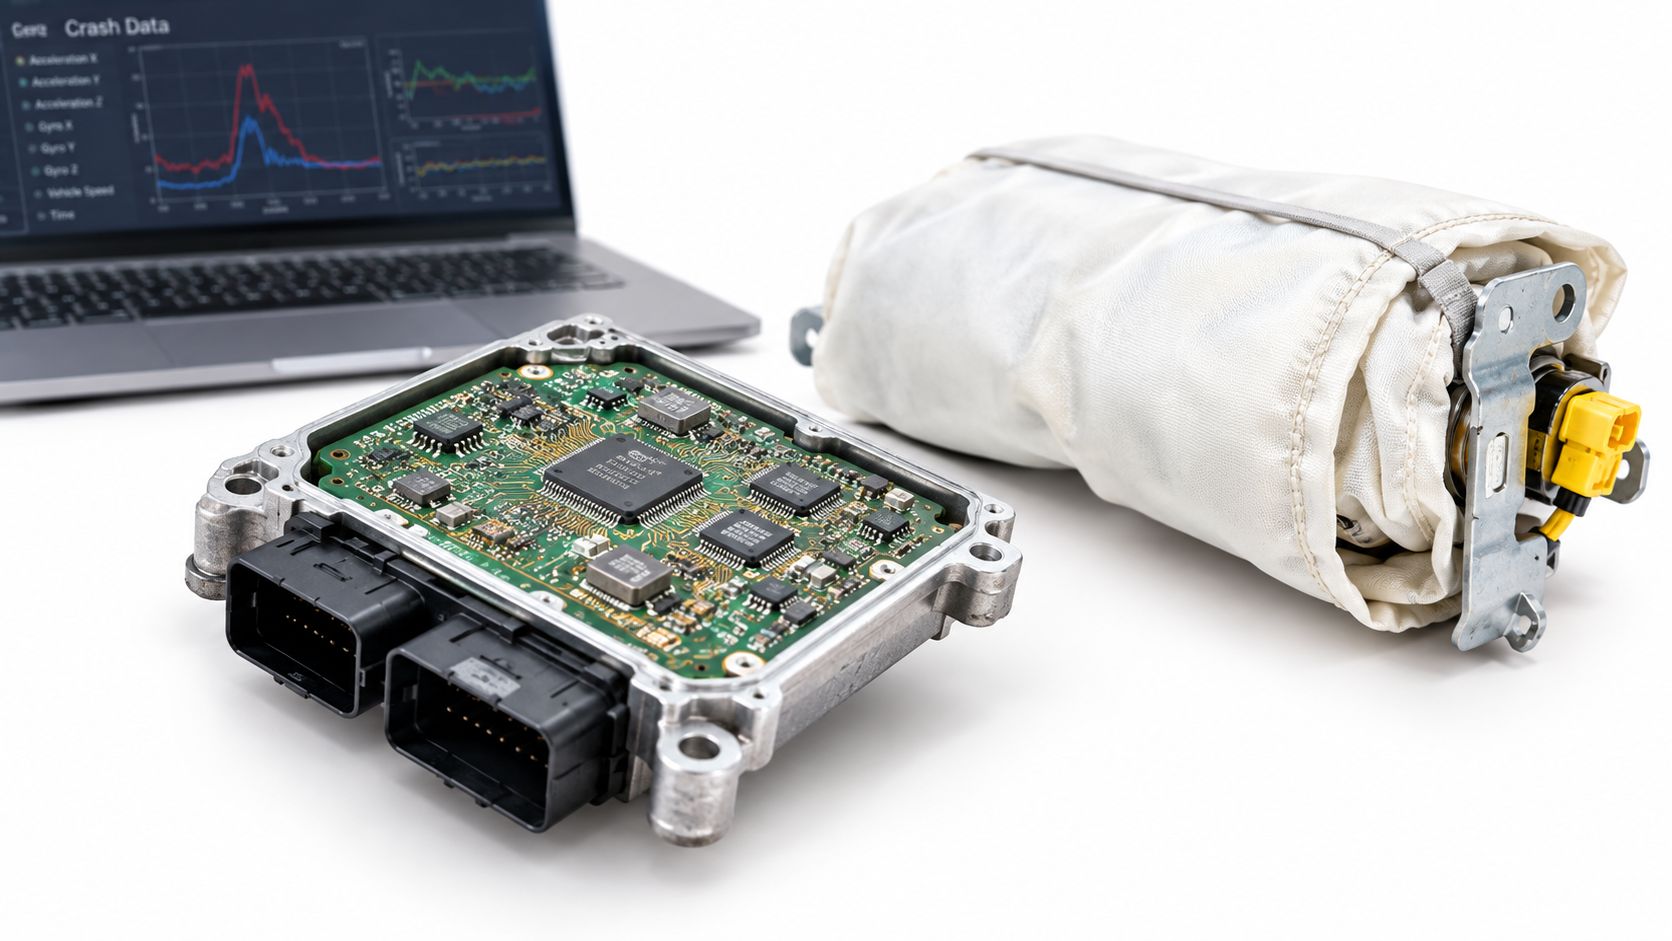
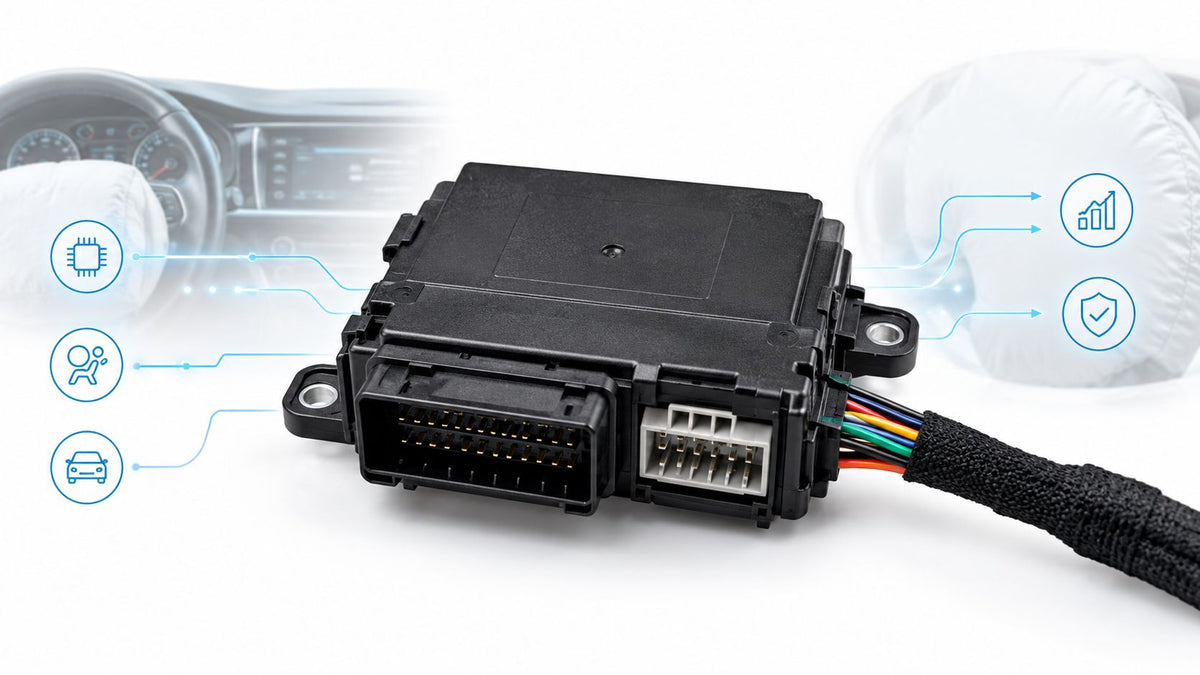
The SRS control module is the decision-making center for the restraint network. It monitors sensors and circuits, determines whether deployment conditions exist, commands airbags or pretensioners, and can store crash information. After a collision, that memory may keep the warning light active even after the damaged physical parts have been replaced.
Airbags are complementary restraints, not substitutes for belts. According to NHTSA's airbag safety material, frontal airbags saved 4,330 lives in the United States in 2019, and the combination of an airbag with a lap-and-shoulder belt reduced death risk in frontal crashes by 61%, compared with 50% for belts alone and 34% for airbags alone. The same source documents more than 290 frontal-airbag inflation deaths in low-speed crashes during 1990 through 2008, which is why deployment design and professional diagnosis matter.
Resetting isn't the same as clearing a light
A proper module service addresses the module's stored crash data and any eligible hard codes according to the unit's design. It doesn't rebuild a damaged circuit board, repair a crushed connector, replace a missing airbag, or make a fired pretensioner reusable.
This distinction is also addressed in guidance on what needs replacement after an airbag crash and what may be reset. A module should be evaluated before service, because an internally damaged unit may require replacement rather than data clearing.
A useful training visual can reinforce the relationship between module memory, crash signals, and deployment decisions:
Diagnose before sending the module
Record the original diagnostic trouble codes, photograph the module label and connectors, and identify whether airbags or pretensioners deployed. If the module housing is cracked, water-damaged, burned, or mechanically distorted, report that before requesting a reset. The technician needs the correct part and the complete collision context, not just the fact that the warning lamp is illuminated.
Identifying Common Failure Symptoms and Diagnostics
The warning lamp is a starting point, not a diagnosis. A professional workflow separates electrical faults, stored crash data, and mechanical damage before anyone orders parts.
Use the symptom as a direction
| Observed symptom | First inspection | Likely decision point |
|---|---|---|
| SRS warning light remains on | Scan the restraint module and inspect connectors | Clear eligible data only after physical faults are resolved |
| Belt locks after impact | Inspect pretensioner, retractor, and webbing | Service may be possible if the housing and webbing remain sound |
| Belt won't retract | Check for twisted or damaged webbing and retractor damage | Replace damaged webbing or address internal mechanism failure |
| Airbag deployed | Confirm the module, inflator, wiring, and sensors | Resetting the module alone isn't sufficient |
| Intermittent restraint code | Inspect terminals, harness routing, and seat movement areas | Repair the circuit before clearing codes |
Don't erase codes before recording them. The original code can distinguish a deployment event from an open circuit, short, sensor communication fault, or module problem. After the repair, scan again and confirm that the system communicates normally without active faults. This airbag-light diagnostic guide provides additional context for separating warning-light symptoms from the underlying cause.
Inspect before testing
Disconnect the battery only according to the vehicle manufacturer's procedure, and allow the required discharge period before handling SRS connectors. Never probe an airbag or pretensioner circuit with an ordinary test light or improvised meter setup. Use approved diagnostic procedures and the vehicle's service information.
A belt inspection should include the entire webbing path, the retractor mounting, the buckle, the anchor, connector locks, and nearby trim. If a collision pushed the seat, door, or pillar out of position, inspect harnesses for pinching and abrasion before concluding that the module is defective.
A warning light can be cleared in minutes. Restoring the restraint system takes evidence, inspection, and a final functional check.
Repair Versus Replacement Decision Criteria
Repair and replacement solve different problems. Repair is appropriate when the serviceable structure remains intact and the failed function can be restored without compromising the restraint. Replacement is required when the physical safety element is damaged beyond that boundary.
| Component condition | Repair may be suitable | Replacement is the safer direction |
|---|---|---|
| Pretensioner fired, belt webbing intact | Professional mechanism or cartridge service may restore operation | Cracked housing, distorted mounting, or unknown structural damage |
| Webbing worn or lightly discolored | Inspect carefully and follow manufacturer-compatible service criteria | Cuts, tears, fraying, heat damage, or damaged stitching |
| SRS module contains crash data | Specialist data clearing may be appropriate after component repairs | Water damage, burnt electronics, cracked housing, or persistent internal failure |
| Connector has a stored fault | Repair terminal or harness damage when serviceable | Melted connector, crushed wiring, or unverified bypass repair |
| Airbag deployed | Replace the deployed restraint with a correct compatible unit | Never treat a reset as a replacement for the missing inflator |
A dealership quote often combines every possible component into a new-assembly estimate. That may be appropriate for a physically destroyed unit, but it isn't proof that every locked belt or crash-recorded module must be discarded. A collision shop can reduce unnecessary parts use by documenting what deployed and what failed.
Cost is only one part of the choice
Repair can preserve a vehicle-specific assembly, reduce sourcing problems, and avoid replacing parts that remain structurally sound. Replacement can offer a clear path when damage is uncertain, the housing is compromised, the part number is wrong, or the service history can't be established.
Warranty terms also matter. Ask what was repaired, what components were replaced, what testing was completed, and what the warranty covers. A low quote that cannot identify the process or final test isn't a meaningful bargain. The responsible choice is the one that restores the complete restraint chain and leaves a traceable record.
Removing and Preparing Components for Mail-In Service
Mail-in service succeeds or fails before the package leaves the shop. The sender must identify the exact component, remove it without damage, and protect it from impact, moisture, and static risks during transit.
Prepare the vehicle and the part
- Retrieve the codes first. Record SRS trouble codes and photograph the dashboard warning light if possible.
- Use the correct service information. Removal points vary by make, model, seat design, and belt stage configuration.
- Disable the SRS correctly. Follow the manufacturer's battery isolation and waiting procedure before touching restraint connectors.
- Mark the component. Photograph labels, connector shapes, mounting points, and the belt's original routing.
- Identify the stage configuration. Connector count can help distinguish belt types, but it shouldn't replace confirmation from the part label or vehicle documentation.
- Inspect before shipping. Report cracked housings, water exposure, missing hardware, crushed terminals, or webbing damage.
Don't tug on wires to release a connector. Release the lock at the connector body, keep terminals covered, and avoid opening sealed pyrotechnic housings. If removal requires force, stop and confirm the procedure rather than bending a bracket that may be needed for correct installation.
Package for identification and protection
Wrap each component separately so a metal bracket can't strike a module or buckle. Use a rigid box with cushioning that prevents movement, and include the owner's name, return details, vehicle information, part description, and the diagnostic notes. Keep loose fasteners in a labeled bag rather than allowing them to travel against the electronics.
Ask the service provider what must be included before shipping. Some providers need the module and relevant belts together, while others evaluate them separately. Accurate identification reduces delays and prevents a repaired part from being matched to the wrong vehicle.
After service, inspect the returned component for shipping damage, compare its label with your photographs, and confirm the provider's functional test record. Reinstallation still requires correct routing, connector engagement, and vehicle-level scanning.
Federal Motor Vehicle Safety Standards and Refurbishment Requirements
Automotive safety components are designed around measurable requirements, not appearance alone. FMVSS 208 established the U.S. requirement for lap-and-shoulder belts on passenger cars by 1968, following the modern three-point restraint patented by Volvo engineer Nils Bohlin in 1959. Seat belt use later became mainstream globally, reaching about 92% nationwide in the United States in recent surveys, compared with roughly 70.7% in 2000, while independent research associated belt use with about a 45% reduction in fatal injury risk and about a 50% reduction in moderate-to-critical injury risk for front-seat occupants. These historical and safety figures are summarized in RoSPA's seat belt history document.
What FMVSS 209 makes concrete
FMVSS 209 specifies that seat belt webbing must be at least 46 mm wide, except in non-contact portions. It also sets minimum tensile requirements of 26,689 N for Type 1 webbing, 22,241 N for the pelvic portion of Type 2 webbing, and 17,793 N for the upper torso portion. The standard limits the force needed to decrease belt assembly size to 49 N, which makes correct geometry and stitching part of the safety function.
The refurbishment question isn't limited to fabric. A service must preserve the belt path, sewn loops, retractor behavior, buckle engagement, mounting geometry, and compatibility with the vehicle's SRS logic. Replacing webbing with a visually similar material isn't enough.
Elongation and retractor behavior
NHTSA test material for FMVSS 209 specifies that Type 1 webbing must not elongate more than 20% at 11,120 N. Type 2 webbing is limited to 30% in the pelvic portion and 40% in the upper torso portion at that load. Emergency-locking retractors are expected to lock before 25 mm of webbing payout under 0.7 g acceleration, a useful benchmark when evaluating retractor or pretensioner service. These requirements appear in the NHTSA interpretation and test material.
Manufacturing standards and repair regulation aren't identical. A provider should explain how its process preserves the relevant construction and how it tests the returned component, rather than using a standards reference as a marketing label.
Common Misconceptions About Automotive Safety Component Repair
A fired pretensioner doesn't automatically answer the repair question. The correct answer depends on the condition of the housing, mounting points, webbing, retractor, wiring, and vehicle-specific deployment design. Some units may be professionally serviced, while others should be replaced because the physical assembly is compromised.
“A reset makes the whole system safe”
It doesn't. A crash-data reset addresses module memory only after the airbags, pretensioners, sensors, wiring, and belts have been inspected and repaired or replaced as needed. Independent guidance on SRS crash-module resets after collisions emphasizes that clearing data doesn't restore missing or damaged restraint hardware.
“Only a dealer can restore the vehicle”
A dealer may be the right choice for some vehicles or complex structural repairs, but dealer replacement isn't the only possible service path. An independent specialist can be appropriate when the part is correctly identified, the repair process is documented, compatible components are used, and post-installation testing confirms normal operation.
“Any replacement webbing is acceptable”
Webbing is a load-bearing part. Width, weave, elongation, stitching, routing, labels, and hardware compatibility all matter. A color match improves the interior only when the replacement also meets the required construction and is installed with correct stitching.
“Mail-in service is automatically unsafe”
Shipping a component doesn't make the repair unsafe. Poor identification, careless removal, inadequate packaging, undocumented work, and skipped installation checks create the risk. Ask whether the provider explains removal, uses appropriate components, performs functional testing, and gives clear return documentation.
The expensive option isn't automatically the safe option, and the cheap option isn't automatically a repair. The evidence is in the component condition and the verification record.
Post-Service Installation and Functional Verification Steps
Reinstallation is part of the repair, not a separate cosmetic task. A correctly serviced belt or module can still fail to protect the occupant if the bracket is misaligned, the webbing is routed incorrectly, a connector isn't fully locked, or a required calibration is skipped.
Install methodically
Use the vehicle's service information for fastener torque, seat position, anchor orientation, connector routing, and module mounting. Don't substitute a similar bolt, pinch a harness under a bracket, or force a connector that doesn't match the original position. Confirm that every connector's secondary lock is engaged and that wiring is clear of seat rails, sharp edges, and trim clips.
Check the belt path from the anchor through the guide and retractor. The webbing should lie flat, extend smoothly, retract without binding, and latch securely into the correct buckle. Don't apply lubricant or disassemble a retractor unless the manufacturer's procedure specifically allows it.
Scan and test before road use
After the battery and connectors are restored, use a compatible scan tool to communicate with the SRS module. Confirm that the module reports no active restraint faults, then cycle the ignition and observe the warning lamp according to the vehicle's normal startup behavior. A lamp that remains on, flashes abnormally, or returns after movement requires another diagnostic pass.
Perform controlled checks:
- Belt movement: Pull the webbing out and allow it to retract without snags.
- Latch security: Insert the tongue fully and confirm release operates normally.
- Lock function: Follow the applicable service test procedure for emergency locking behavior.
- Connector stability: Move the seat through its permitted range while checking for intermittent faults.
- Documentation: Record the part identity, service performed, codes before and after, and final test result.
A pyrotechnic pretensioner is a one-time device after firing, as explained in South Australia's seat belt safety guidance. Don't reinstall one just because the belt retracts. Final verification should cover the complete restraint system, not just the dashboard light.
Seat Belt Repair offers mail-in service for seat belt pretensioner repair, seat belt webbing replacement, and SRS airbag control module reset, with functional testing of serviced components before return. If your post-collision belts are locked, damaged, or non-retracting, or your module retains crash data, visit Seat Belt Repair to review the service process and prepare the correct parts for shipment.

Оставить комментарий
Этот веб-сайт защищается hCaptcha. Применяются Политика конфиденциальности и Условия использования hCaptcha.