
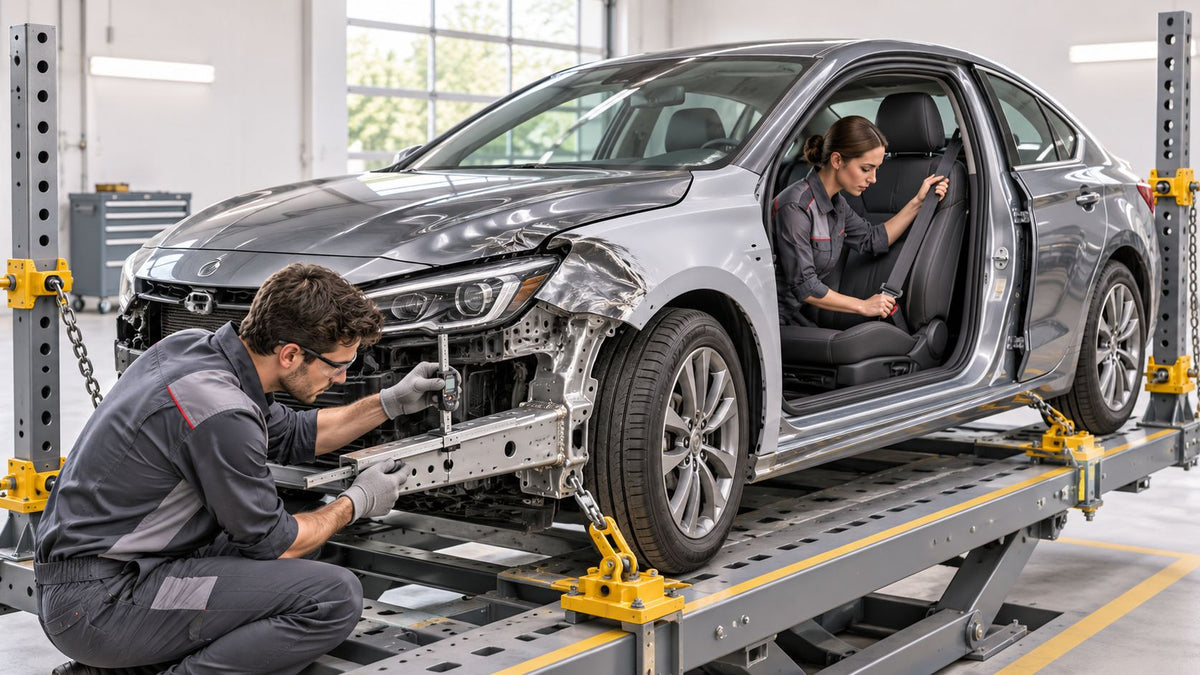
A car can look lightly scuffed in the parking lot and still be unsafe to drive. The seat belt has locked after a crash, the airbag warning light is on, and a quick coat of paint won't make either problem go away. A complete repair has to put the vehicle's shape, finish, and safety systems back in working order.
That's why an auto body repair estimate should account for more than the visible dent. Ask how the shop will check the structure, inspect parts hidden behind panels, and handle any belts or airbag components affected by the crash.
Table of Contents
- What Auto Body Repair Covers After a Crash
- How Shops Assess Damage Before Writing the Estimate
- Structural Repair Versus Cosmetic Bodywork
- Seat Belts and Airbag Modules Inside the Body Job
- A Front-Hit Sedan Moving Through the Shop
- Quality Checks Before the Car Leaves the Shop
- Choose Repair or Replacement Before You Book the Job
What Auto Body Repair Covers After a Crash
A locked belt and an illuminated airbag light can be easy to miss if you focus only on the scuffed bumper. They point to a different part of the repair: the restraint system. Use the categories below to check whether an estimate considers the full crash, not just what's visible from outside.
| Damage category | Typical signs | Usual repair path | Safety implication |
|---|---|---|---|
| Cosmetic panels | Scratches, dents, paint transfer, clear-coat failure | Paintless dent repair, filler on suitable outer panels, or refinish | Belts and airbags may still be fine |
| Structural | Rails, pillars, aprons, or rockers out of factory specs | Measure, pull, section, or replace | The structure needs repair; check restraints if the crash activated them |
| Restraint system | Locked or slack belt, fired pretensioner, airbag light, stored crash codes | Pretensioner repair, webbing replacement, or SRS module reset | The car isn't road-ready until restraints work |
| Glass and driver aids | Cracked windshield, shifted camera or radar brackets | Replace glass and calibrate sensors after the structure is straight | Misaimed sensors can affect safety-system operation |
| Hidden front or rear parts | Crushed absorber, radiator support, bumper beam, or sensors | Remove covers and replace damaged concealed parts | Inspect restraints even if the panels look minor |
These categories can overlap in one collision. A bumper cover may have a scuff, a hidden absorber may be crushed behind it, and a sensor bracket may have shifted. Treating the visible mark as the whole repair can leave the estimate incomplete.
What each category means in the shop
Cosmetic damage affects appearance and the shape of an outer panel. A shallow dent with unbroken paint may suit paintless dent repair, or PDR. A deeper crease or damaged finish may need conventional panel repair and refinishing.
Structural damage involves parts that help the vehicle manage crash forces. Technicians measure these areas against the maker's specifications, then decide whether to pull, section, or replace the affected metal. Filler and fresh paint can't restore a rail or pillar that's out of position.
Restraint problems need their own repair plan. A fired pretensioner can leave a belt locked or unable to retract, while an airbag module may store crash data that keeps the warning light on. Neither problem is repaired by smoothing a panel.
Glass and driver-assistance systems need attention when a windshield, camera, radar unit, or mounting bracket has moved. Calibration checks that the sensor is aimed correctly after the related work is complete.
Mark every row that applies before accepting an estimate. One crash can affect several categories at once, including damage you can't see until the shop removes a cover or trim piece.
How Shops Assess Damage Before Writing the Estimate
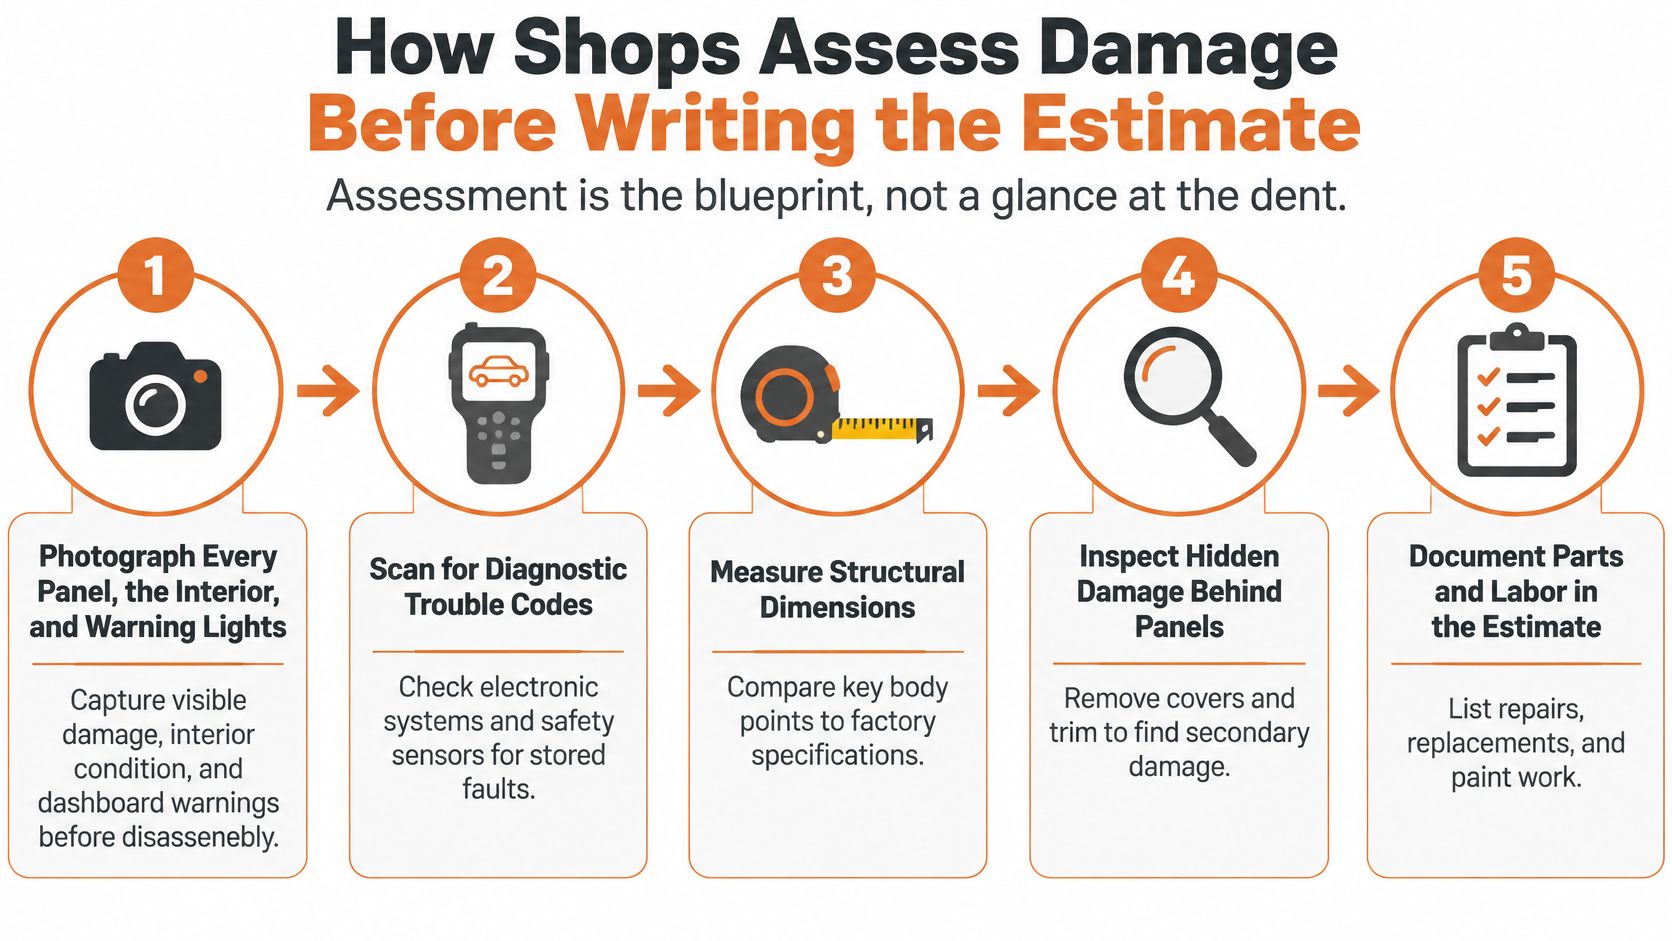
A useful estimate starts with inspection, not a guess based on the dent. The shop needs a record of what's visible, what the vehicle's systems report, and whether its structure measures correctly. Each step catches a different kind of missed work.
A practical assessment sequence
- Photograph the exterior, interior, and dashboard. Record each damaged panel, the cabin near the impact, and any warning lights before teardown. These photos help document the starting condition and clarify which damage appears only after parts are removed.
- Scan the safety systems and check the belts. A diagnostic scan can reveal airbag, pretensioner, or occupant-classification faults that a walk-around won't show. Check whether each belt extends, retracts, and locks as intended. A belt may look normal while its internal mechanism has locked after the crash.
- Measure the structure. Use a frame rack's measuring system or a tram gauge to compare key points with factory dimensions. Check areas such as the rails, aprons, and strut towers. A pulled panel can hide a shift that affects alignment or how the vehicle will behave in a later collision.
- Teardown the damaged area. Remove bumper covers and trim to inspect absorbers, clips, brackets, supports, and sensors. A cracked outer cover doesn't tell you whether the beam behind it is straight or whether the absorber has done its job.
- Separate the repair types. List cosmetic work such as PDR, paint, and blend panels apart from structural work such as pulling, sectioning, or replacement. Give belts and modules their own restraint-system lines so they don't disappear inside a general parts allowance.
- Write the estimate to match the inspection. Document what's known, and leave room to update the plan if teardown reveals concealed damage. A clear estimate makes a supplement easier to understand and gives the customer a record of why the work changed.
A clean-looking exterior can conceal a fired pretensioner, stored crash data, or a crushed part behind the bumper. Skipping the scan or teardown may produce a car that looks finished but still has a safety fault. If an estimate includes only paint and labor hours, ask how the shop checked the structure and restraints.
Structural Repair Versus Cosmetic Bodywork
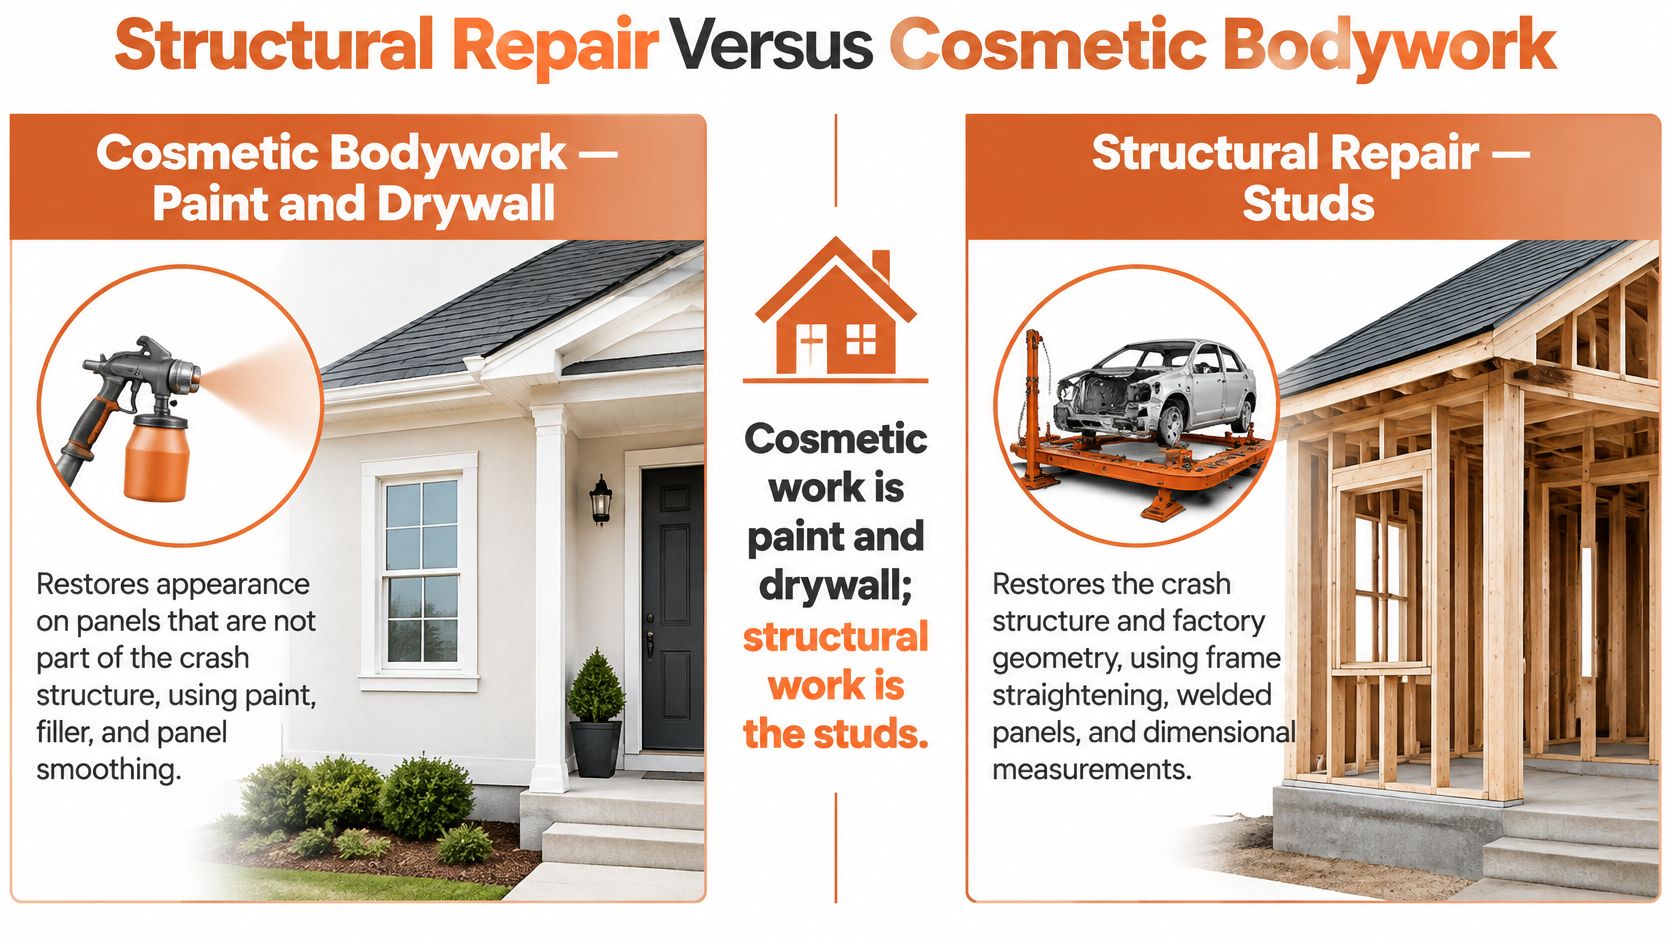
Think of a house: cosmetic work is paint and drywall; structural work is the studs. A smooth wall doesn't prove the framing is sound. In the same way, a shiny panel doesn't show whether the vehicle's load-bearing parts are back in position.
| Criterion | Cosmetic bodywork | Structural repair |
|---|---|---|
| Goal | Restore look and panel shape | Restore crash strength and factory dimensions |
| Typical parts | Outer skins, bumpers, trim, paint | Rails, pillars, aprons, rockers, radiator supports |
| Main methods | PDR, filler on skins, refinish and blend | Measure, pull, section, weld or bond, replace |
| Wrong choice looks like | Filler on a load path or a color mismatch next to unrepaired structure | Replacing a door skin while leaving a bent rail |
Match the method to the part
For a shallow dent with intact paint, PDR can preserve the original finish. When paint is cracked or the panel is too sharply creased, conventional repair may involve reshaping the outer skin, using filler where appropriate, and refinishing the panel. The shop may blend color into adjacent panels so the transition isn't obvious.
Structural work follows a different path. The shop measures first, then uses a frame rack or other approved equipment to pull damaged areas back into position. If a part can't be restored within the maker's repair procedure, it may need replacement. Sectioning, welding, adhesives, or rivets should be used only where that procedure allows them.
Some parts sit close together but need different decisions. A door skin may be cosmetic while the rocker behind it is structural. A plastic bumper cover can hide a bent beam. The outer part's appearance doesn't tell you what happened to the part underneath.
A repair isn't complete if filler is hiding a damaged load path or a pulled pillar remains out of specification.
If the damage is limited to paint or a small dent and the structure measures correctly, start with the cosmetic row. If the impact was hard enough to deploy an airbag or lock a belt, the restraint system needs a separate plan as well as any bodywork.
Seat Belts and Airbag Modules Inside the Body Job
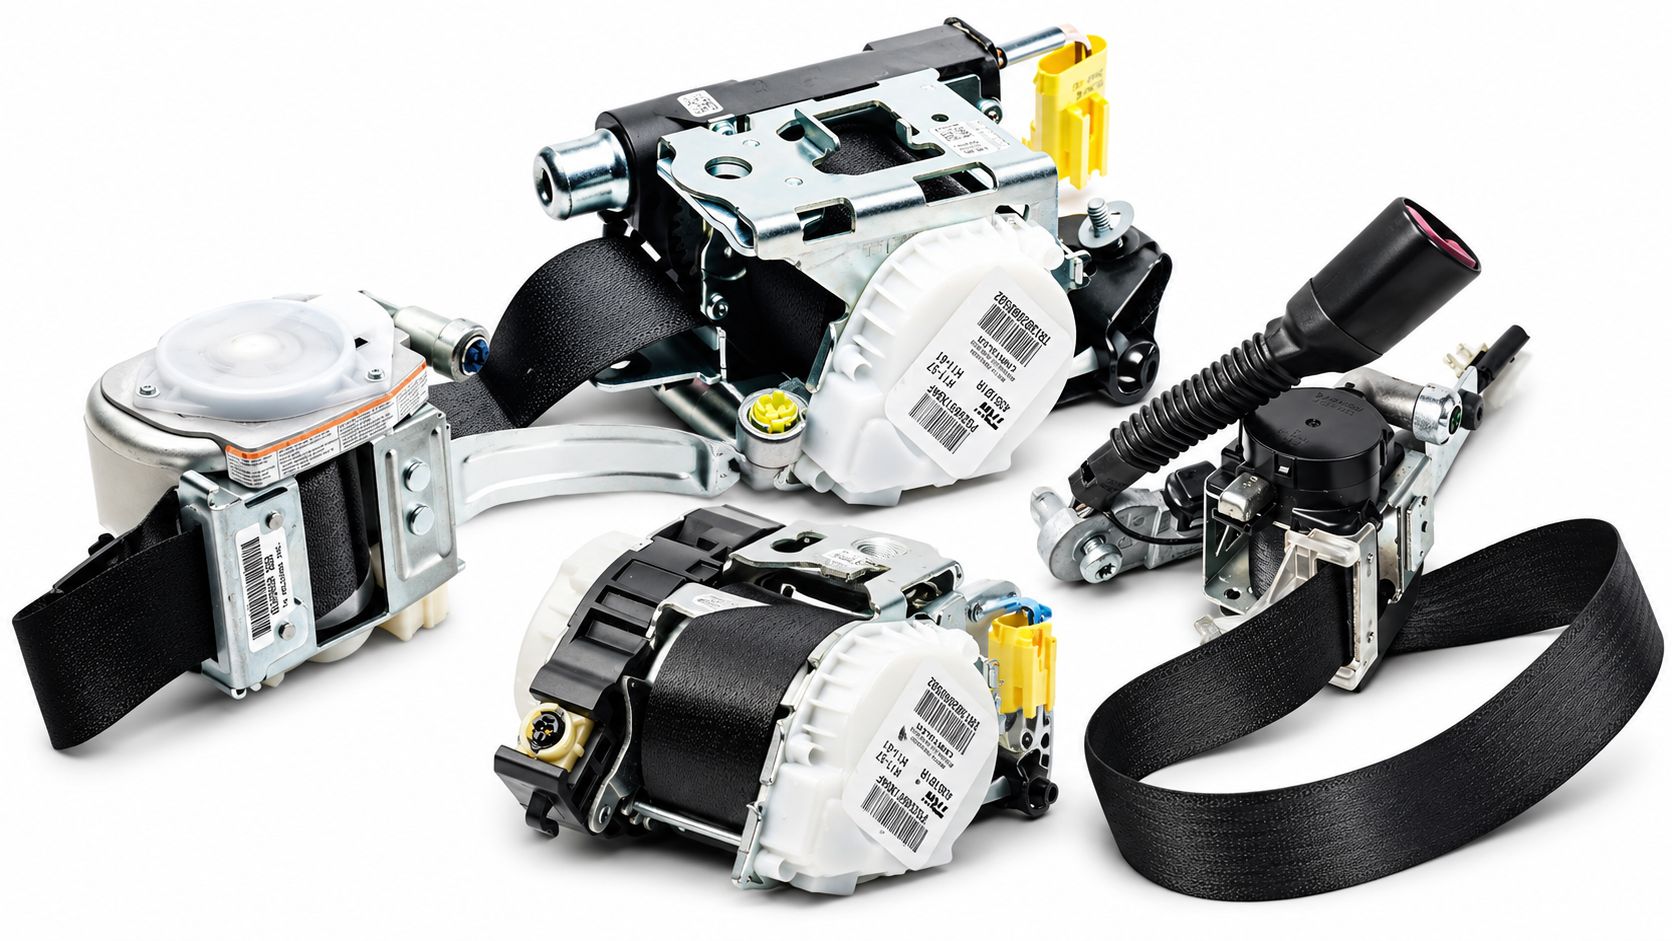
A pretensioner is a one-time tightening device. During a crash, it can pull the belt snug to help restrain the occupant. After it fires, the belt may lock, refuse to retract, or appear normal even though the mechanism has been spent. The body repair can be excellent and the vehicle can still be unsafe if the restraint fault remains.
Consider a sedan with a repaired fender, a locked driver's belt, and an airbag light that stays on. The shop removes the affected belt and airbag control module, identifies the correct parts, and sends them to a specialist for bench service. When the tested components return, the local shop reinstalls them and checks the system in the vehicle.
Make the mail-in step part of the workflow
A mail-in repair is a shop handoff, not a last-minute extra. The shop removes the component; the mail-in service repairs it and sends it back. The local shop or mechanic handles reinstallation. Seat Belt Repair says it repairs seat belts and airbag modules within 24 hours or less, and that certified technicians repair belts to factory standards. It doesn't install the returned parts.
The technician must identify the correct unit before shipping it. Connector count can help distinguish a single-, dual-, or triple-stage system, but the shop should confirm part identification rather than guess. Sending a belt and module together can help coordinate their return and the in-vehicle safety check.
Webbing damage is a separate issue from a fired pretensioner. Cut, frayed, or chewed webbing needs appropriate replacement, including correct stitching and labels. A module reset can address stored crash data, but it can't repair damaged webbing or correct a bent structure.
For more on which components may need replacement or resetting after a collision, see this guide to airbag systems after a crash. Restoring an original restraint assembly doesn't take the place of measuring the vehicle's structure or repairing it to the required specifications.
A Front-Hit Sedan Moving Through the Shop
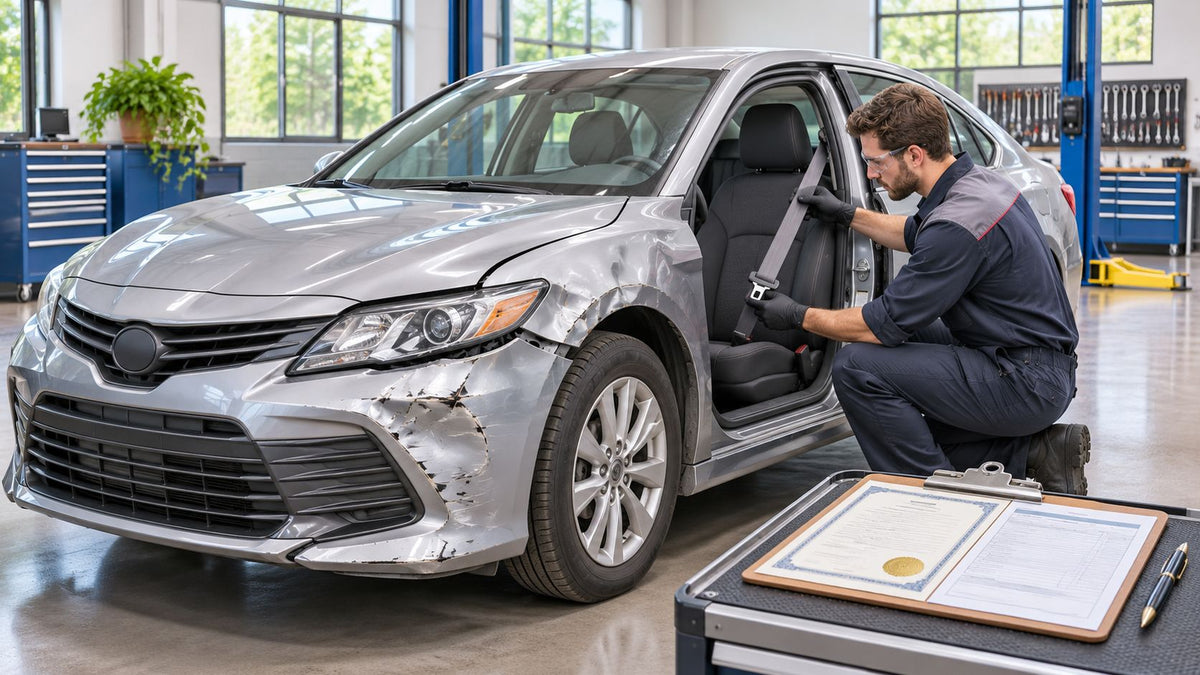
A sedan arrives with a creased hood and fender, a cracked bumper cover, an airbag warning light, and a driver's belt that won't pull out. From the curb, it could look like a panel-and-paint job. Intake shows there's also a restraint problem to address.
The shop photographs the car and scans its safety systems. A tram gauge or rack measurement shows the radiator support has moved, while the rails remain within a range that can be corrected with a controlled pull. Teardown reveals a crushed absorber behind the bumper and an intact hood hinge.
Work proceeds in parallel
The shop pulls the radiator support back into position, then replaces the crushed absorber and damaged bumper beam. It doesn't cover a crease near a structural area with filler and call the job done. Once the structure is stable, technicians repair or replace the fender, refinish the hood, and blend color into the door as needed.
At the same time, the shop removes the locked driver's belt and airbag module for mail-in service. That work can happen while body repairs are underway, rather than waiting until the panels are finished to discover the safety system still needs attention.
Reassembly includes checking the belt's operation and confirming the airbag warning light is off after the system is restored. If the windshield or a camera bracket moved during the collision or repair, the shop checks whether calibration is needed. A parking-lot door ding with intact paint and no safety warnings may stay in the cosmetic category, but that's a different assessment from this front hit.
The locked belt wasn't visible in the parking-lot photos. Finding it at intake lets the shop include the restraint work in the plan instead of sending a polished car back with an unresolved safety fault.
Quality Checks Before the Car Leaves the Shop
A car that looks repaired isn't necessarily repaired. Quality control should move from the structure to the finish and then to the systems that protect occupants. Each check answers a different question about whether the work is complete.
Structure and workmanship
Dimensional sign-off comes first. Compare the completed measurements with the vehicle's factory specifications and keep the before-and-after results. A straight-looking panel can still sit on a structure that's out of position.
Inspect the joints and protection. Welds, rivets, and adhesives should follow the repair procedure for that vehicle. Restore corrosion protection where metal was exposed, and seal seams so water can't start rusting the repair from the inside.
Check fit and finish. Look at panel gaps and how the doors, hood, and trunk close. Check paint color and texture in good light. Filler that telegraphs through the finish can signal that the panel wasn't shaped properly before refinishing.
Restraints, driver aids, and your handover
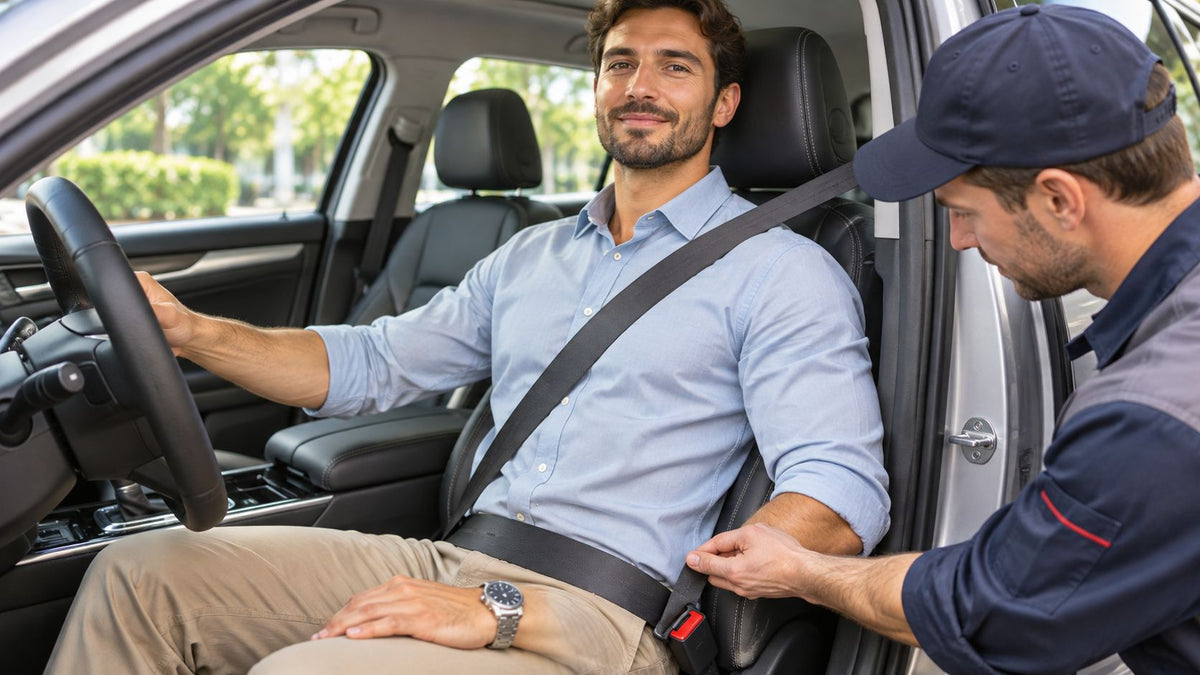
Check that belts extend and retract, buckles latch, and repaired restraint components function before they're reinstalled. Confirm the airbag warning light is off after the module work and that no relevant hard crash codes remain. Manufacturer procedures matter for these repairs, including the requirements that apply to restraint parts under Federal Motor Vehicle Safety Standards.
The shop should calibrate affected cameras and radar after glass or bracket work where the repair requires it. Functional testing after service gives the shop a chance to catch an issue before delivery. For details on testing repaired restraint components, see functional testing requirements for seat belts.
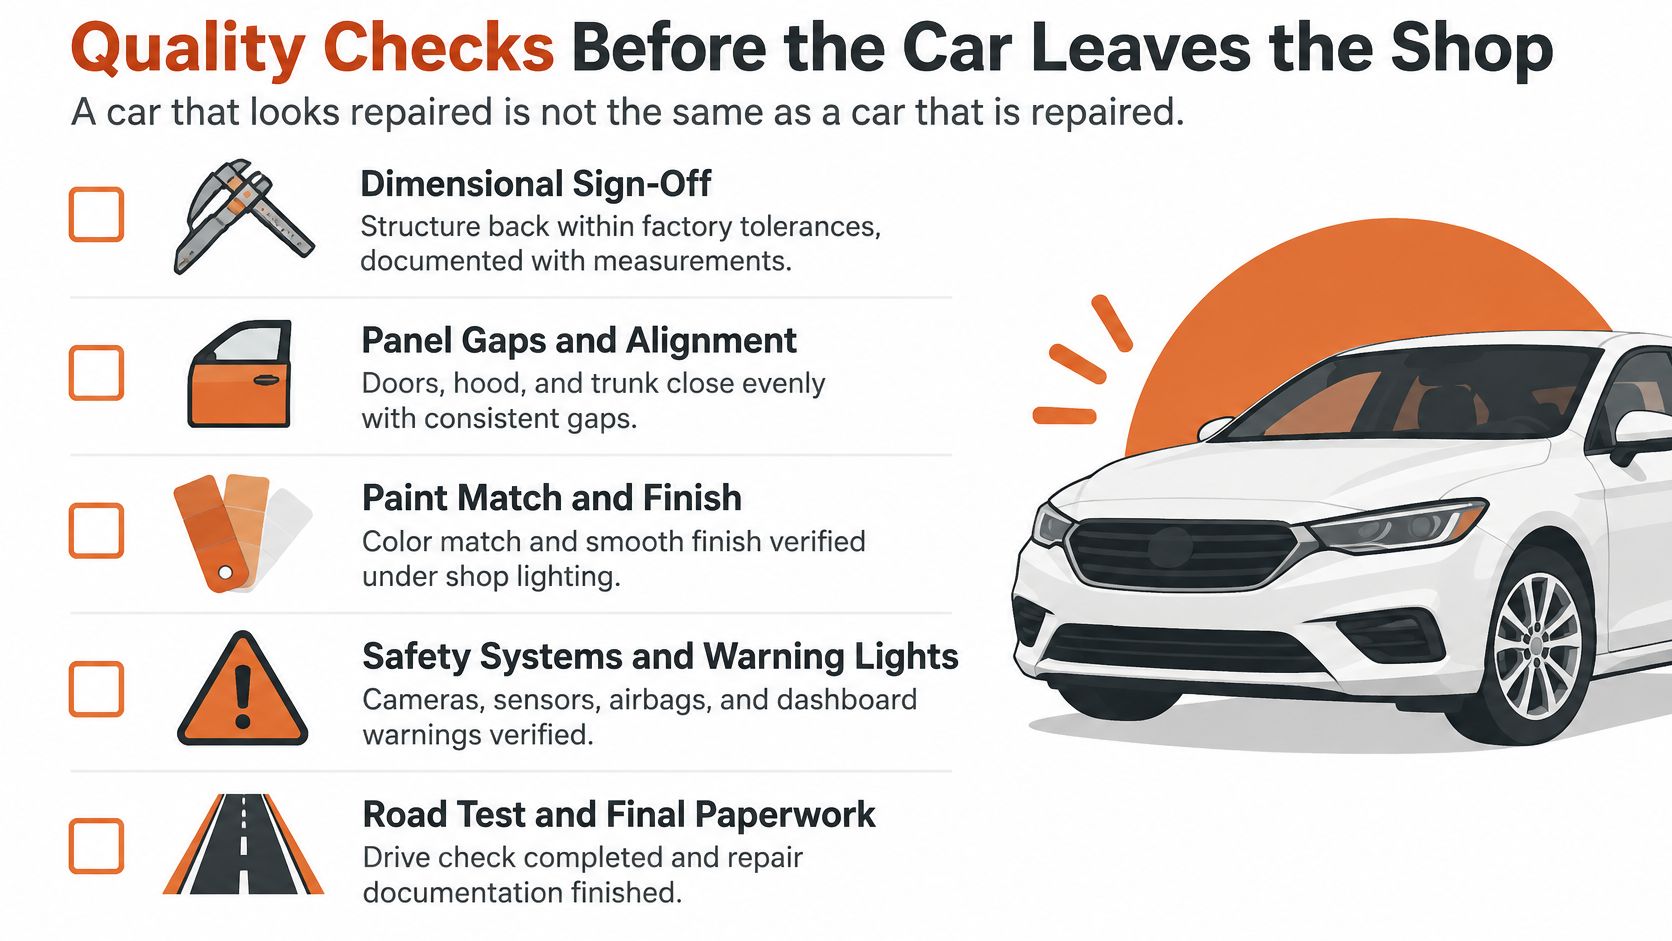
Watch the final checks as part of the full repair process:
Before you leave, check the warning lights, belt travel, and door and hood gaps. Ask for copies of the measurements and scan results, not just a summary that the paint looks good. A guarantee on a restraint repair is useful, but the tested part still has to be installed and the related system checked in the car.
Choose Repair or Replacement Before You Book the Job
Choose among three paths based on the inspection: a full collision repair, cosmetic-only work, or restraint-component service. The estimate's measurements, scan, and belt check should make that choice clearer.
Book a full collision shop when rails, pillars, aprons, or radiator supports are out of specification, or the repair needs pulling, sectioning, welding, or refinishing. Cosmetic-only work fits a vehicle whose structure measures correctly, whose belts extend and retract, and whose restraint system has no unresolved warnings or crash faults.
When the belt or module is the problem but its housing and mounting points remain intact, a mail-in restoration may be an alternative to replacing the complete assembly. The local shop removes the part; Seat Belt Repair handles seat belt repair, SRS module resets, and webbing replacement, then returns the tested component for local reinstallation. Send the component to Seat Belt Repair, 40 Main St, Westfield, MA 01085. Its service is fully guaranteed, and it will assist if the belt still doesn't function correctly after repair.
That approach isn't a substitute for structural work. Crushed rails or corroded belt mounts need the appropriate repair or replacement before a module reset can help. Put restraint work on the estimate whenever an airbag deployed or a belt won't travel, and coordinate the body job and shipment at the same time. Shops and dealerships can also contact Seat Belt Repair about business accounts and bulk service options. For parts that may be involved in collision repair, see this guide to collision repair parts.
If a collision leaves a belt locked, webbing damaged, or an airbag module holding crash data, Seat Belt Repair offers mail-in seat belt repair, webbing replacement, and SRS module resets. The shop or mechanic reinstalls the tested parts and checks the system in the vehicle. Visit Seat Belt Repair to review the available service options.

Leave a comment
This site is protected by hCaptcha and the hCaptcha Privacy Policy and Terms of Service apply.