
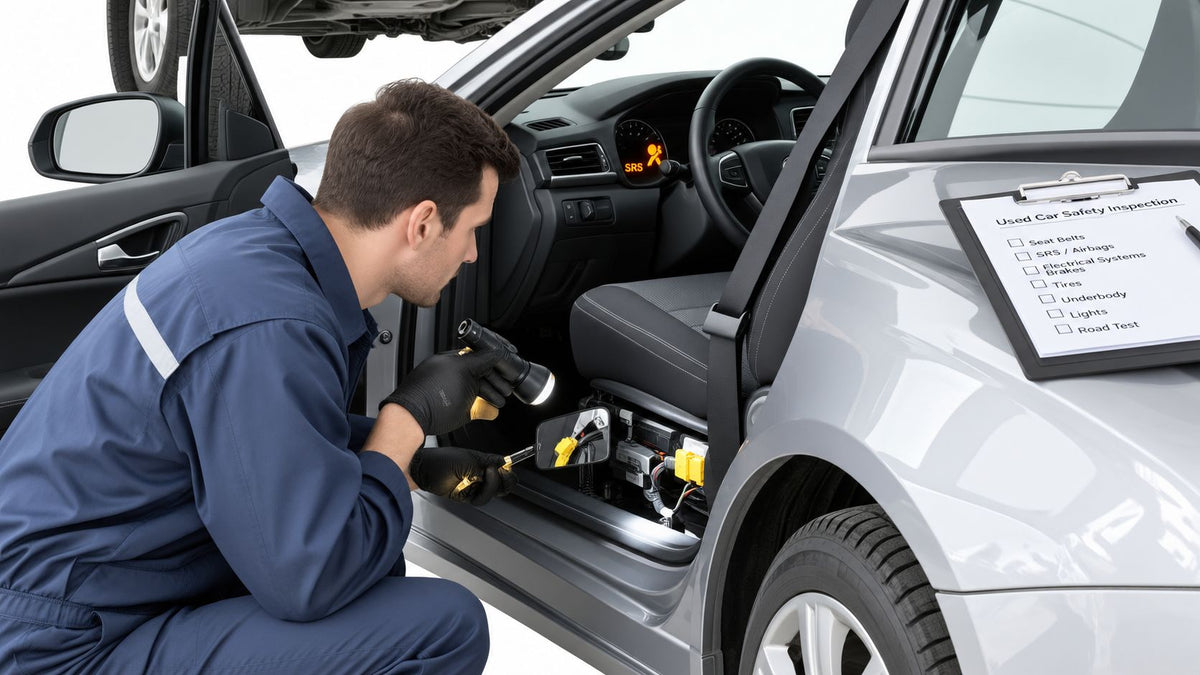
A passed inspection sticker and a clean-looking repair can create dangerous confidence. Neither one, by itself, proves that a used vehicle's seat belts, pretensioners, airbags, or SRS control module are ready to protect occupants in another crash.
That matters most with salvage and post-collision vehicles. A car can drive straight, show no warning lights, and present tidy panel gaps while still carrying unresolved crash data or a restraint component that fired once and was never replaced. A proper used car safety inspection therefore has to go beyond paint, tires, brakes, and the dashboard. It has to establish what happened to the vehicle and whether the safety system was correctly restored.
Table of Contents
- Why Most Used Car Inspections Miss the Restraint System
- Preparing for the Walkthrough
- Exterior, Underbody, and Tire Inspection Steps
- Seat Belt and SRS Module Checks
- What the Road Test Actually Reveals
- Documentation for Resale or Fleet Records
- When to Send Components for Professional Repair
Why Most Used Car Inspections Miss the Restraint System
A state inspection certificate confirms compliance with the items that program checks. It does not reconstruct the vehicle's crash history. Inspectors commonly assess brakes, steering, suspension, lighting, tires, visibility, and basic restraint operation, but the process may not interrogate the SRS module, verify pretensioner deployment history, or confirm that replacement airbags and seat belts match the original safety configuration.
Inspection data shows why a passed certificate needs context. A 2014 independent study analyzing 5,333 inspections across 4,418 cars found U.S. light-duty vehicle fail rates of 12% to 18%, considerably higher than the commonly cited 2% figure. It also found that 5.3% to 6.5% of inspected vehicles failed because of safety-related issues, according to the independent vehicle safety inspection study. A fail rate that high shows inspections catch real defects, yet none of those fail categories covers stored crash data or pretensioner history.
A clean belt can hide a fired pretensioner
A belt that extends, latches, and retracts smoothly may still contain a triggered pretensioner. The webbing can appear normal after a collision even though the pyrotechnic mechanism has already used its stored energy. Parts documentation should support any repaired or replaced belt assembly. A quick tug in the cabin proves only that the belt operates mechanically.
The airbag lamp requires the same caution. If it illuminates during the key cycle and then goes out, the system is responding as expected at that moment. That behavior does not prove every deployment component is original, correctly installed, or free of stored crash information. Some routine inspection systems do not inspect airbags, while others treat them as advisory rather than pass-or-fail items, as explained in this used-car SRS inspection guidance.
Practical rule: Treat a passed inspection as permission to investigate further, not as proof that the restraint system is healthy.
Use the VIN and repair records to establish what happened, then examine belt hardware, connectors, module behavior, and collision structure. Buyers evaluating a salvage vehicle should understand what salvage-car repair can involve, particularly when restraint components may have deployed. A professional SRS inspection belongs in the decision when records are incomplete or deployment history cannot be verified.
Preparing for the Walkthrough
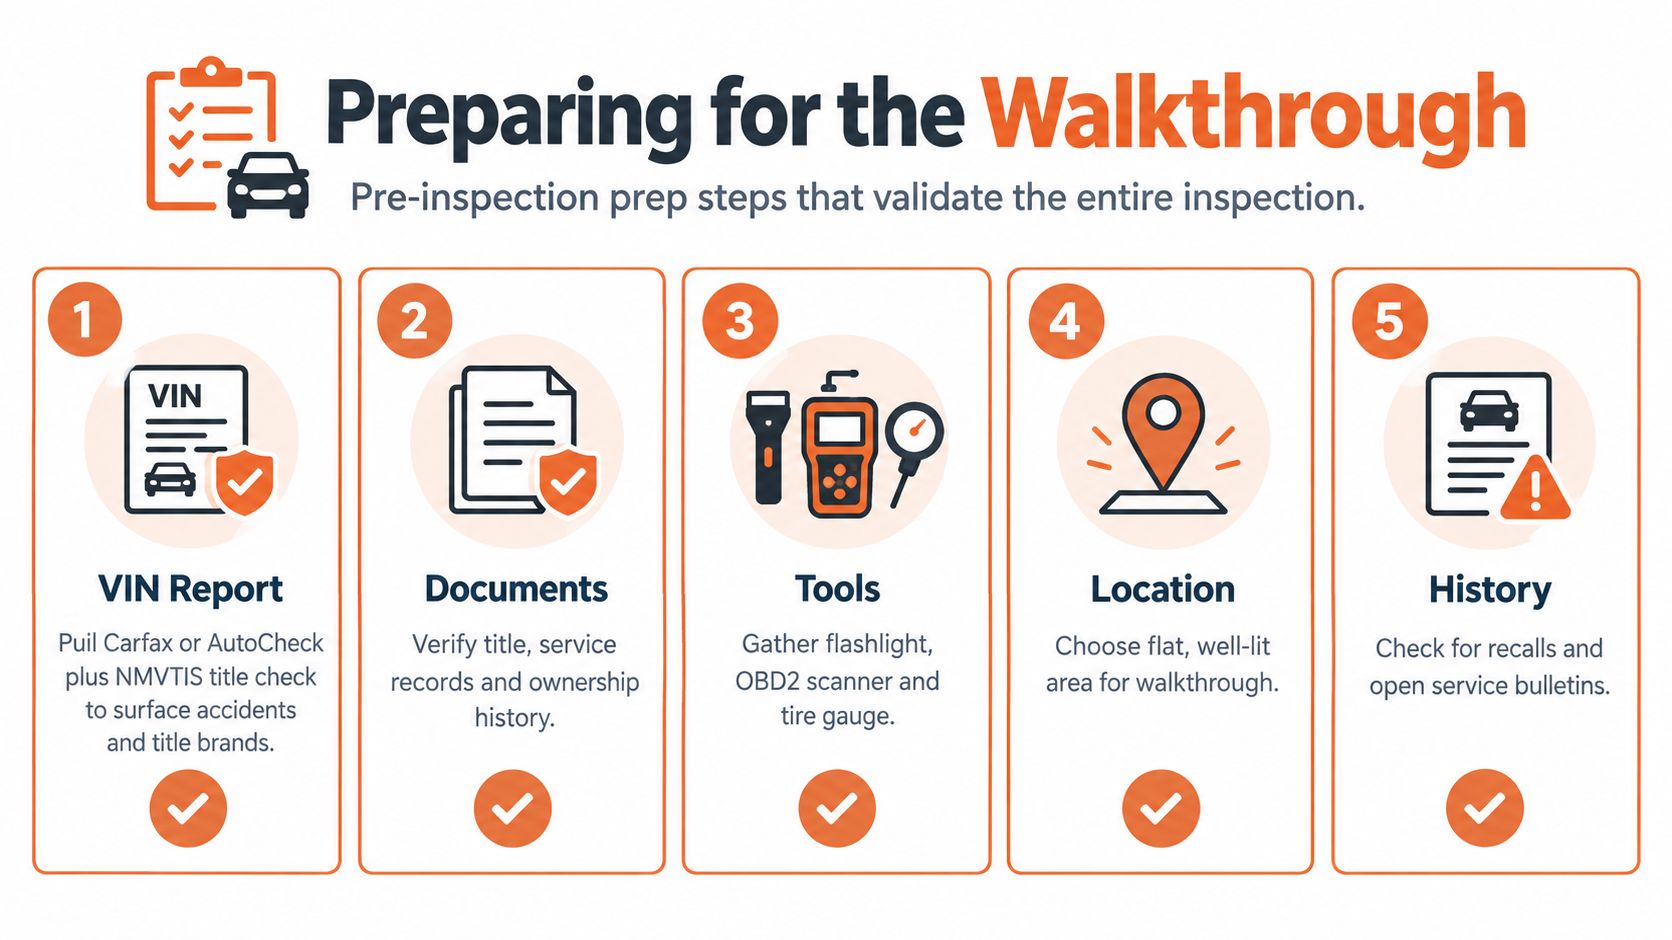
Preparation determines whether the inspection tells you anything reliable. Begin with the VIN and collect more than one history source. A Carfax or AutoCheck report can reveal reported collisions, title brands, and listed repairs, while an NMVTIS title check helps identify salvage, rebuilt, or other ownership records that may not be obvious from a seller's description.
Read the reports for restraint-specific language. “Accident reported” is broad. Entries mentioning airbag deployment, seat belt replacement, pretensioner work, salvage processing, or collision repair deserve follow-up questions and supporting invoices. Missing information isn't proof that no collision occurred, particularly when repairs may have been paid for privately.
Bring tools that expose what a quick walkaround misses
Choose a flat, well-lit location and inspect the vehicle in daylight. Bring:
- A bright flashlight and small mirror: Use them around seat tracks, belt anchors, frame rails, radiator supports, and floor pans.
- A notebook or phone notes app: Record findings by location, not from memory. “Left front repair” isn't enough. Note the panel, fastener, weld, connector, or tire position.
- A tire gauge: Confirm that tire pressure isn't masking a handling complaint during the road test.
- An OBD-II adapter with SRS-capable software: Generic code readers often access only the powertrain. If the adapter can't communicate with the restraint module, treat that limitation as important.
- A length of string or fishing line: It can help you observe belt retraction and movement under controlled load, although it isn't a substitute for a technician's test equipment.
Ask to see the vehicle cold. Before starting it, turn the key to the run position and watch the warning lamps. Record which lamps illuminate, whether the SRS lamp performs a normal self-check, and whether any light returns after startup. That cold baseline gives you a reference before heat, vibration, or a recently cleared code changes the evidence.
Exterior, Underbody, and Tire Inspection Steps
Start at one front corner and work around the vehicle in a continuous loop. Don't inspect panel gaps as isolated cosmetic details. A gap that changes from one end of a door to the other, a VIN label that doesn't align with neighboring labels, or overspray on rubber seals can indicate prior collision work. Recent guidance on repaired vehicles also identifies fresh seam sealer, mismatched welds, and non-OEM glass as clues, while warning that private repairs may never appear in public history databases. This collision-damage inspection guide gives useful context for those less obvious signs.
Follow the damage path
Open and close every door, hood, and trunk. Each latch should engage cleanly without lifting, dropping, or forcing the panel into position. A door that latches only when slammed may point to a shifted striker, distorted pillar, or poorly repaired door opening.
Look beneath the hood and inside the trunk for the end of the repair story. Inspect the radiator support, inner fenders, apron areas, trunk floor, spare-wheel well, and rear body panel. Compare left and right sides. Factory spot welds usually follow a repeatable pattern. Replacement sections may show plug welds, grinding marks, unusual bead shapes, or seam sealer with a different texture.
Then move underneath:
- Frame rails: Surface rust and ordinary road scrapes aren't automatically serious. Crushed sections, heat discoloration, ripples, or fresh welds need a frame specialist.
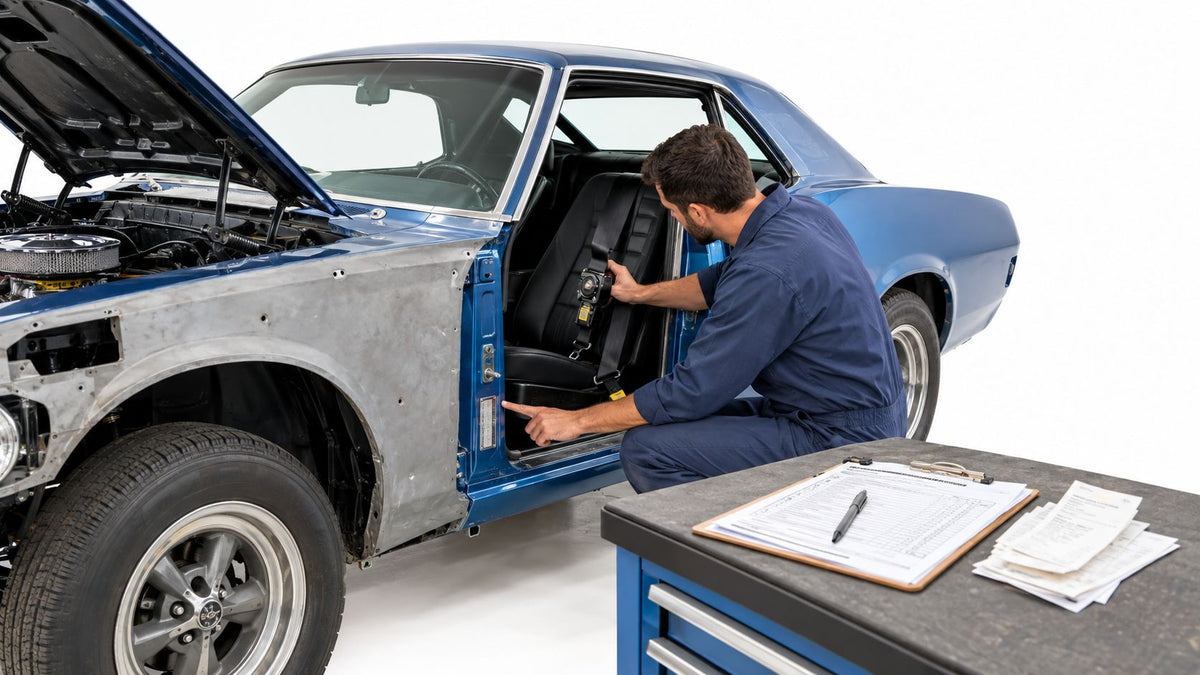
- Floor pans: Look for cut-and-replaced metal, irregular plug welds, new coating over repair seams, and distorted seat-belt anchor areas.
- Suspension and subframes: Check for bent mounting points, shifted hardware, scraped coatings, and fasteners that don't match nearby hardware.
- Glass and trim: Non-OEM glass or disturbed curtain-airbag trim isn't conclusive alone, but it strengthens the case for asking how the collision was repaired.
Read the tires as geometry evidence
Inspect all four tires across the full tread, including the inner edges. Uneven wear can result from ordinary alignment neglect, but concentrated inner-edge wear after a reported impact warrants alignment specifications and a closer look at the knuckle, control arm, subframe, and mounting points.
Walk away, or pause the purchase for structural measurement, when you find visibly crimped rails, distorted anchor points, major floor-pan replacement, or repair work that doesn't match the seller's story. Cosmetic mismatch is negotiable. Structural uncertainty around occupant seating and restraint anchors is a different category.
Seat Belt and SRS Module Checks
The restraint system deserves the same attention as the brakes because it has to work in milliseconds, not merely pass a casual function check. Examine every seating position, including rear seats that buyers often ignore.
Pull each belt slowly to full extension. Inspect the webbing for cuts, fraying, glazing, discoloration, contamination, twisted stitching, and stiffness near folds or anchor points. Look closely around the buckle stalk and lower anchor. A belt may retract normally while its pretensioner or load-limiting components have been compromised.
Test belt movement without mistaking it for proof
Let the belt retract under its own spring tension. It should feed back evenly without bunching, dragging, or stopping. With the belt extended, give it a sharp, controlled pull. A functioning emergency locking retractor should lock promptly. If it allows noticeable extension before catching, locks inconsistently, or remains locked and won't retract, stop treating the result as a minor convenience issue.
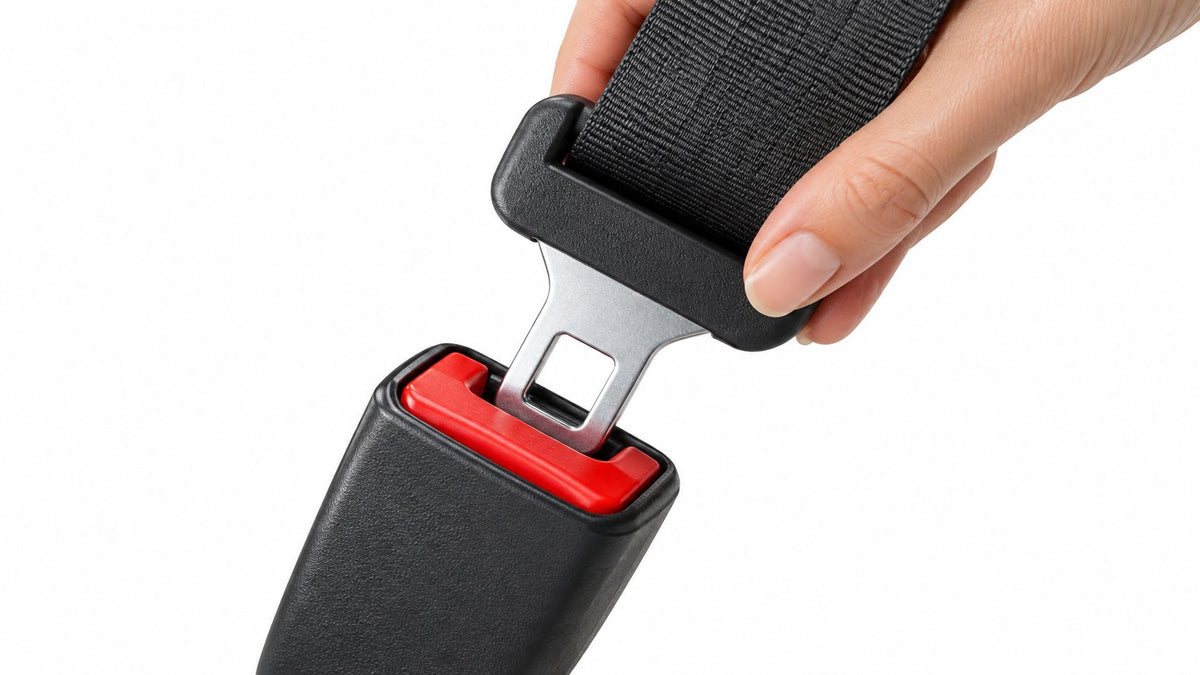
Check each latch plate and buckle. The latch should engage with a distinct click, resist a firm pull, and release cleanly when the button is pressed. Inspect the buckle housing for cracks, deformation, heat marks, or signs that it was replaced with an unmatched part.
Interpret the SRS lamp carefully
Turn the key to the run position without starting the engine. The SRS lamp should illuminate as part of the self-check and then go out after the system completes its initial check. A lamp that remains lit, flashes, or never illuminates at key-on can indicate a fault, a deployment event, a disconnected connector, or an attempt to conceal a warning by removing or altering the bulb.
The lamp behavior narrows the possibilities, but it doesn't identify the root cause. Inspect the wiring beneath the seats for loose connectors, corrosion, pinched harnesses, or evidence that the seats were removed. Check the steering wheel for abnormal stiffness, grinding, or inconsistent feel while turning, which can support closer examination of the clock spring and steering-wheel airbag circuit.
Look for replaced covers, uneven steering-wheel grain, passenger-dash texture differences, disturbed A-pillars, and curtain-airbag trim that doesn't sit correctly. These clues can suggest deployment or replacement, but visual inspection can't confirm whether the module still stores crash data. A scan with manufacturer-level access remains the reliable way to identify hard codes, deployment records, and module communication faults.
Watch this overview before handling restraint components or connectors:
A belt that looks acceptable isn't automatically safe after a crash. Review the latch and release behavior in more detail with this guide to seat belt latch problems, then escalate any deployment suspicion instead of relying on appearance.
What the Road Test Actually Reveals
Consider a 2017 sedan advertised after a reported side-impact repair. At startup, the SRS lamp performs its normal check and disappears. That result supports basic circuit communication, but it doesn't certify the side-impact sensors, belt pretensioners, module memory, or repaired pillar structure.
Drive first at low speed in a quiet area. Make gentle turns, brake progressively, and listen with the radio off. A belt retractor that ratchets or tightens without the occupant pulling it can point to a damaged spool or abnormal belt movement. A warning chime over rough pavement may reveal a loose buckle connector or an intermittent seat-belt reminder circuit.
Use mixed conditions, not one easy loop
On ordinary pavement, check whether the steering wheel returns naturally after a turn and whether the car tracks without constant correction. On rougher pavement, listen for trim movement, suspension knocks, and dash or pillar noises. A vehicle repaired around a windshield or A-pillar can produce wind noise that deserves inspection of the glass installation and nearby curtain-airbag mounting, although the noise alone doesn't prove a restraint fault.
During braking, note any ABS or traction-control warning that appears only after the vehicle moves. That pattern can indicate a wheel-speed sensor or hub issue, including wiring disturbed during collision repair. Test the parking brake in a safe location and confirm that the vehicle holds as expected.
A road test tells you how the repaired structure and electrical connections behave under movement. It doesn't replace a scan or frame measurement.
Use the symptom to choose the next action. Persistent warning lights or repeated belt locking justify a specialist inspection. A pull, vibration, or new ABS light calls for chassis and brake diagnosis. A quiet drive with no warning signs means you can continue, not that you can skip the records and SRS verification.
Documentation for Resale or Fleet Records
A professional-looking repair needs a professional paper trail. Start with the VIN history, title documentation, service records, recall result, and collision invoices. The records should distinguish a generic accident entry from documented airbag, seat-belt, pretensioner, or SRS-module work.
For seat belts, record the inspection date and vehicle mileage. Photograph the webbing, labels, buckle, anchor points, and any replacement markings. If a belt was repaired or replaced, retain the invoice and part information rather than accepting a vague statement such as “airbag replaced.”
For SRS work, request documentation that identifies the module part number, the work performed, and whether crash data and hard codes were addressed. A line item that only says “module reset” doesn't tell an auditor whether the module communicated correctly afterward or whether deployed physical components were replaced.
Minimum documentation set for a used car safety inspection
| Document | What It Proves | Source |
|---|---|---|
| VIN history and title records | Reported collisions, title brands, and ownership information | Carfax, AutoCheck, and NMVTIS records |
| Recall verification | Whether the VIN has unresolved safety campaigns | NHTSA VIN recall lookup |
| Collision repair invoice | Which structural and restraint parts were repaired or replaced | Repairing body shop or seller |
| Seat-belt inspection record | Condition of webbing, buckles, retractors, and anchors at inspection | Inspector or repair facility |
| SRS diagnostic record | Module communication, stored faults, and post-repair status | Qualified diagnostic technician |
| Frame measurement report | Whether structural dimensions were checked after significant impact | Collision repair facility |
| Fleet inspection log | Odometer, inspector identity, component findings, and disposition | Fleet or maintenance department |
For resale, preserve copies in the vehicle file and match every document to the VIN. Fleet operators should add the odometer reading, inspection date, inspector signature, component-by-component result, and follow-up order. The Progressive used-car inspection checklist also supports checking service history, recalls, title records, underbody rust, tires, lights, and a professional pre-purchase inspection.
When to Send Components for Professional Repair
Set the handoff threshold before you start. A seat belt that locks and won't retract, webbing with meaningful cuts or fraying, a pretensioner showing signs of deployment, or an anchor that has shifted isn't a DIY “monitor it” item. Remove the vehicle from consideration until a qualified restraint specialist or manufacturer-trained technician evaluates it.
The same applies to SRS faults. If the airbag lamp stays on or returns after a repair attempt, if the module retains crash data, or if a scan tool can't communicate with the module, stop clearing codes and investigate the cause. A module associated with a deployment event may require replacement or specialized reset procedures, and the correct action depends on the vehicle's design and fault record.
Use a firm decision rule
Send the component out when:
- The mechanism has fired: Triggered pretensioners, retracted buckle stalks, slack belts, or deployment indicators require professional handling.
- The belt binds: A retractor that won't feed smoothly or locks unexpectedly can fail when occupants need it.
- The SRS fault returns: Recurring faults point to an unresolved circuit, sensor, module, or component problem.
- The structure is uncertain: Damaged anchors, repaired pillars, altered floor pans, or distorted mounting points need specialist assessment.
- The records don't match the car: Missing invoices or unexplained replacement parts increase the risk that the repair was incomplete.
Don't confuse a cleared dashboard lamp with a restored restraint system. The repair must include correctly functioning physical components, compatible wiring, proper installation, and a module that communicates without relevant faults. For mail-in service options involving locked pretensioners, webbing replacement, or SRS module reset, review how to choose a seat belt repair service and verify that the provider explains what it repairs, what it tests, and what must be reinstalled locally.
Seat Belt Repair offers mail-in service for locked pretensioners, damaged webbing, and SRS modules with crash data or hard codes, using OEM components and functional testing before return. If your salvage or post-collision vehicle fails the restraint checks above, visit Seat Belt Repair to identify the right service and arrange the next safe repair step.

Оставить комментарий
Этот веб-сайт защищается hCaptcha. Применяются Политика конфиденциальности и Условия использования hCaptcha.