
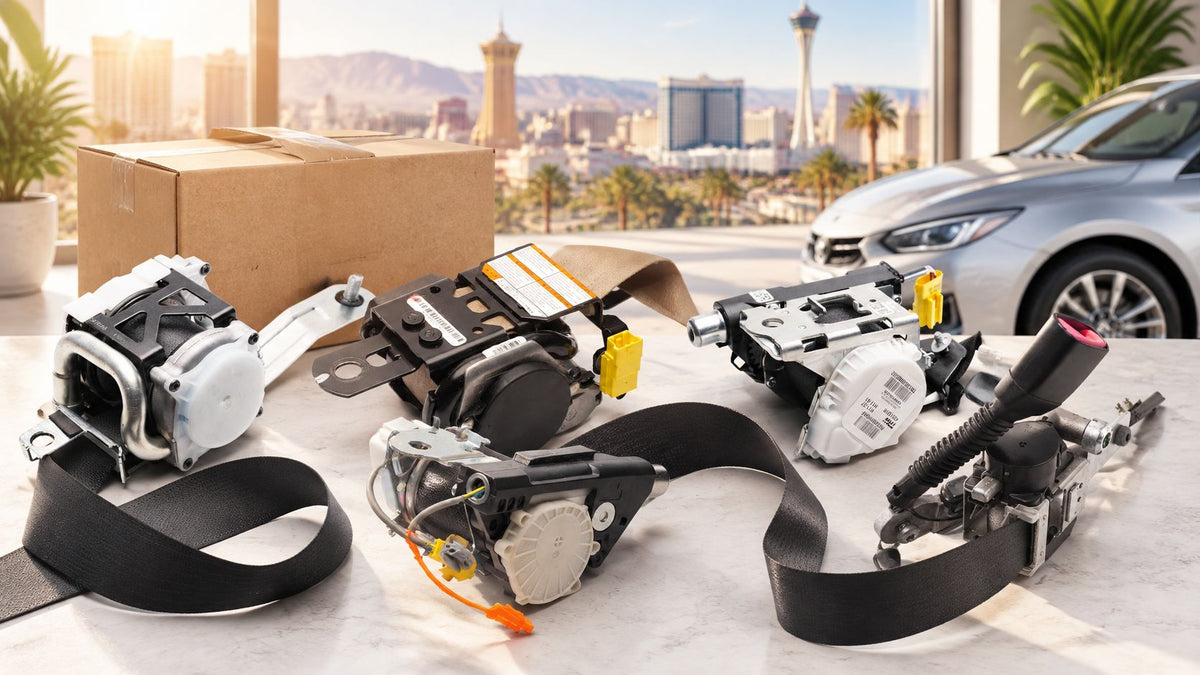
Las Vegas owners can mail a seat belt or SRS module to our national shop in Westfield, Massachusetts, where repair is typically completed within 24 hours of receipt, then have the part reinstalled locally. You or your local shop handles reinstallation, but the VIN recall check and the vehicle manufacturer's repair requirements come before shipping.
You might be standing beside a car that looks nearly finished, except the driver's belt won't pull out and the airbag light is still on. Or you've bought an auction vehicle and discovered that its restraint repairs need more planning than its bodywork. The right decision starts with identifying the fault, not ordering a reset.
Table of Contents
- Seat Belt Repair Paths for Las Vegas Cars
- Check Recalls Before You Pay for Repair
- What a Crash Does Inside the Seat Belt
- Webbing Strength Rules That Decide a Repair
- How to Ship a Seat Belt From Las Vegas
- Las Vegas Cars That Need This Repair
- Send the Belt After the Recall Check
Seat Belt Repair Paths for Las Vegas Cars
Las Vegas seat belt problems and the right repair path
| Problem | Mail-in repair | Typical dealer path | Timing and install |
|---|---|---|---|
| Locked, deployed, or non-retracting pretensioner | Where appropriate under the vehicle's repair requirements, replace the gas cartridge or mechanism with OEM parts on single-, dual-, or triple-stage belts | Replace the full seat belt assembly | About 24 hours after receipt for bench service; owner or local shop reinstalls |
| Cut, torn, frayed, faded, or dog-chewed webbing | Replace the full load-bearing webbing in an OEM-matched or custom color, preserving original tags when possible | New belt assembly | Allow for shipping and local installation; never sew a local patch into damaged webbing |
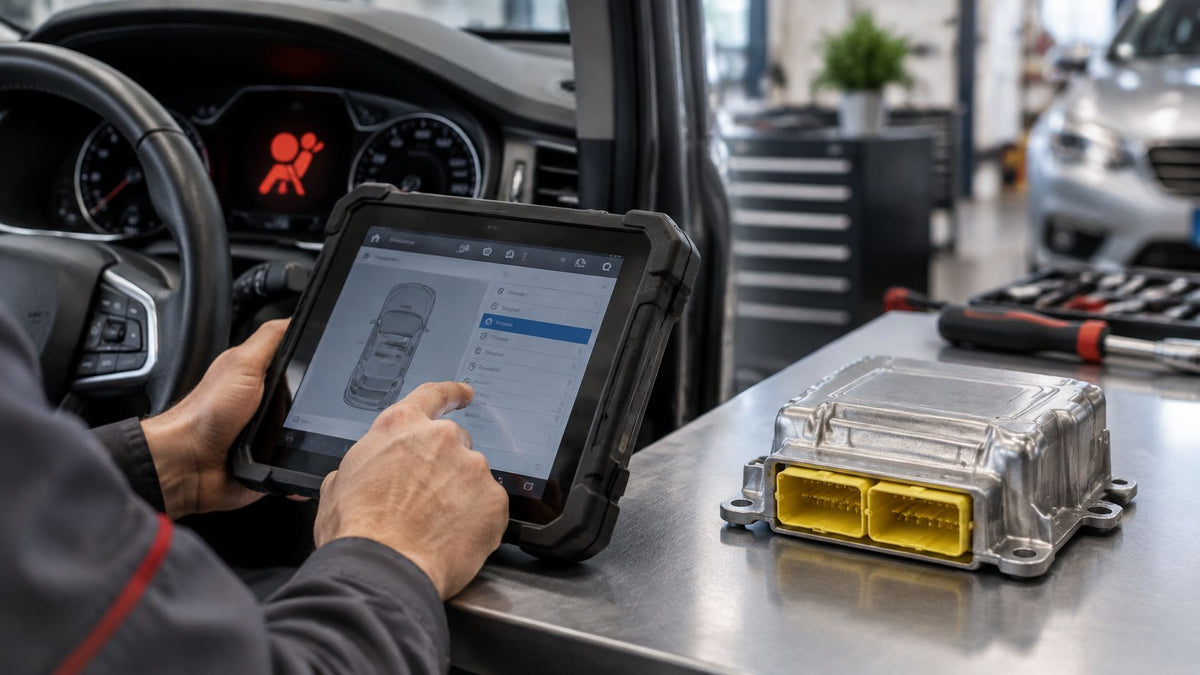
| Airbag light and stored crash data | Evaluate the SRS module for crash-data reset; replace it when the manufacturer requires replacement | New module plus programming when specified | Identify and package the module separately; scan the vehicle after installation |
| Open NHTSA or manufacturer safety recall | Don't send it for paid repair until the campaign is ruled out | No-cost dealer remedy, potentially including replacement parts or software | Recall comes before price or turnaround |
| Slow retraction with no crash and no warning light | Service only after confirming an actual webbing or retractor fault | Assembly replacement if diagnosis calls for it | Confirm the fault before removing or shipping anything |
A search for seat belt repair Las Vegas can lead to both local collision facilities and national mail-in services. Those aren't interchangeable jobs. A component specialist works on the removed part; the local installer evaluates how that part fits into the vehicle's complete restraint system.
A dealer replacement can be the correct route even when bench service is available. The deciding factors include manufacturer instructions, recall coverage, physical damage, and whether the original assembly remains suitable for service. Repair availability isn't permission to disregard an OEM replacement requirement.
Compare the complete repair scope
Ask for a written scope that separates removal, component work, shipping, installation, programming, and diagnosis. Comparing a bench-service charge with an installed dealer quote without those distinctions won't tell you the cost of either route.
For a slow belt, start with inspection rather than assuming deployment. Twisted webbing, incorrect trim routing, and an internal mechanism fault need different responses. Don't spray lubricant into the retractor or force the belt loose.
The safety context matters: NHTSA's Nevada highway-safety plan reports observed front-seat belt use of 93.1% in 2022, while unbelted passenger-vehicle fatalities represented close to 40% of vehicle-occupant fatalities. Belts are heavily relied upon, and their condition deserves the same attention as the repaired structure around them.
Check Recalls Before You Pay for Repair
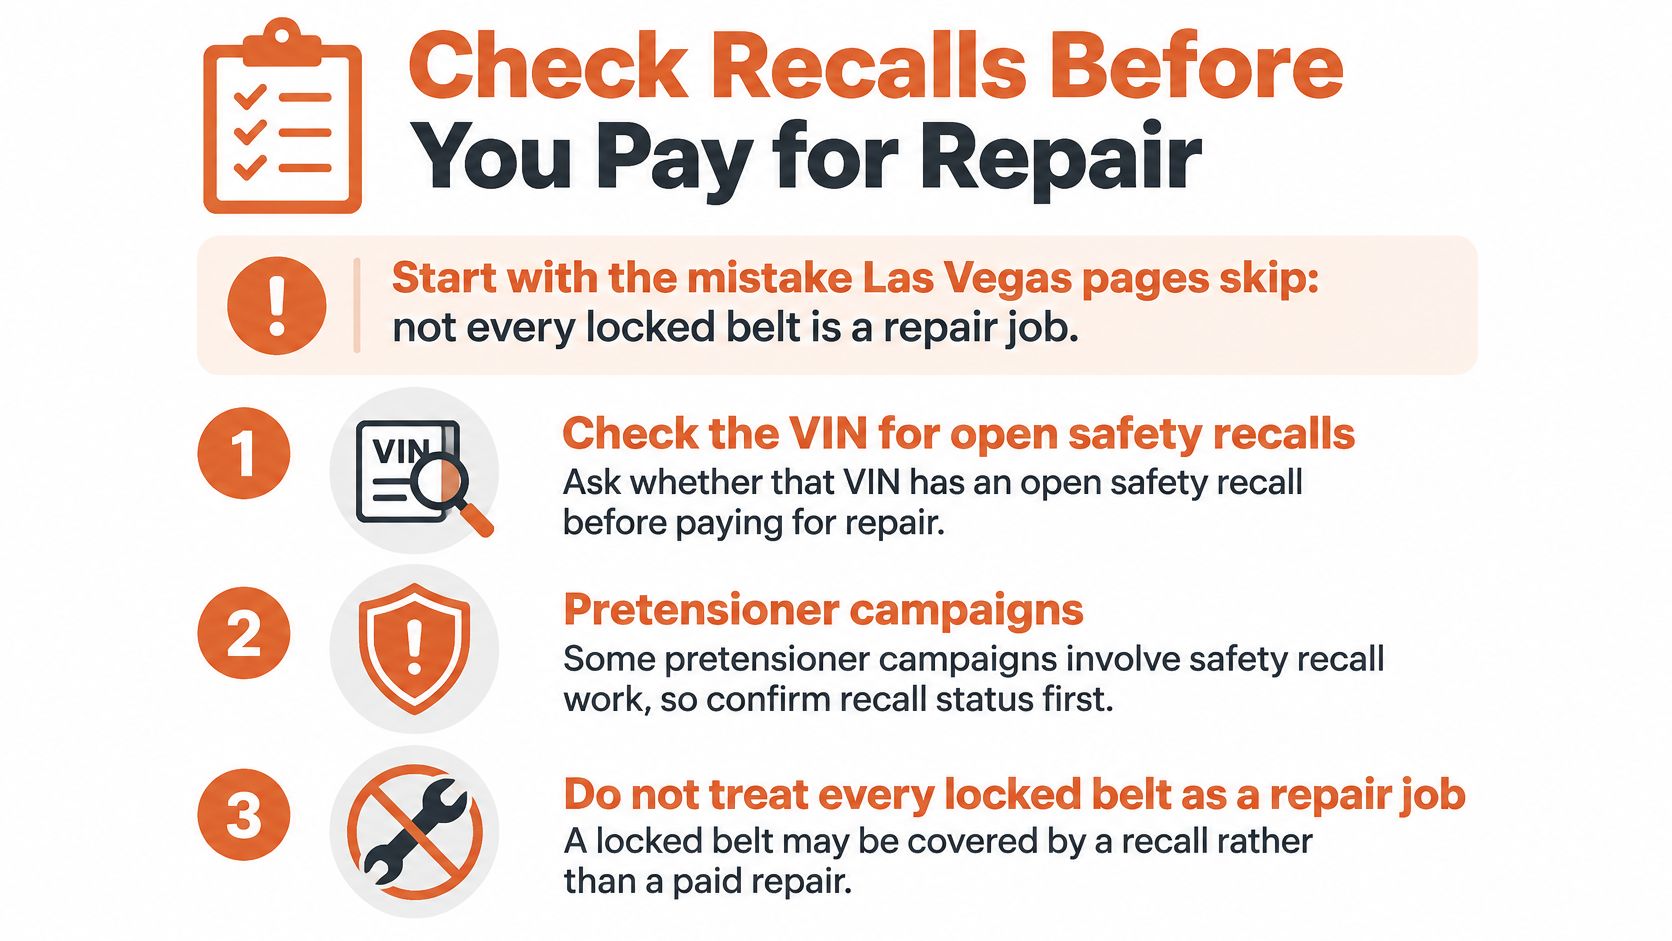
Not every locked belt is a paid repair job. Check whether the VIN has an open restraint-system recall before authorizing component service. A belt can have a recall-related defect even when its ordinary locking function still appears to work.
Don't assume a newer vehicle is exempt. A 2025 Audi recall report filed with NHTSA covered certain 2025–2026 vehicles with damaged torsion bars that could allow webbing to unwind uncontrollably during a crash. Vehicle age and a clean-looking interior don't settle recall eligibility.
Follow the VIN-first decision path
- Check the VIN with NHTSA and the manufacturer. Use the complete VIN, not just the model name. Save the result and ask the dealer to confirm any restraint-related campaign and its remedy.
- Separate the defect from the crash event. Tell the dealer whether the belt stopped working before the collision, immediately afterward, or without any known impact. Recall eligibility and collision damage are separate questions.
- Get the applicability decision in writing. Before paying a third party, retain confirmation of whether a campaign applies and whether it has already been completed. An applicable recall remedy takes priority over a generic rebuild.
Use this checklist before authorizing removal or shipment.
Have the VIN, model year, warning-light status, crash history, and pretensioner part number ready. Photograph the label if it's accessible without disturbing the assembly. Don't remove trim or disconnect a pyrotechnic component just to obtain a number for an initial inquiry.
Our explanation of a seat belt lock can help you describe the symptom, but a symptom description doesn't establish recall coverage or prove deployment.
Before authorization: Ask whether the proposed work addresses a recall defect, collision deployment, or an ordinary mechanical fault. Those are different repair paths.
For Copart and insurance-auction rebuilders in the valley, make the VIN check part of intake on every vehicle. Don't let missing auction paperwork substitute for a recall search, and don't assume a belt that pulls out normally has passed inspection. Not every deployed or locked assembly is repairable, and a required replacement part or software remedy can't be replaced by clearing a code.
What a Crash Does Inside the Seat Belt
Say your car has been in a collision. The doors still open, the engine starts, and the belt fabric looks intact, but the shoulder belt won't move. That symptom deserves an SRS diagnosis, not an attempt to free a sticky reel.
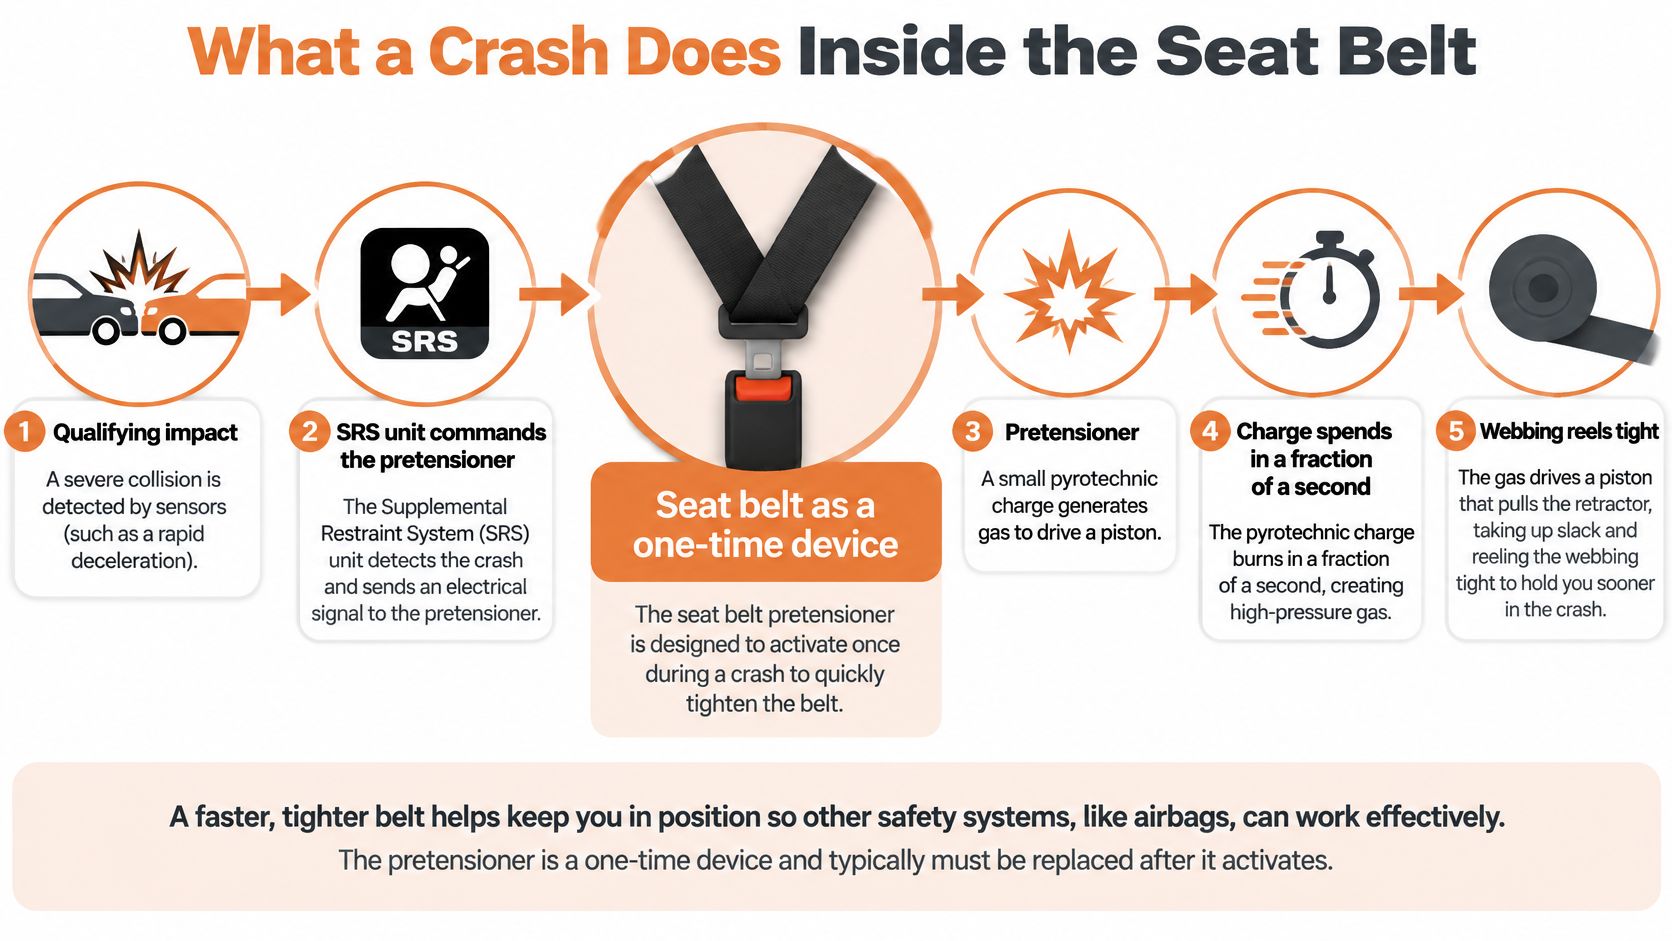
In a qualifying crash, the supplemental restraint system, or SRS, can command a pyrotechnic pretensioner to take up belt slack. The pretensioner's deployment charge is a one-time device. After activation, an assembly may remain locked, fail to retract, or look less obviously damaged than you'd expect.
This diagram shows the relationship between the crash command and belt tensioning.
Separate the fabric, mechanism, and electronics
The webbing is the load-bearing fabric across the occupant. The retractor and pretensioner manage belt payout, locking, and crash-related tightening. The airbag control module monitors restraint circuits and may retain deployment information.
Those components work together, but they don't share a single universal reset. Replacing fabric doesn't renew a deployed charge. Servicing a retractor doesn't repair damaged wiring, and erasing a module's crash record doesn't restore a damaged mounting point.
NHTSA pretensioner recall documentation describes rapid belt retraction during qualifying crashes and records failures involving abnormal deployment and cable breakage that can reduce restraint effectiveness. A locked assembly therefore needs more investigation than a pull test.
- Mechanical condition: Establish whether the retractor, pretensioner, buckle, or associated hardware is damaged.
- Electronic condition: Identify deployment records and circuit faults rather than assuming every warning is stored crash data.
- Required remedy: Follow a manufacturer replacement or software instruction instead of substituting a generic rebuild.
Identify the assembly rather than guessing
Connector photographs help identify single-, dual-, and triple-stage configurations, but connector count alone shouldn't determine the repair. Match the part label, VIN application, and service information. Don't unplug or electrically test a pretensioner to investigate its stages.
The seat belt pretensioner explanation provides more context for distinguishing deployment symptoms from ordinary retractor behavior.
The accompanying video offers a visual reference for the mechanism.
The important distinction is between restoring component operation and completing the vehicle's required collision repair. One doesn't automatically establish the other.
Webbing Strength Rules That Decide a Repair
FMVSS 209 webbing limits used to judge a belt
The NHTSA FMVSS No. 209 test procedure gives minimum width and breaking-strength requirements, as well as maximum elongation limits, for relevant occupant-contacting webbing and Type 2 belts.
| Requirement | Pelvic section | Upper torso section |
|---|---|---|
| Minimum width on occupant-contacting webbing | 46 mm | 46 mm |
| Minimum breaking strength | 22,241 N | 17,793 N |
| Maximum elongation under an 11,120 N load | 30% | 40% |
A patch does not demonstrate compliance with these limits. Cuts, dog-chewed areas, frayed edges, and local seams can change the load-bearing fabric and how it stretches. A hand tug cannot establish crash performance.
Damaged load-bearing webbing needs a suitable assembly-level replacement, not a stitch over the damaged spot. The replacement fabric, attachment stitching, and hardware must work together. A supplier's strength claim alone does not show that the completed assembly suits the vehicle.
Inspect more than the visible shoulder section
Webbing may look intact across the seat while damage sits near an anchor, guide, or retractor. Inspect the accessible length for cuts, edge wear, contamination, distorted stitching, and damage where the fabric folds around hardware.
Sun fading on a Las Vegas car parked outdoors is a reason to assess condition, not a reliable measure of strength. Dog tooth marks can extend beyond the visibly damaged area. Color and feel cannot confirm that webbing is sound.
- Record the original configuration: Photograph the routing, labels, attachment points, and seating position before qualified removal.
- Match the assembly: Confirm that replacement webbing suits the original retractor, buckle, guides, anchors, and attachment design.
- Preserve identification correctly: Retain original manufacturer tags when feasible, but do not treat a saved tag as proof that a rebuilt assembly is certified.
- Check eligibility before installation: Resolve applicable recalls and manufacturer replacement requirements before returning the belt to the vehicle.
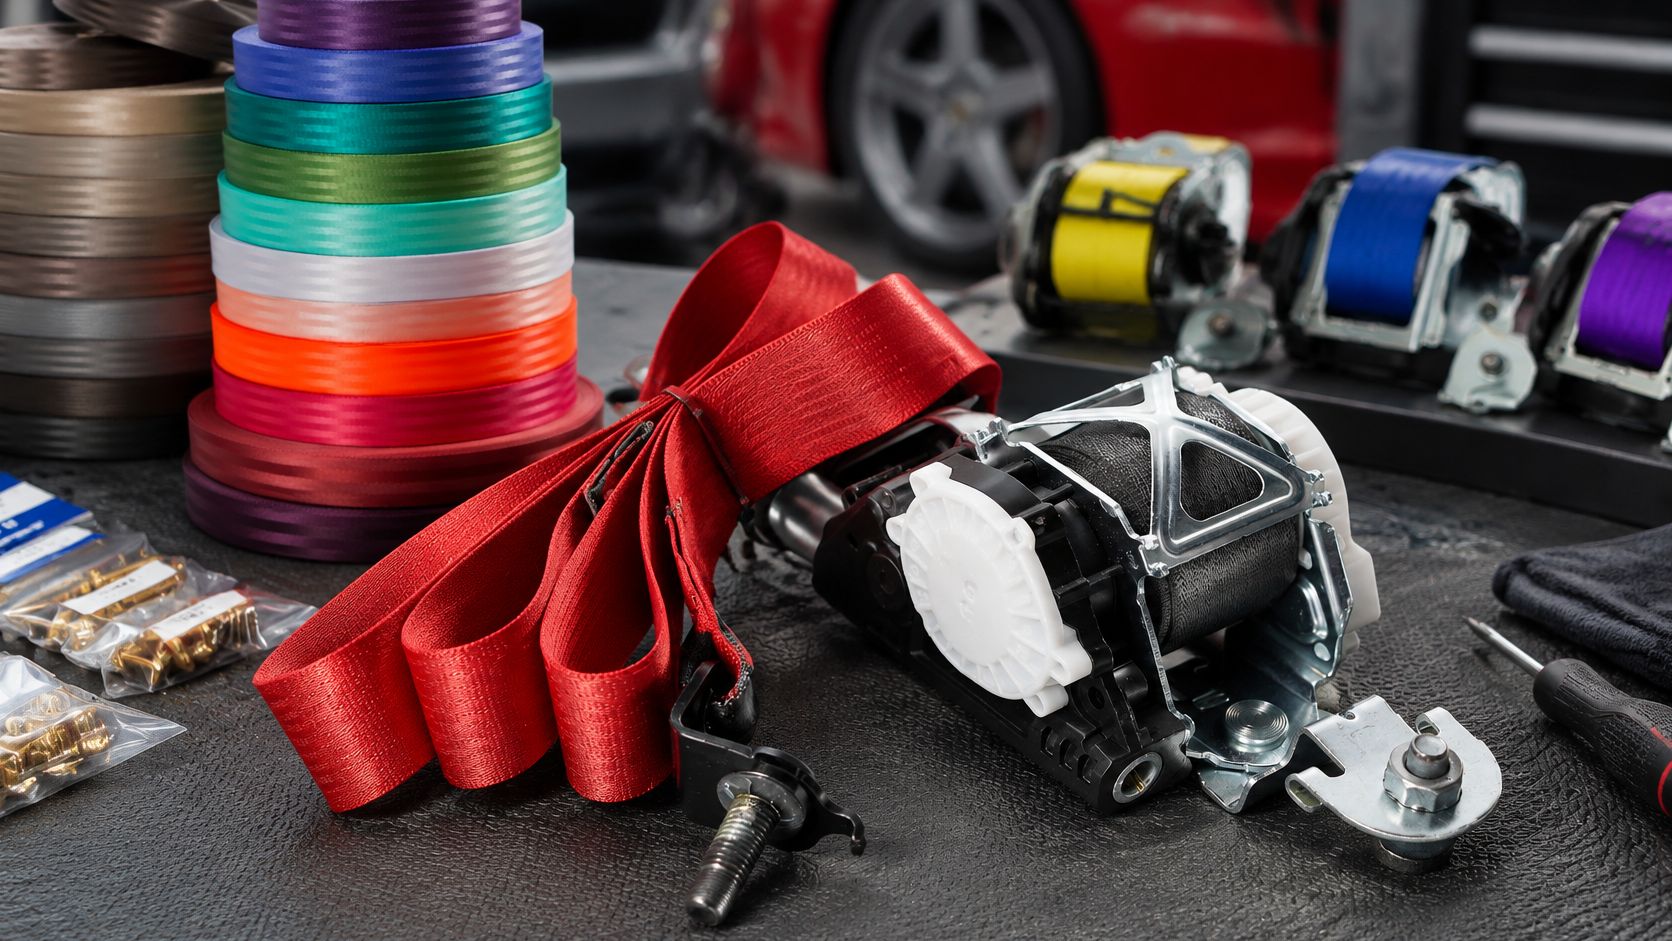
A Seat Belt ReWebbing Service - Any Custom Color replaces the fabric rather than locally patching it. The image shows the service.
Choose color after confirming suitability
Factory-matched and custom colors are finish choices, not performance specifications. For a classic interior, preserving the original appearance may matter, but it does not justify reusing damaged fabric.
A matching color is useful. Correct material, attachment construction, and compatibility are essential.
After installation, confirm that the belt follows its proper route and operates without twists or trim interference. A neat interior is a finishing detail, not proof the restraint is ready for a crash.
How to Ship a Seat Belt From Las Vegas
Ship only after recall eligibility and the manufacturer's repair requirements have been resolved. Pretensioners are pyrotechnic devices, so confirm the carrier's acceptance, packaging, marking, and transport requirements before preparing a parcel. Ordinary cushioning alone doesn't establish that a shipment is compliant.
Prepare the part and the paperwork
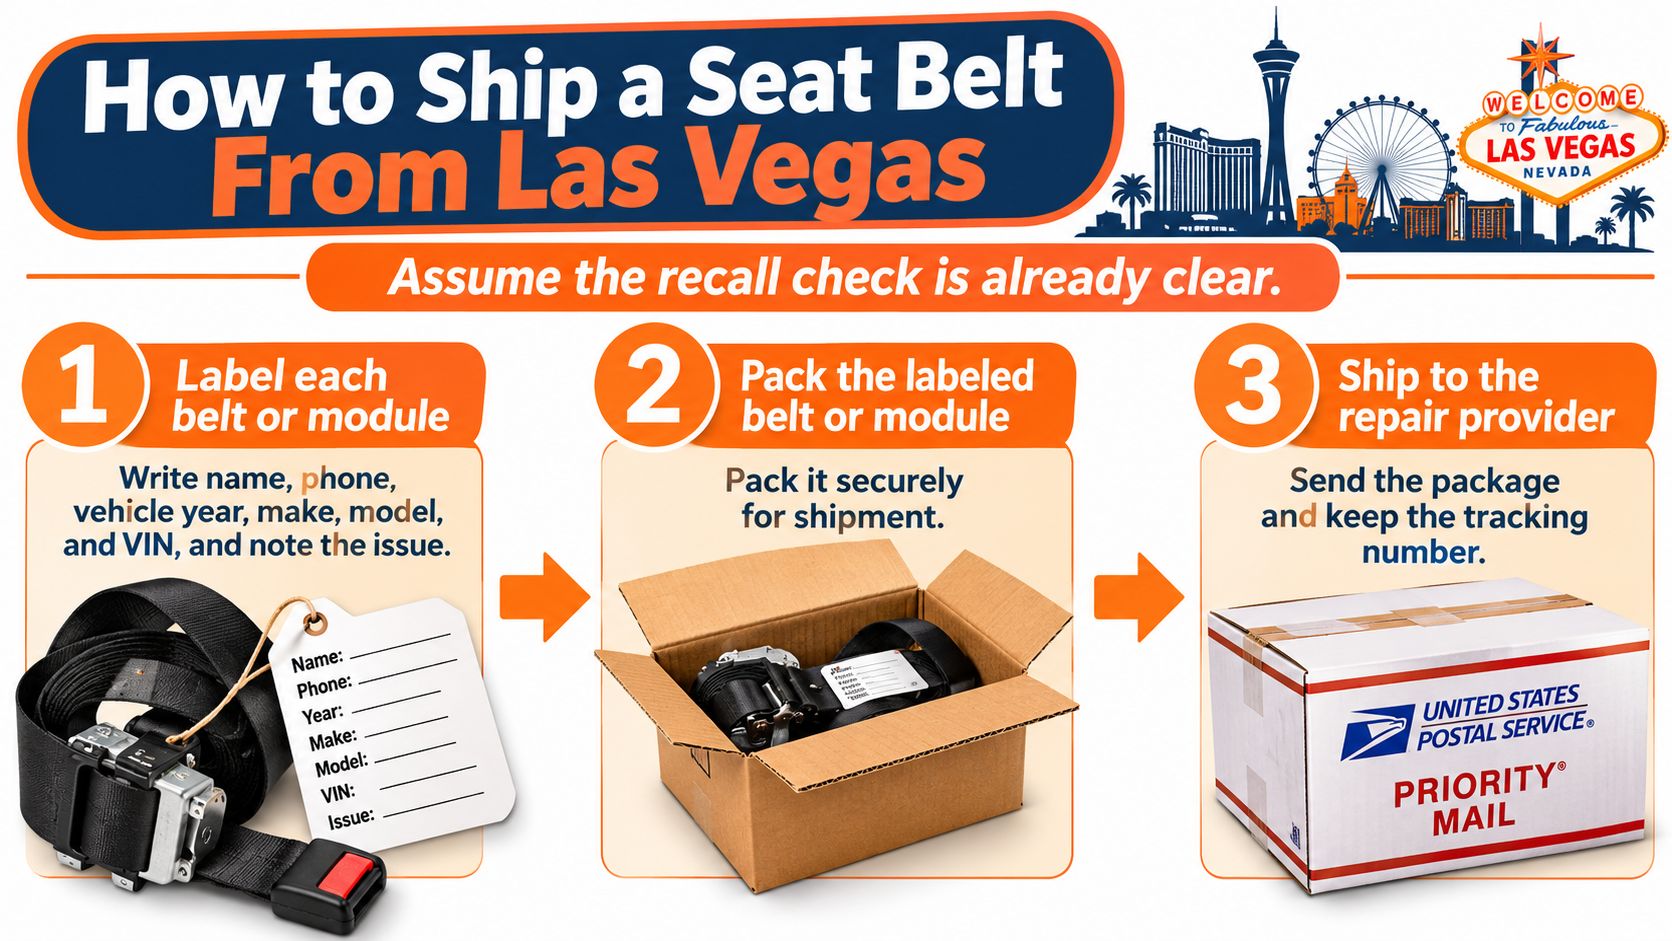
- Label each component. Include your name, phone number, vehicle year, make, model, VIN, seating position, and symptom. A label such as driver front, locked after collision is more useful than belt repair, particularly when several assemblies arrive together.
- Photograph identification and connectors. Have the removing technician record the part label and connector configuration before disconnection. Those photographs help resolve stage-identification questions without relying on memory or mixing up similar-looking assemblies.
- Use qualified removal and the factory procedure. Follow the manufacturer's battery isolation, waiting-period, trim-removal, and SRS instructions. Don't cut the webbing to get the assembly out, probe deployment connectors, or improvise around a difficult mounting point.
- Keep associated items identified. Bag permitted loose hardware separately and label it to the correct seating position. Protect connectors and leads so they don't take the weight of the assembly or become trapped against mounting brackets.
- Confirm transport compliance, then protect the assembly. Follow the carrier's instructions for the specific pretensioner. Secure the part against movement and crushing, and protect it from impact and excessive heat; don't assume a standard consumer shipping label is sufficient.
- Address the shipment correctly. Send accepted, properly prepared parts to Seat Belt Repair, 40 Main St., Westfield, MA 01085. Include the identification sheet inside the package so an exterior label isn't the only connection to your order.
- Keep tracking and distinguish repair from transit. Our bench turnaround is 24 hours after receipt. Outbound travel, return travel, carrier interruptions, and your installer's schedule are separate, so don't promise a vehicle handover based only on bench time.
- Arrange local installation before the part returns. We don't provide installation. Book a Las Vegas body shop or qualified mechanic who can follow the vehicle's procedure and complete the necessary vehicle-level checks.
This visual checklist helps keep the identification and shipping paperwork together.
Resolve questions before closing the box
Email info@seatbeltrepair.com with clear label and connector photographs if identification is unclear. Our pretensioner repair guide can help you prepare questions, but it isn't a substitute for model-specific removal instructions.
For a classic-car or custom-color shipment, include a written color preference or swatch request. Keep that note with the relevant assembly so the intended finish doesn't get separated from the part.
Las Vegas Cars That Need This Repair
A commuter sedan already at the body shop
Say a sedan is rear-ended on US-95 and arrives at a Las Vegas collision shop with a locked driver's belt and an illuminated airbag lamp. The body shop can investigate the restraint damage while planning the structural and cosmetic repairs.
If the vehicle's procedures permit component service, the removed parts can travel while other authorized work continues. That coordination can prevent the restraint job from being overlooked until the paint is finished. It doesn't make the car ready for delivery when the parcel comes back.
An auction SUV with mixed restraint damage
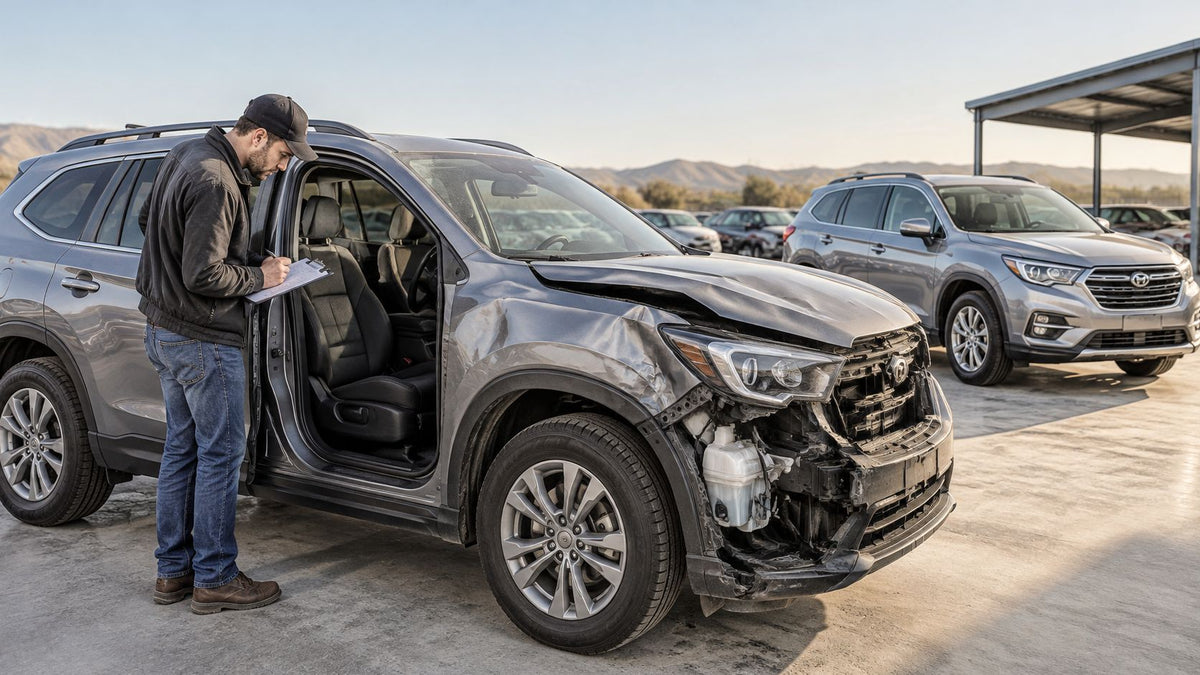
Consider a hypothetical insurance-auction SUV with deployed front pretensioners and frayed rear webbing. The shop needs an itemized restraint plan rather than a blanket instruction to reset everything.
One assembly may need replacement under the manufacturer's procedure, another may be eligible for component service, and damaged fabric needs its own assessment. The rebuilder should document occupied seating positions when known, inspect attachment areas, and preserve fault information before authorizing work. Missing crash history calls for investigation, not an assumption that unmentioned components survived.
A daily driver or classic with damaged fabric
A car with dog-chewed or desert-faded webbing and no reported crash presents a different question. The technician should assess the material and mechanism without assuming that a pretensioner has fired.
A suitable rewebbing route addresses the fabric condition and intended interior finish. It shouldn't be sold as an electronic repair when there's no established electronic fault.
The installer owns the vehicle-level handoff
A dark airbag light isn't proof of crashworthiness. Volkswagen and Audi safety instructions published through NHTSA warn against disassembling or repairing pretensioners, using test lights, and exposing the components to impacts or excessive heat. Where those instructions govern the vehicle, they take precedence over a general offer of bench repair.
A scan can identify electronic faults, but it can't verify anchor integrity, correct torque, untwisted routing, or every physical condition of a seat-occupancy system. Hybrid and electric vehicles can also require manufacturer-specific high-voltage precautions.
The local installer's documented handoff should include:
- Identity: Match the VIN application, part number, and seating position.
- Installation: Follow factory routing, fastening, torque, and connection procedures, including secure mounting before reconnection where specified.
- Diagnosis: Scan the complete SRS system and investigate remaining faults.
- Indicator behavior: Confirm the normal startup lamp check rather than merely observing that the lamp stays dark.
- Release decision: Stop if a fault returns or a required inspection remains incomplete.
Component service ends at the part. Vehicle release requires the complete repair to be checked.
Send the Belt After the Recall Check
If the VIN has an open restraint recall, book the dealer remedy; if it doesn't, establish whether the manufacturer permits component service before shipping. That decision is more useful than choosing the cheapest advertised reset and discovering later that the assembly had to be replaced.
Seat Belt Repair, a Safety Restore subsidiary in business since 2013, provides mail-in seat belt repair, airbag-module service, and webbing replacement, including custom colors. Service starts from $64.97, uses genuine OEM components for applicable repairs, and carries a Lifetime Warranty. If an issue remains after repair, we'll continue helping until the repaired belt functions correctly.
Authorize a defined scope
For a locked post-collision belt, send the part identification and diagnosis rather than ordering by symptom alone. For damaged fabric, specify whether you want the original appearance retained or a different color. Neither request should override a factory replacement requirement.
Before sending anything, make sure the written plan answers these questions:
- What is being serviced? Identify the assembly and the established fault.
- What is excluded? Account for installation, any required programming, and vehicle diagnosis.
- Who releases the car? Name the local shop responsible for final inspection and SRS verification.
Calls go to 413-707-4984, texts to 413-564-1242, and email to info@seatbeltrepair.com. Have the VIN, seating position, part-label photograph, and fault description ready so the conversation starts with the correct component.
Don't drive with an unusable driver's restraint, and don't occupy a seat with a defective belt. Arrange appropriate transportation while the vehicle's condition is assessed. The practical sequence is recall check, manufacturer-approved repair decision, shipment to Westfield, then local installation and SRS verification before returning the car to service.
Seat Belt Repair offers national mail-in component service for Las Vegas owners and shops handling collision-damaged belts, SRS modules, and worn webbing. Visit Seat Belt Repair to discuss your part after checking recall coverage, then coordinate installation and final vehicle checks with your local technician.

Оставить комментарий
Этот веб-сайт защищается hCaptcha. Применяются Политика конфиденциальности и Условия использования hCaptcha.