
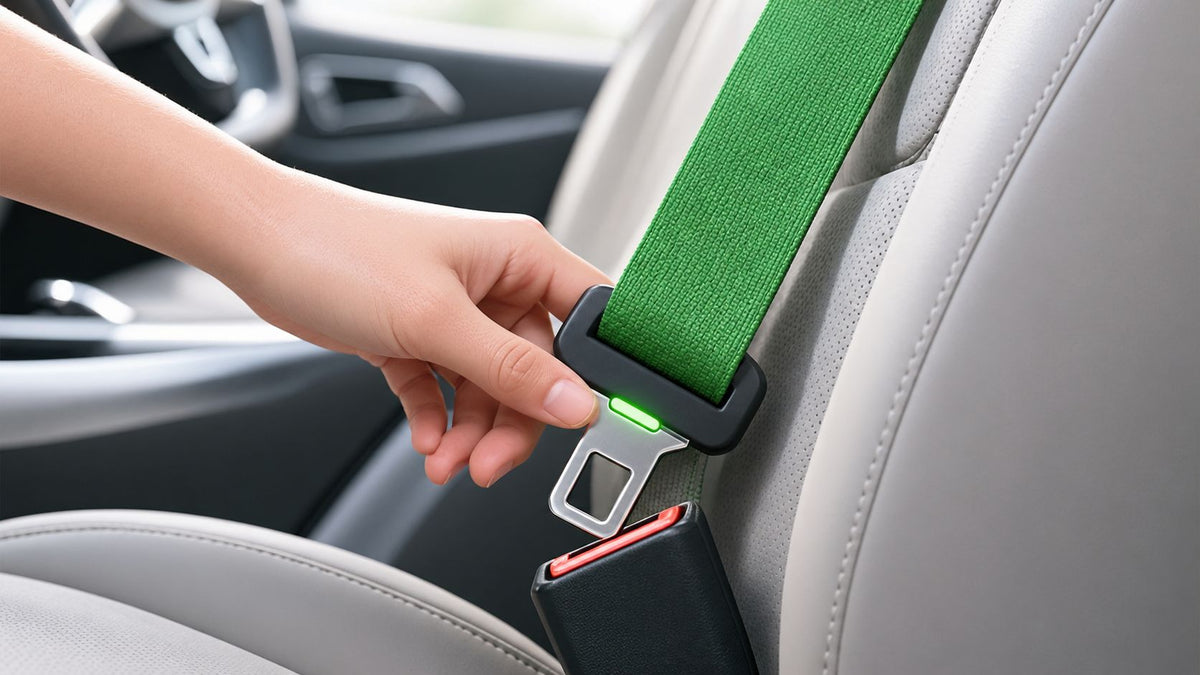
Most advice about a green seat belt starts in the wrong place. People jump straight to color matching, but green can mean a status light, an original factory webbing color, or a custom replacement choice, and each one has different safety and repair implications. If you mix those meanings together, you can end up buying the wrong part, missing a crash-damaged pretensioner, or assuming a belt is fine just because it looks right.
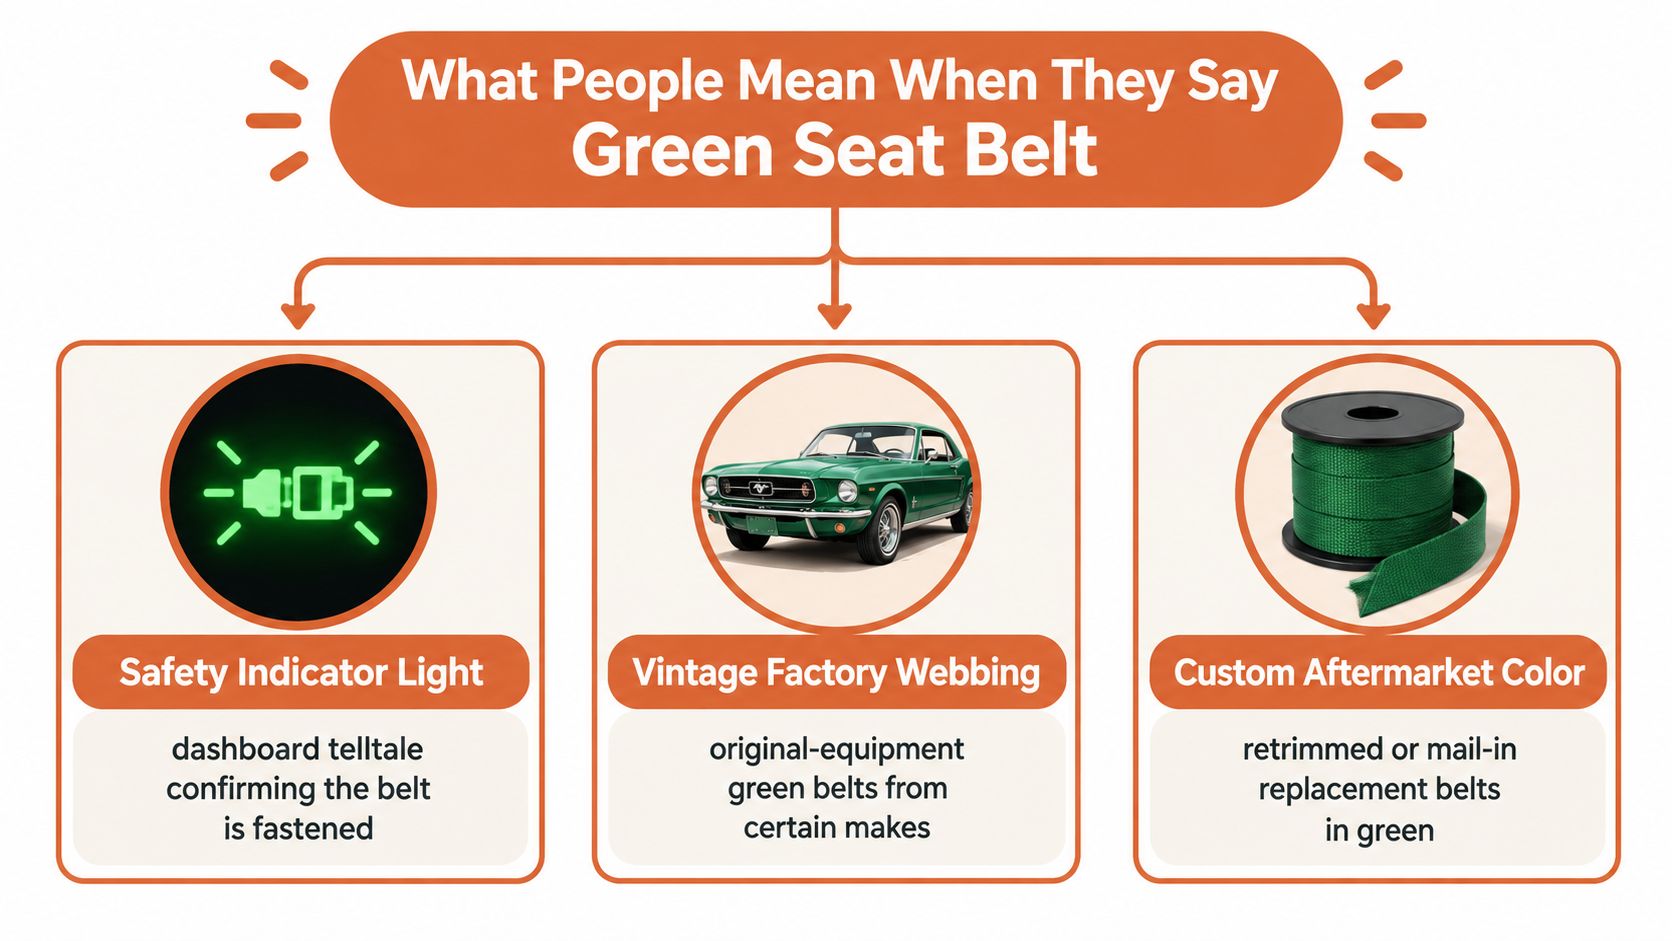
Table of Contents
- What People Mean When They Say Green Seat Belt
- The Green Light on Your Buckle and What It Really Signals
- Factory Green Webbing Versus Custom Green Options
- FMVSS No 209 and What Every Green Belt Must Actually Meet
- Mail-In Webbing Replacement and Pretensioner Repair
- Green Webbing After a Crash What Repairs and What Does Not
- Dealer Replacement Versus Mail-In Repair Versus DIY
- Practical Rules for Choosing and Verifying Any Green Seat Belt
What People Mean When They Say Green Seat Belt
The phrase green seat belt usually points to one of three different things. It can mean a status indicator, the green light or icon that tells you the belt is latched. It can mean factory green webbing, where the car left the plant with green material or a green-tinted restraint. It can also mean a custom green replacement, chosen for a restored cabin, a fleet, or a show build.
That distinction matters because each version answers a different question. A green indicator tells you the occupant-facing system sees a valid belt condition. Factory green webbing is about originality and matching the vehicle's build spec. Custom green webbing is about appearance, and it still has to meet the same restraint requirements as any other belt.
A driver asking about the light on the buckle wants to know whether the belt is fastened. A restorer asking about green webbing wants authenticity. A repair shop asking about replacement wants a part that fits, tests correctly, and survives installation.
Practical rule: Do not buy a belt until you know which version of “green” you are actually dealing with.
For owners comparing used parts, recycled interiors, and repaired assemblies, sustainable car parts from Scrap A Vehicle is one reference point in the wider reuse conversation. If you are trying to restore a specific interior, the exact shade and the exact assembly details both matter.
For custom replacement work, the service flow is often closer to rewebbing than buying a whole new assembly. A specialist option such as Seat Belt Repair's custom color rewebbing service shows how the industry treats color as one variable inside a larger safety part, not as the whole story.
The Green Light on Your Buckle and What It Really Signals
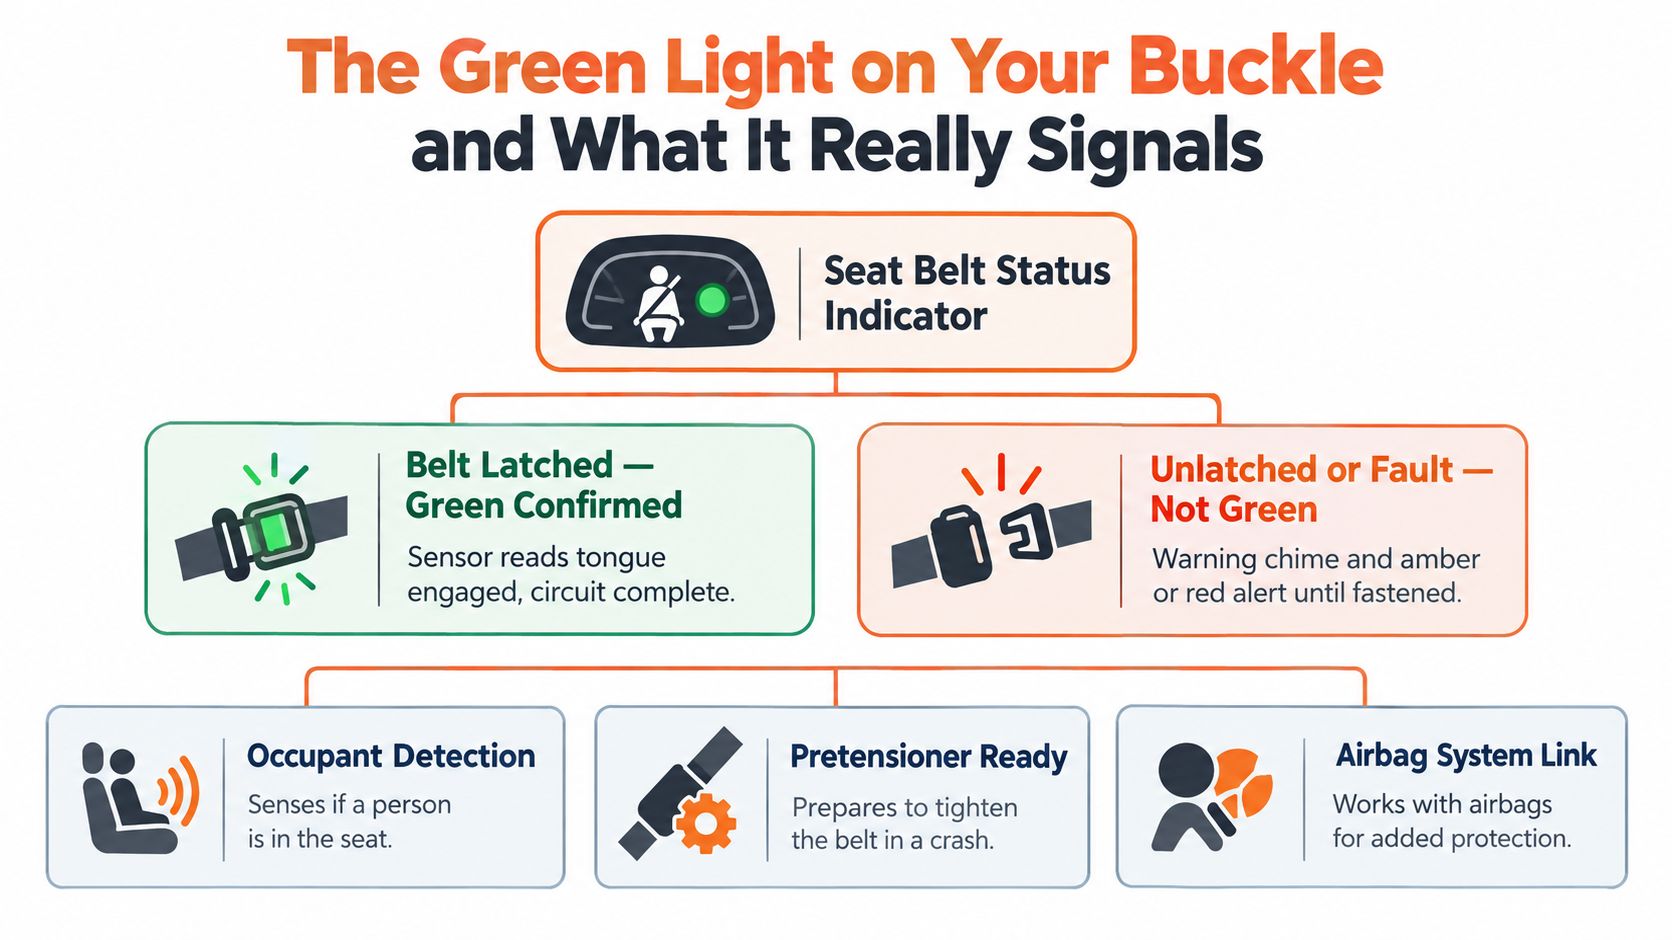
The green light is the easiest version to misunderstand because it feels like a pass/fail judgment on the whole belt. In vehicle human-machine interfaces, green commonly means the belt is correctly fastened, red usually means the belt is unfastened or there's a fault, and gray may indicate an empty seating position. That color logic appears in a U.S. National Highway Traffic Safety Administration regulatory submission about rear-seat belt reminders, where the point was clarity, not styling.
The reason green became the “good” color is simple. Drivers need a fast visual cue, and a clear cue supports the larger safety habit of buckling up. The broader safety record is strong, belts are consistently identified as effective crash countermeasures, and U.S. seat-belt use rose from about 11% to 14% in the late 1970s and early 1980s to about 92% of front-seat occupants by 2022, after mandatory-use laws, reminders, and enforcement expanded. That shift is documented in the NHTSA submission on restraint use and belt reminders (NHTSA regulatory submission).
The green signal is a confirmation, not a repair certificate.
What the indicator does not prove
A green buckle light does not tell you the webbing survived a crash. It does not prove the pretensioner hasn't fired, the retractor hasn't locked, or the SRS module has been cleared and revalidated. It only says the occupant-facing logic is seeing an acceptable belt condition at that moment.
That's why a green indicator after an accident can be misleading. You can have a belt that reads as “fine” on the dash and still have hidden problems in the retractor, pretensioner, or crash-memory system. The indicator is part of the safety system, not a substitute for inspection.
For context, contemporary safety summaries report that belts reduce the risk of death by about 45% and the risk of injury by about 50% for relevant vehicle occupants, and a widely cited U.S. estimate attributes roughly 15,000 lives saved annually to seat-belt use (AAA seat-belt history timeline). Those benefits come from use and proper function, not from the color of the indicator.
Factory Green Webbing Versus Custom Green Options
Factory green webbing and custom green webbing solve different problems. Factory color is about returning a car to its original appearance. Custom green is about choosing a color that was not part of the original build.
The distinction matters because the restraint still has to do the same job. A belt is not trim; it is load-bearing safety hardware. The color can change, but the webbing, stitching, hardware, and fit must still match the vehicle's restraint system.
Three practical use cases
- Vintage authenticity: Restorations often need green webbing because that is what the car had from new. The color has to align with the surviving interior, and the belt has to preserve the original restraint geometry.
- OEM color-matched replacement: A belt can be worn, stained, frayed, or dog-chewed and still need to look original after repair. In that case, the color match matters to the owner, but the construction details matter more.
- Custom interior choice: Fleet branding, show cars, and bespoke cabins often use green because it coordinates with the cabin or stands out on purpose. That choice works only if the completed assembly still meets the same performance expectations as any other restraint.
The practical difference is in the build, not the shade. Webbing width, weave, stitching, and hardware compatibility all have to line up with the vehicle. If they do not, a perfect color match still leaves you with the wrong belt.
For owners sourcing parts through reuse, a resource like sustainable car parts from Scrap A Vehicle can help frame the conversation around reuse, but it does not replace verification of the restraint specs.
If you need a color-specific reweb, the service model matters too. A dedicated option such as Seat Belt Repair's rewebbing service shows the right approach, because color is part of the job, not the whole job.
FMVSS No 209 and What Every Green Belt Must Actually Meet
A green belt passes inspection only if the entire restraint assembly meets the standard, not just the color or the visible stitching. For a Type 2 restraint, FMVSS No. 209 requires a minimum breaking strength of 22,241 N (5,000 lbf) for the pelvic portion and 17,793 N (4,000 lbf) for the upper-torso portion, and the webbing is generally required to be at least 46 mm wide (FMVSS No. 209). Green webbing does not change those requirements, because color does not carry crash load.
Green belt checklist for shops and owners
| Check | Specification | Why it matters |
|---|---|---|
| Webbing width | Generally at least 46 mm | Narrow or incorrect webbing can change fit and compliance |
| Pelvic strength | 22,241 N (5,000 lbf) minimum | Helps the lap portion hold during a crash load |
| Upper-torso strength | 17,793 N (4,000 lbf) minimum | Supports shoulder restraint performance |
| Stitching and seams | Must match the assembly's load path | Bad stitching can fail before the webbing does |
| Hardware compatibility | Must fit the existing retractor and pretensioner | Mismatched hardware can create hidden faults |
A shop needs evidence, not a color sample. Ask for the supplier's certification or destructive-test data, plus the lot-specific breaking-strength certificate and the webbing width measurement, not just a photo of green webbing. A belt can look correct and still be built wrong. A non-green belt that meets FMVSS is safer than a green one that does not.
Practical rule: Match the belt to the restraint system, not the interior swatch.
That rule matters because the replacement material has to preserve the original load path. If the weave, elongation, or attachment details change, the belt may absorb crash energy differently and load the occupant in a different way. That is why the question is never just whether the shade looks right.
For the post-repair verification steps that confirm a belt still meets FMVSS No. 209, see the functional testing requirements overview.
Mail-In Webbing Replacement and Pretensioner Repair
A damaged green belt does not always require a full assembly replacement. If the webbing is cut, faded, frayed, or stained, the belt can often be rewebbed while the original hardware, labels, and vehicle fit stay in place. If the belt is locked, deployed, or slow to retract, the pretensioner side of the assembly may also need repair.
How the repair flow usually works
- Remove the assembly. The owner or shop unbolts the belt and packs it safely.
- Ship it to a specialist. The unit is checked for webbing condition, pretensioner state, and hardware wear.
- Replace the webbing. The old material is removed, and new green webbing is stitched in with the correct pattern.
- Repair the pretensioner if needed. The mechanism and gas cartridge are addressed with OEM components on compatible units.
- Test and return. The rebuilt assembly is function-tested before it ships back to the installer.
The mechanism matters because the pretensioner changes how the belt reacts in the first moment of a crash. A clear explanation of how seat belt pre-tensioners work helps separate a cosmetic problem from a restraint problem. The webbing may look normal while the restraint has already lost part of its crash-management function.
Seat Belt Repair describes a mail-in model that includes pretensioner repair, webbing replacement, and SRS module reset work, with OEM parts and functional testing before shipment. The company says it has serviced over 250,000 customers and more than one million parts since 2013, with a 24-hour repair turnaround after items are received. Those details show the difference between a cosmetic swap and a restored restraint workflow.
For customers sending in a part after an accident, the post-accident mail-in seat belt repair service is the type of service intended for that condition. Installation still happens in the vehicle after the rebuilt unit comes back.
Green Webbing After a Crash What Repairs and What Does Not
After a collision, the belt can have several separate problems at once. The pretensioner may have deployed, the retractor may be locked, the webbing may be stretched or cut, the stitching may be compromised, and the SRS module may still hold crash data. Clearing a warning light alone doesn't tell you any of that is fixed.
That distinction matters because hidden damage is common in salvage and rebuilt vehicles. A green belt can look clean and intact while the pretensioner has already done its job once. It can also look repaired on the outside while the module still stores hard codes or the retractor remains out of spec.
NHTSA recorded 22,713 passenger-vehicle occupant deaths in 2024, and 48% of fatalities with known restraint use were unrestrained, which is why post-crash verification has to be taken seriously. NHTSA's 2025 estimate of front-seat belt use was 91.3%, unchanged from 91.2% in 2024 (NHTSA seat belts).
How to think about post-crash recovery
- Check the connector count. It helps identify belt stage and the likely repair path.
- Inspect the pretensioner. If it fired, it may need replacement rather than a cosmetic reset.
- Examine the webbing and stitching. Damage here changes how the belt behaves under load.
- Review the SRS module. Crash data can stay stored after the belt looks normal.
- Replace what's damaged. That may mean webbing only, pretensioner repair, or a full assembly.
A repaired green belt is fine when the labels, stitching pattern, and function are restored. A green belt that only hides an unreplaced pretensioner is not. Color never fixes crash history.
Dealer Replacement Versus Mail-In Repair Versus DIY
Dealership replacement is the most straightforward path when the whole assembly is damaged, but it's also the least flexible. You usually get a complete OEM assembly, programming, diagnostics, and labor, which is clean but often overkill if the issue is mainly webbing or pretensioner recovery.
Mail-in repair targets the damaged parts more directly. The assembly is removed, rebuilt with OEM-aligned components, tested, and returned for reinstall. That model is especially useful when the goal is to preserve the original color, match a custom green interior, or restore a salvage vehicle without buying an entire new unit.
DIY fits a narrower lane. If the belt is not crash-damaged and the job is purely cosmetic, an experienced owner may handle a webbing swap on a vintage interior. But once pretensioners, SRS faults, or post-collision conditions enter the picture, DIY quickly becomes the wrong tool.
| Option | Best for | Main tradeoff |
|---|---|---|
| Dealer replacement | Full assembly damage | Cost and downtime |
| Mail-in repair | Webbing damage, pretensioner repair, color match | Requires removal and reinstall by the owner or shop |
| DIY webbing swap | Non-crash cosmetic restoration | Easy to get wrong if specs, labels, or stitching are missed |
The decision rule is simple. If the issue is appearance only, a webbing-only solution may be enough. If the issue involves crash history, retractor lockup, or pretensioner deployment, the whole restraint system has to be evaluated as a unit.
Practical Rules for Choosing and Verifying Any Green Seat Belt
Start with the meaning of green. If it's a status light, verify the buckle system and the rest of the restraint electronics. If it's factory webbing, match the original construction as closely as possible. If it's custom color, treat color as the last decision, not the first one.
A short verification routine
- Inspect the webbing closely. Look for fraying, fading, chemical staining, cuts, and worn labels.
- Measure the material. Width and weave have to fit the restraint standard, not just the trim.
- Check the pretensioner separately. Don't assume a good-looking belt is mechanically sound.
- Confirm the SRS status. If the vehicle has crash history, stored codes matter.
- Demand documentation. Supplier certification or test data is part of the job.
- Verify installation. A correct belt still has to be bolted back in properly.
A green belt can also help with visibility in dark interiors. That's plausible, especially for fleets, ride services, and owners who want a quick visual check. But no national evidence shows green is safer than black, gray, or any other color, and the safety benefit still comes from correct use and verified restraint performance.
Practical rule: Use green if you want it, but verify the assembly as if the color weren't there.
That approach keeps the conversation grounded. A green seat belt is fine when the webbing, hardware, pretensioner, and SRS work together the way they should. It's unsafe when the color hides unresolved crash damage or non-compliant material.
If you're dealing with a belt that's frayed, deployed, locked, or just needs to match a green interior, Seat Belt Repair handles webbing replacement, pretensioner repair, and SRS module reset with OEM-aligned processes. Visit Seat Belt Repair to review the service options and choose the right path for your belt, whether the issue is cosmetic, post-crash, or both.

Оставить комментарий
Этот веб-сайт защищается hCaptcha. Применяются Политика конфиденциальности и Условия использования hCaptcha.