
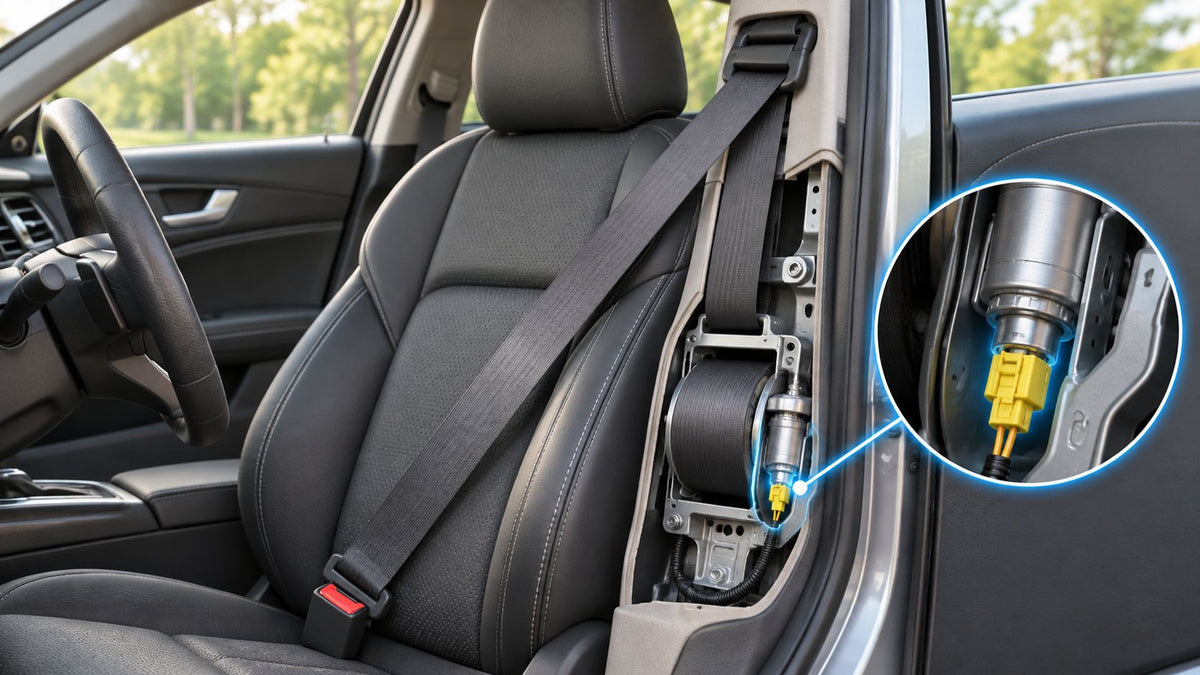
You're looking at an airbag warning light, and the scan report names a part you've probably never ordered before: seat belt tensioner igniter driver side N153. Maybe the belt still pulls out normally. Maybe you're inspecting a salvage vehicle, and the seller says the light only needs a reset.
Neither observation settles whether the driver's restraint is ready for service. The useful starting point is to separate the component identifier, the electrical fault, the belt's physical condition, and its recall history before deciding what to repair.
Table of Contents
- What N153 Means on a Scan Report
- Where the Igniter Fits in a Crash
- Fault Codes and Symptoms Tied to N153
- Recall and Crash History Checks Before Reuse
- Diagnose N153 and Confirm the Fault Before Any Part Order
- Repair Options for a Faulty or Deployed Driver Belt
What N153 Means on a Scan Report
N153 is Volkswagen Group's diagnostic designation for the driver-side seat-belt tensioner igniter, the electrically triggered part of a pyrotechnic pretensioner. It isn't a buckle switch, and it doesn't identify the entire seat-belt assembly.
The scan entry commonly appears as DTC 00654, Seat Belt Tensioner Igniter Driver Side (N153). Ross-Tech's diagnostic reference associates it with excessive resistance, a short to positive, or a short to ground, and identifies defective wiring, connectors, or the N153 unit as possible causes.
Think of the identifier as an address. It tells the technician which deployment circuit the restraint controller is reporting, not which replacement part to buy without further checks.
Restraint identifiers for driver and passenger seat belts
The layout below describes the documented dual-pretensioner arrangement, not a universal configuration for every Volkswagen or Audi. Where a location isn't established, use the vehicle-specific component-location diagram rather than assuming symmetry.
| Identifier | Side and role | Location |
|---|---|---|
| N153 | Driver side, first tensioner igniter | Seat-belt retractor assembly in the documented arrangement |
| N297 | Driver side, second tensioner igniter | Belt end fitting in the documented arrangement |
| N154 | Passenger side, first tensioner igniter | Confirm in the passenger-side component-location diagram |
| N298 | Passenger side, second tensioner igniter | Confirm in the passenger-side component-location diagram |
| G551 | Driver-side belt-force limiter | Confirm in the driver-side component-location diagram |
| G552 | Passenger-side belt-force limiter | Confirm in the passenger-side component-location diagram |
A driver-side belt can therefore have another igniter besides N153. Ordering a component because its description includes “driver side” isn't precise enough. Match the identifier on the scan report to the wiring diagram, then match that circuit to the physical assembly.
Safety warning: Ross-Tech warns that clearing a short-to-positive or short-to-ground fault can cause the seat-belt tensioner to deploy. Don't treat this code as a routine warning-light reset.
Before arranging diagnosis, save the complete fault wording, including its electrical condition. Record the vehicle's year, make, model, and VIN as well. A cropped screenshot showing only N153 leaves out information the technician needs to choose the correct test procedure.
Where the Igniter Fits in a Crash
A pretensioner works like a fast cinch. During normal driving, the belt allows ordinary movement. During a qualifying crash, the restraint system can tighten the belt to reduce slack before the occupant loads the webbing.
That tightening function is different from the belt's familiar locking action. A retractor that locks when checked mechanically hasn't demonstrated that its pyrotechnic tightening mechanism will work.
From crash detection to controlled restraint
The basic sequence is easier to understand as separate actions:
- The controller evaluates the impact. Crash sensors provide information to the restraint-control module, which determines whether deployment conditions are met.
- The module commands the applicable igniter. For the retractor arrangement discussed here, N153 initiates the driver-side retractor pretensioner.
- The mechanism takes up slack. The igniter starts a pyrotechnic reaction that drives the pretensioner mechanism, drawing the belt snugly against the occupant.
- The force limiter manages belt loading. Its job is different from tightening. It allows controlled webbing payout as the occupant loads the belt.
This is a functional explanation, not a universal firing timetable. The vehicle's restraint strategy determines which devices activate and under what conditions.
Volkswagen's technical bulletin for the 2012–2013 Passat and Tiguan describes two tensioner igniters and one belt-force limiter at each front seating position, locating driver-side N153 in the retractor and N297 in the belt end fitting. That arrangement explains why a fault naming one circuit doesn't establish that every tensioner on the same side has failed.
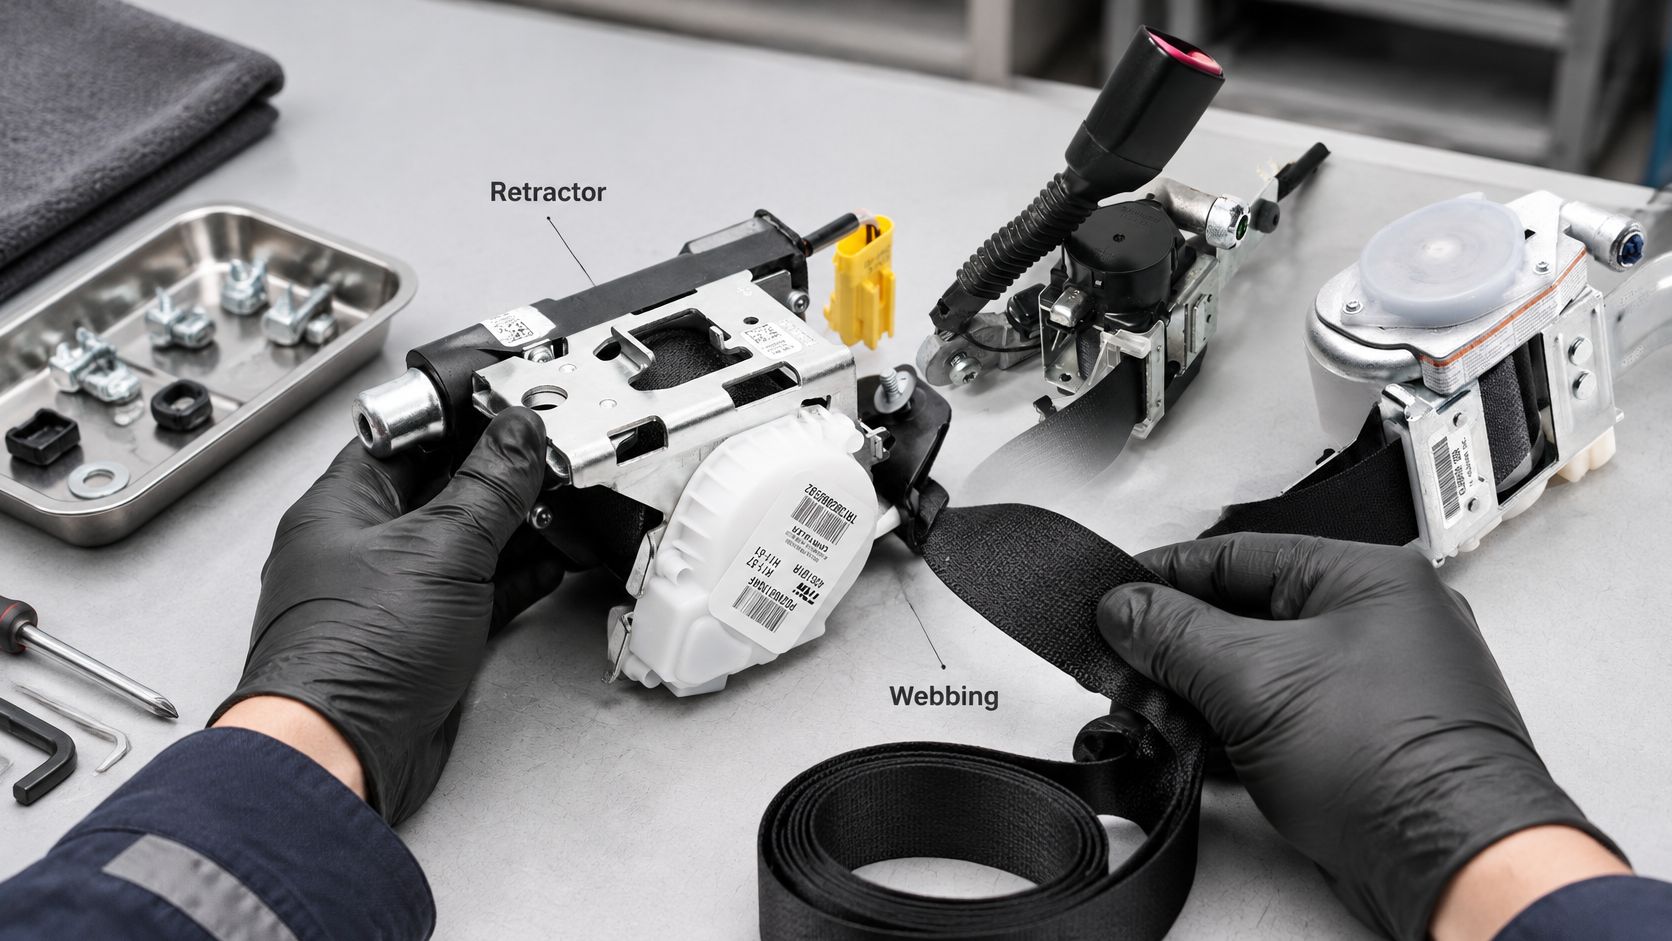
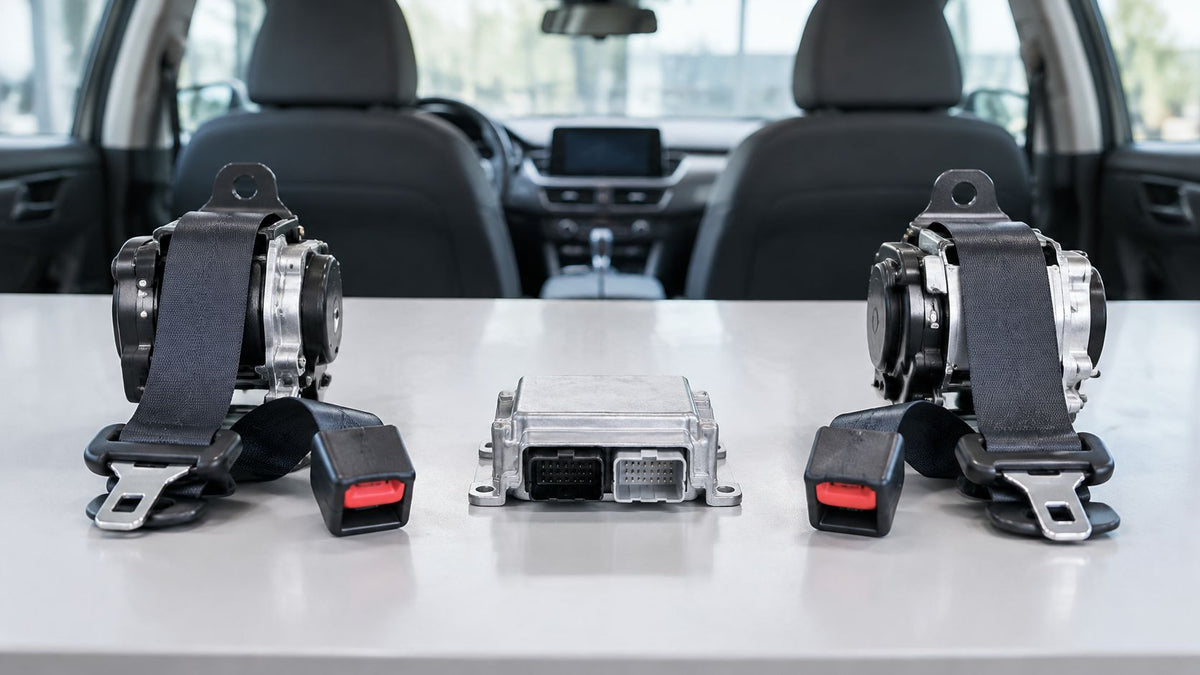
The retractor and webbing are parts of a larger restraint assembly, as this workshop view illustrates.
Stage identification isn't fault identification
For service identification, we classify Single Stage as one electrical plug, Dual Stage as two plugs, and Triple Stage as three plugs. Count the relevant pretensioner connections, not unrelated wiring for nearby seat equipment.
Plug count helps identify the assembly, but the wiring diagram establishes which connection belongs to the reported circuit. Our explanation of how a seat-belt pretensioner works provides additional background on the mechanism.
An activated pyrotechnic device doesn't return to an unused state when the belt is pulled or the battery is disconnected. It must never be handled like a reusable electrical switch.
Fault Codes and Symptoms Tied to N153
An illuminated SRS or airbag warning light means the restraint controller has detected a fault affecting system readiness. The code's electrical description matters as much as the component name, because different descriptions call for different checks.
DTC 00654 conditions and first checks
The following are diagnostic directions for a qualified technician using the vehicle's repair procedure, not instructions to probe an igniter with a household meter.
| Condition | Likely cause | First check |
|---|---|---|
| Resistance too high | Wiring or connector fault between the restraint module and pretensioner, or faulty N153 unit | Inspect connectors and evaluate circuit values using the manufacturer-approved procedure |
| Short to positive | Harness damage or contact with a live circuit | Inspect for chafing and pin damage after prescribed SRS isolation; don't clear the code |
| Short to ground | Damaged wiring or terminal contact to ground | Trace the harness against the wiring diagram after prescribed SRS isolation; don't clear the code |
Ross-Tech's Volkswagen/Audi fault-code guidance identifies wiring, connector, and tensioner faults as diagnostic possibilities; excessive resistance can arise from damaged wiring, poor terminal contact, connector disturbance, or a deployed pretensioner. A fault attributed to N153 isn't proof that the igniter itself is defective.
For example, suppose a connector terminal no longer grips its mating pin properly. The controller can detect an unacceptable circuit condition even though the igniter hasn't deployed. Replacing the belt without correcting the terminal problem leaves the electrical cause in place.
The reverse assumption is just as risky. A technician shouldn't conclude that a post-collision belt needs only connector attention because excessive resistance can have a wiring-related cause.
Read the symptom without overinterpreting it
Different observations answer different questions:
- The warning light is on. The controller has identified a restraint-system problem, but the lamp alone doesn't locate it.
- The belt extends and retracts. The mechanical movement is observable, but that doesn't confirm the deployment circuit is healthy.
- The belt is stuck. Further inspection is necessary to distinguish deployment-related damage from routing, installation, or retractor problems.
- The fault is intermittent. Connection quality or harness movement may be relevant, but the condition still needs diagnosis rather than repeated erasure.
A platform-specific diagram also prevents a common parts mistake: confusing the retractor circuit with a separate end-fitting circuit. A replacement can look appropriate, fit the same side of the vehicle, and still fail to address the circuit named by the controller.
Diagnostic rule: Replace a component because testing identifies it as faulty, not because its name appears in the fault description.
The code provides a starting location for investigation. Harness inspection, approved SRS measuring values, and evaluation of the actual assembly turn that starting point into a diagnosis.
Recall and Crash History Checks Before Reuse
A salvage buyer finds a driver belt with clean webbing and no visible damage. The warning light is off, and a circuit reading appears normal. Neither check reveals whether the belt was involved in a collision or whether a recall remedy is outstanding.
A Rivian safety recall report illustrates why history matters: certain 2022–2025 EDV vehicles were recalled after repeated misuse, including sitting on a buckled belt, could damage the driver-side pretensioner cable. The remedy combined inspection or replacement with an over-the-air misuse-detection update. This is not an N153 recall; it shows that restraint-system concerns can involve physical components as well as electrical faults.
Check the vehicle, not just the loose part
Before returning a belt to service, check its history and condition:
- Recall status. For a U.S. vehicle, enter the VIN in NHTSA's recall lookup and ask the manufacturer's dealer to confirm any applicable restraint-system remedy.
- Crash and deployment history. Review collision records, repair invoices, and available auction photographs. Missing records leave the belt's history unknown; they do not show that it was never deployed.
- Locking and retraction. Have the belt assessed using the manufacturer's procedure with the assembly installed. A sharp pull may reveal a locking issue, but it is not a complete acceptance test.
- Physical damage. Check accessible webbing, guides, end fittings, cables, and mounting points. Twisting, abrasion, displaced hardware, or cable damage needs further investigation.
- Controller status. Check the SRS module for stored faults and deployment information, where available.
The guide to seat-belt locking problems explains why a stuck belt may need more than a quick attempt to free the webbing.
Handle unknown belt history
A clean cover and intact connector cannot establish that a loose belt is suitable for reuse. Ask for the identification label, donor-vehicle information, and records of its condition.
A module reset addresses the controller. The belt and its associated hardware still need a sound basis for return to service. If a recall applies, follow the manufacturer's remedy; a repair, reset, or mechanical check does not replace a required recall inspection or replacement.
Use the video below as supplementary context, not as a substitute for the vehicle-specific service procedure.
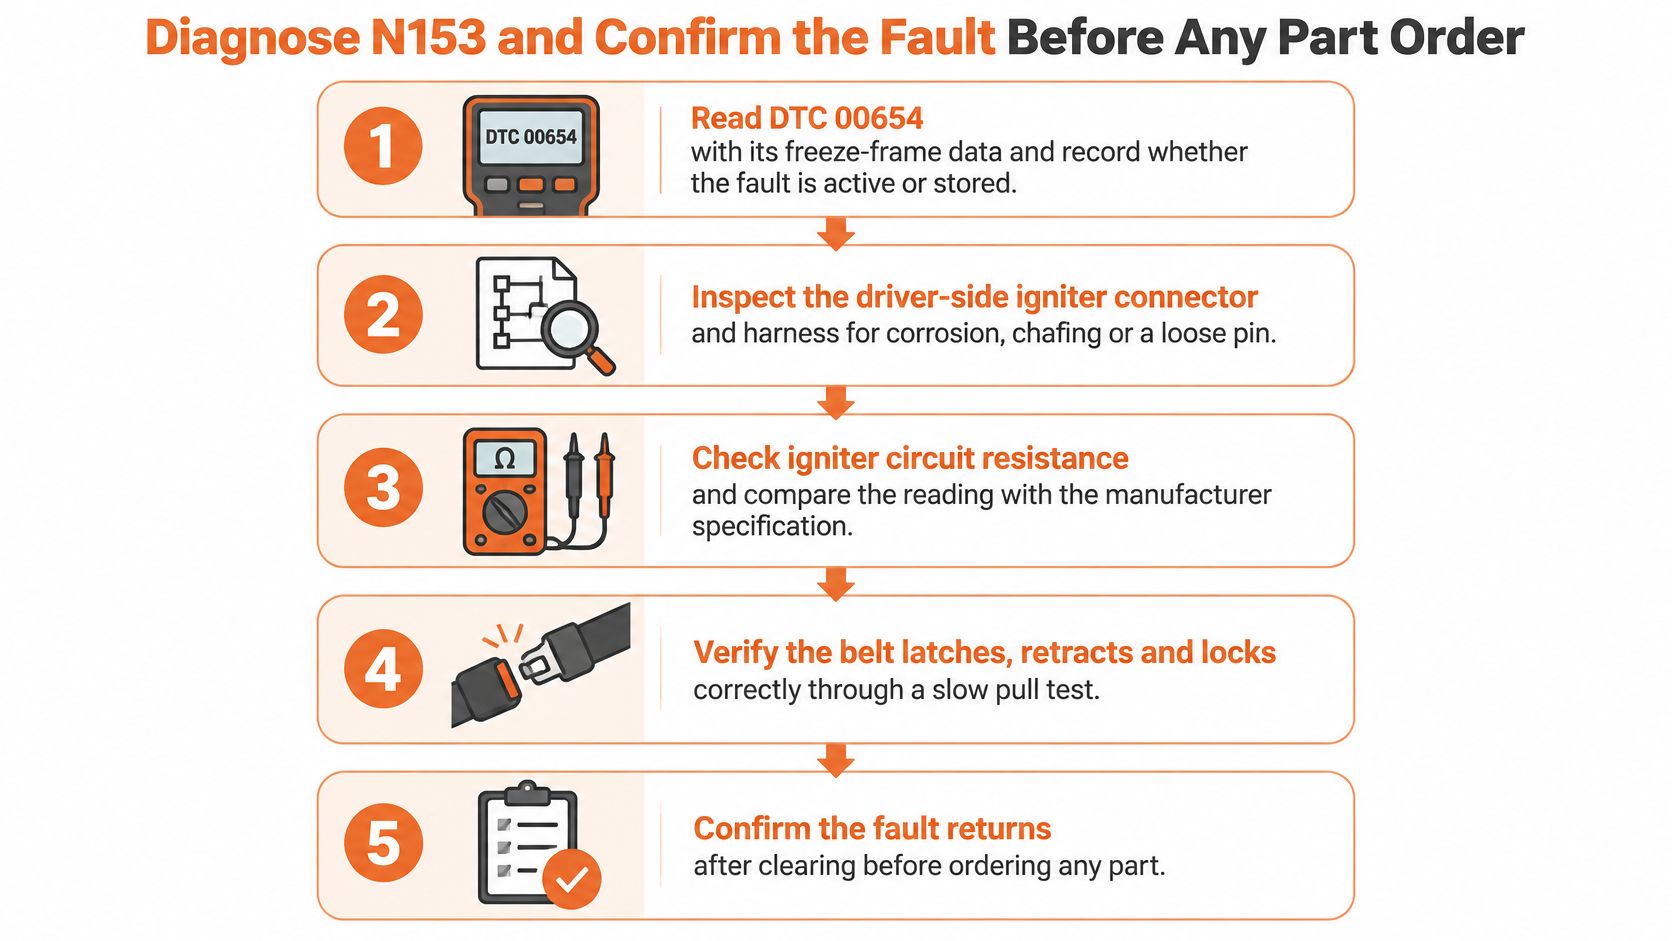
Diagnose N153 and Confirm the Fault Before Any Part Order
An N153 fault code narrows the search to a restraint circuit, but it does not prove the igniter itself has failed. Save the evidence, identify the circuit, and test only as the vehicle's service procedure allows. Physical SRS work belongs with a qualified technician using the correct service information and approved equipment.
The workflow illustration is an overview. Follow the vehicle's service procedure for every diagnostic step.
Preserve evidence and identify the circuit
- Save the complete scan before changing anything. Use a diagnostic tool that can communicate with the restraint controller. Record the full fault description, whether the fault is active or stored, and any available environmental or freeze-frame information. An active fault means the controller currently detects a condition. A stored fault still needs an explanation.
- Use the VIN-appropriate wiring diagram to identify the circuit, connector, and component location. Follow the diagram for the specific vehicle rather than assuming every driver-side pretensioner uses the same deployment circuit.
- Review visible condition and history without disturbing connectors. Note seized webbing, damaged covers, altered mounting hardware, or evidence of prior work. A locked belt calls for investigation. Do not force the mechanism or open its pyrotechnic section.
Isolate safely before hands-on testing
- Follow the manufacturer's SRS deactivation procedure before touching components. This includes the specified battery-disconnection procedure and waiting period. The required interval depends on the vehicle, so use its service information.
- Inspect the harness and connectors along the identified route. Look for chafing against brackets, trapped wiring, corrosion, damaged terminal locks, backed-out pins, and poor contact. Use approved terminal-inspection methods rather than pushing oversized probes into connector cavities.
- Check circuit values only as the repair manual permits. Read supported SRS measuring values through the diagnostic tool and use prescribed test adapters or simulators where specified. Never place a general-purpose ohmmeter, test light, or external voltage source across a pyrotechnic igniter.
Save the scan before power is removed; perform connector inspections or electrical tests only after the required precautions are complete.
Make a repair decision from the findings
- Determine whether the confirmed defect is in the wiring, connector, pretensioner, or larger assembly. If the belt type is unclear, Seat Belt Repair can help identify it from photos or its electrical plugs. Photograph labels and accessible connections without unplugging live SRS components.
- Complete the prescribed repair and verification procedure. Clear codes only when permitted after the repair, then follow the vehicle's required verification steps. A cleared warning light alone does not establish that the belt hardware is safe.
A module reset also needs context. After the module is reset and reprogrammed, Seat Belt Repair ships it back ready for reinstallation. The installed vehicle still needs its required checks, since module work does not certify unrelated wiring, mounting points, or belt hardware.
Give the shop the VIN, component identifier, complete fault condition, scan details, deployment history, and recall status. These details help the technician distinguish a circuit problem from a failed component before ordering parts.
Repair Options for a Faulty or Deployed Driver Belt
The correct repair follows the inspection result. A damaged connector, an activated pretensioner, and cut webbing are different problems, even when the owner first notices the same dashboard warning.
Repair path by inspection result
| Situation | Typical approach | Check first |
|---|---|---|
| Wiring or connector fault, belt intact | Repair the harness or connector according to the manual, then retest | Approved resistance and continuity checks against specification |
| Confirmed faulty igniter, belt intact | Replace the permitted igniter or pretensioner assembly with the correct OEM part | Part identification, plug count, and wiring diagram |
| Pretensioner deployed, belt locked | Professional rebuild and recharge, or assembly replacement, subject to vehicle service requirements | Deployment evidence, crash history, and repair eligibility |
| Webbing cut, torn, or frayed | Replace damaged webbing through an appropriate service or replace the assembly; retain original identification labels | Full accessible webbing length and assembly condition |
| Open recall on belt or module | Follow the manufacturer's remedy first | VIN-based recall status |
A deployed pretensioner doesn't recover by itself. Returning it to working condition requires rebuilding and recharging or replacement, and the manufacturer's service requirements determine the acceptable route for the vehicle.
The following image accompanies the post-collision repair option.
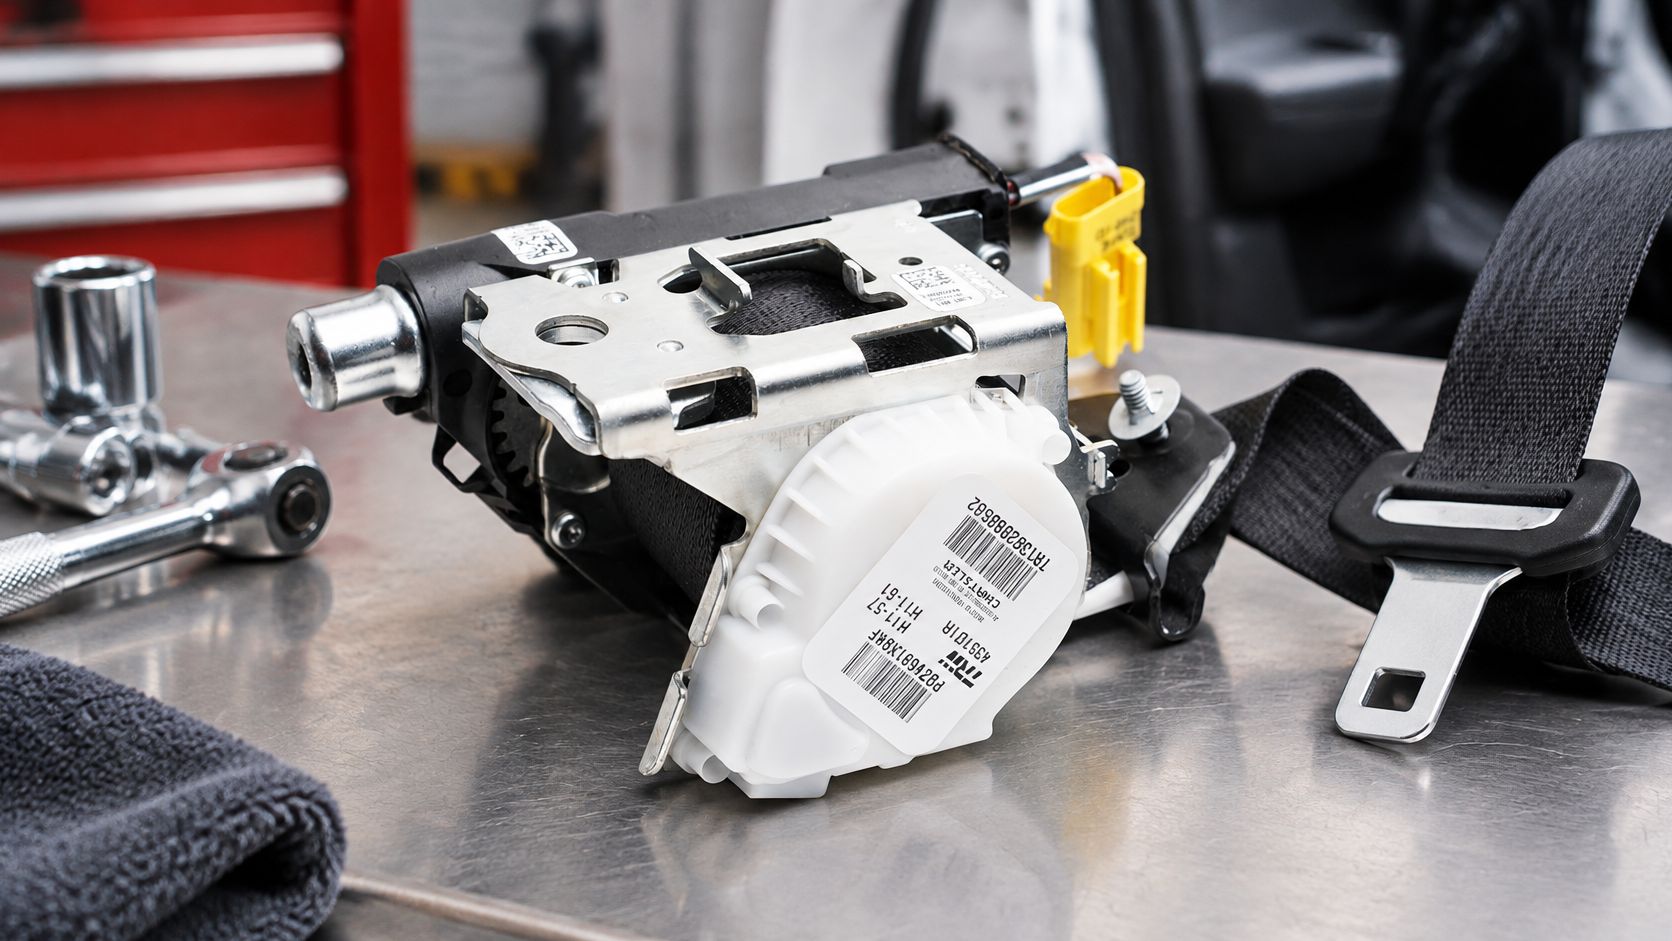
Our Seat Belt Repair After Accident service addresses locked belts, deployed pretensioners, and deployed retractors by rebuilding the original assembly and testing its operation. The retractor repair process replaces the pretensioner's igniter/inflator with OEM parts; an SRS module reset addresses the module separately rather than repairing a defective belt circuit.
Removal and final verification matter
We provide step-by-step removal instructions and assistance for belts and airbag modules. Most are accessed by removing trim panels and unbolting components from the vehicle frame, but SRS isolation, mounting-bolt requirements, routing, and torque specifications remain vehicle-specific.
Keep connectors and fasteners identified, protect the component during shipping, and retain its labels. Our explanation of seat-belt pretensioner repair gives additional context for professional repair rather than owner disassembly.
After installation, check belt routing, retraction, latching, and locking according to the service procedure. Fasten the buckle and check whether the dashboard seat-belt reminder turns off, then separately verify SRS warning-lamp operation and rerun the restraint-controller scan. The buckle reminder test isn't a test of pretensioner readiness.
Seat Belt Repair offers mail-in pretensioner repair, webbing replacement, and SRS airbag module reset services. Visit Seat Belt Repair with your N153 scan report, vehicle details, and component photos for help identifying the correct belt and arranging the appropriate service after diagnosis.

Оставить комментарий
Этот веб-сайт защищается hCaptcha. Применяются Политика конфиденциальности и Условия использования hCaptcha.